What do Scientists do on holidays?

What do Scientists do on holidays?

I am off on holidays tomorrow, so you are not likely to hear much from me for a couple of weeks!

@MyKidsTime shared this funny little cartoon with me the other day, thought it was very well timed and worth sharing with you all while I’m gone.

So, in case you think I will just be relaxing on a sunny beach somewhere… this is actually what I will be doing…

Image Credit: Sarah Zimermann at unearthedcomics.com
With a holiday like this I am sure to come back with my head full of lots of new ideas for this blog ;0) Back again in August, in the meantime hope you all enjoy this lovely weather!


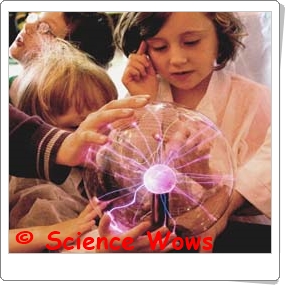
Fun Friday – Static Electricity

Fun Friday – Static Electricity

What is Static Electricity?

Static electricity is a charge that builds up when two things are rubbed together. Matching charges of static electricity push each other away (repel) while opposite charges attract each other.

Let’s Learn More!

Everything is made up of atoms.  An atom is the smallest piece you can break an object down to while still maintaining it’s properties.

photo credit: ProLithic 3D via photopin cc

Atoms are made up of protons, neutrons and electrons.  Protons have a positive (+) charge, neutrons have no charge (neutral) and electrons have a negative () charge.

At the centre of each atom is a nucleus, this is where the protons and neutrons are found.

The electrons are found to the edge of the atom, they are constantly moving in a circular motion around the nucleus.

When two objects are rubbed together electrons pass from one to the other, making one more positively charged and the other more negatively charged.  This charge is called static electricity.

How does lightning work?

photo credit: Brujo+ via photopin cc


Lightning is caused by a build up of static electricity in clouds.  As the charge in the cloud grows, the base of the cloud builds up a strong negative charge.  This negative charge creates a build up of positive charge in the ground.

If the attraction between the cloud and the ground (or between two clouds) becomes strong enough, a spark of lightning will jump between the two.  This lightning is a giant spark of moving electrons travelling between the cloud and the ground.


Did you know… that the heat of a lightning bolt is hotter than the surface of the sun?

Some things give up or take on electrons more easily than others.

Objects can be ranked according to how easily they give up or take on electrons and this ranking is called the triboelectric series.  Things listed at the top of the triboelectric series give up electrons more easily than those ranked below.

Experiment to try at home

photo credit: Kevin Baird via photopin cc

1. Hair raising fun!

You will need… a balloon and a good head of hair!

What to do… blow up the balloon and tie it tight.  Rub the balloon all around your hair (this is called charging the balloon); Now move the balloon slowly away from your head and watch your hair stand on end!

So what is happening?… When the balloon is rubbed on your hair electrons are passed from your hair to the balloon.  This gives the balloon a negative charge and your hair a positive charge.  As opposites attract, your hair is attracted to the balloon and sticks to it while you pull it away.

2. Attract a can!

You will need… a balloon, a good head of hair and an empty aluminium can!

What to do… charge the balloon on your hair as before.  Lay the empty aluminium can on it’s side on a table.  Then bring the charged balloon close to the can, but do not let it touch it.  Slowly draw the balloon away from the can and watch the can follow.

So what is happening?… The aluminium can becomes attracted to the negatively charged balloon as the area around it becomes positively charged.

3. Bending water!

You will need… a balloon, a good head of hair and a running tap!

What to do… Turn on a tap to a small, steady stream of water and leave it running.  Charge the balloon on your hair as before.  Bring the charged balloon slowly towards the stream of water and you should see the stream of water slowly bend towards the balloon! (If the experiment does not work for you just reduce the flow of water).

So what is happening?… Just as with the aluminium can, the stream of water becomes attracted to the negatively charged balloon as the area around it becomes positively charged.

I hope you have some hair raising fun with these experiments :0)  If you have any questions or queries, or would like me to cover a particular subject in the Fun Friday blog, please just leave me a comment below!

I am going to take a little blogging break for a couple of weeks but will return in August for plenty more fun, facts and experiments to share.

Why does the Rooster crow?

Why does the Rooster crow?

As hen keepers we have debated whether we should keep a rooster in the flock or not.  Truth be told, they have usually ended up in there by proxy and we just tend to let them stay.  We do try to keep it at just one rooster at a time though…. there is only so much crowing one neighbourhood can take!

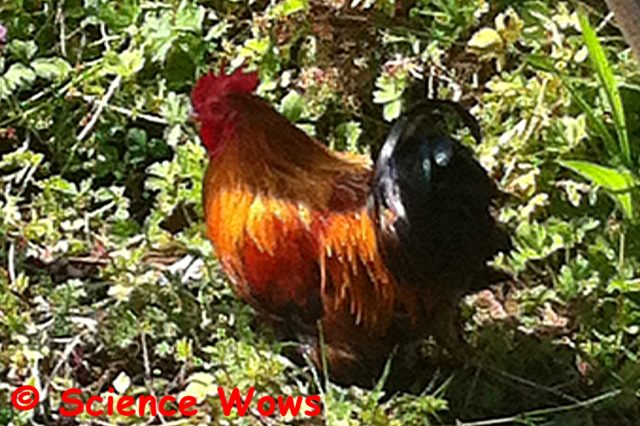
So for the last year or two “Lord Farquaad” has ruled the roost that is our back garden.  He is a very handsome Pekin bantam, small and round, charming characteristics of his breed.  What he lacks in stature he makes up for in ego…. hence the name.

Lord Farquaad - small in stature and big in ego!
Lord Farquaad – small in stature and big in ego!


I do find that his presence keeps the social order of chickenhood at an even keel and as I sleep on the other side of the house, and the neighbours and children claim not to hear or mind his morning vocals, I’m happy enough to leave it all as it is.   I am oblivious to his predawn declarations… “get up, get up the sun is coming!!”  A living, screeching alarm clock…. but did you ever wondered…

why does the rooster crows?


Ultimately they crow to mark their territory!  The sound levels are a throw back to the habitat of their wild ancestors… you need to have volume to be heard in the jungle!

If you are like me, you may have just gone along with the assumption that light is the overriding stimulus for the roosters predawn fanfare.  However, recent studies in Japan have shown that this is not the dominant factor! By varying the amount of light hours roosters were exposed to a different picture emerged.  One set of roosters were exposed to 12 hours of light and 12 hours of darkness for 14 days.  These roosters exhibited anticipatory predawn crowing two hours before dawn.  Another group were kept in constant dim light for 14 days.  This group settled into a 23.8 hour day cycle, crowing daily at almost the same time to declare to dawn regardless of the lack of light.  This finding reveals that roosters actually have an internal clock in place.  They will crow at a regular time each day due to their own circadian rhythm.  Light and sound are contributing factors to their morning crowing, but the process goes on even in the absence of these stimuli.

Lord Farquaad - calling his "ladies" to food
Lord Farquaad – calling his “ladies” to food


Roosters don’t just crow to mark the start of the day, they can often be heard crowing at various other times.  The frequency of these calls depends on local threats, the flock status and the breed and temperament of the bird in question.  Of course they don’t just crow either, they can cluck too, just like their female counterparts. It never ceases to make me smile when Lord Farquaad struts around the food I have just put out, making a series of clucking noises that declare the provisions.  To me his declarations appears to say “ladies, ladies come hither and feast on the bounty I have provided for you!” I mean really, you would think he cooked it all himself!

I feel I cannot discuss the rooster’s crow without looking at how it translates into other languages.  So many animal sounds translate so differently and this is no exception… to us it is a Cock-a-Doodle-do but others hear it differently…

  • qui-qui-ri-qui (Spanish)
  • co-co-ri-co (French)
  • kikeriki (German)
  • kukeleku” (Dutch)
  • wo-wo-wo (Mandarin)
  • ko-ki-kok-koh (Japanese)
  • ky-ka-pe-ky (Russian)
  • yeki-yeki-yek (Thai)
Perhaps you have another translation to add? If you have comments or questions I’d love to hear from you!
Broomrape from my garden

Broomrape from my garden

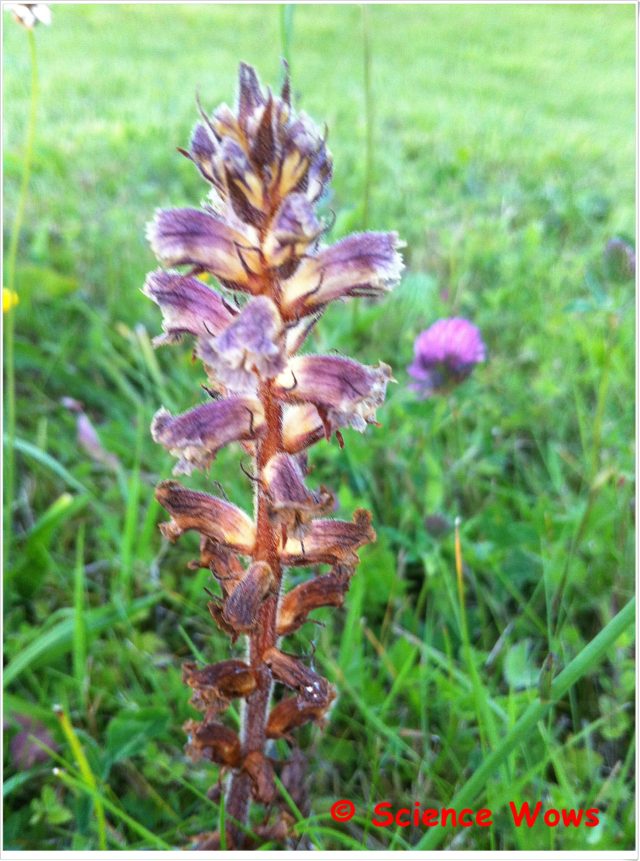
I came across this broomrape while cutting the grass today.  Broomrapes are parasitic plants of the family Orobanchaceae.  

Common broomrape in my garden

The broomrape I found in my garden in a Common Broomrape, parasitic on the root of a number of specific plants, particularly clover (as seen in the background of the photograph).  The stem of the plant is reddish brown in colour and the flowers are white and purple.  There are no true leaves, instead there are triangular shaped scales.All broomrapes lack chlorophyl, the pigment necessary to allow a plant to generate its own food by photosynthesis.  It is this lack of chlorophyl that makes these plants parasitic, needing to rely on other plants for all their nutritional needs. Broomrapes are parasitic on the root of other plants, often just one specific plant, this may be reflected in the name of the broomrape, for example Ivy Broomrape or Thyme Broomrape which are parasitic on the root of the ivy plant or wild thyme plants, respectively.

Although these plants are considered quite orchid like they are actually more closely related to the foxglove.

Can You Name This Creature?

Can You Name This Creature?

Week 8th to 14th July 2013

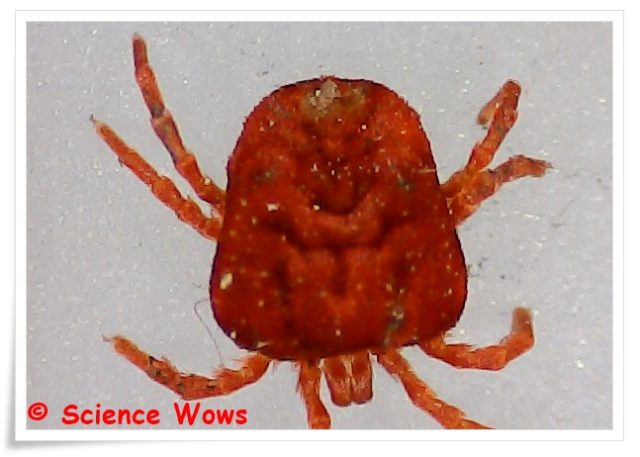
This week’s Mystery Creature comes courtesy of my three young children.  They found this little guy while out bug hunting in the garden and took him in to identify him.  They took this photo of him on my microscope at a 20X amplification; it was a tricky shot to get as he kept scampering out of view (we are not used to viewing live insects under our microscope)!
My three Junior Scientists identified it pretty quickly with help from the internet … do you have any ideas what it is?
Fun Friday – Exploring Bubbles!

Fun Friday – Exploring Bubbles!

WHAT IS A BUBBLE?

A bubble is a thin film of liquid filled with air or another gas. Most bubble are made up of soapy water and air.

LET’S LEARN MORE…

No matter what shape a bubble starts off as, it will always try to form a round shape (called a sphere). A sphere is the shape that allows the least amount of surface area – and therefore the least amount of energy is needed to maintain this shape.

If one or more bubbles touch they will loose their sphere shape – the walls of the touching bubbles will merge. If both bubbles are the same size the shared wall will be flat!

The walls of joined-up bubbles always meet at an angle of 120 degrees

photo credit: kaibara87 via photopin cc
photo credit: Jeff Kubina via photopin cc


WHAT COLOUR IS A BUBBLE?

Bubbles reflect colours from their surroundings so at first they may appear rainbow coloured.

As time goes on the colour of the bubble changes until finally the bubble appears colourless – and then it bursts


HOW DOES IT WORK?

The sphere of a bubble is made up of two layers – an inner wall and an outer wall. As light waves hit the bubble they are reflect off both walls. The walls of the bubble gradually weaken and the distance between the two walls reduces until the reflected light waves cancel each other out and the colour disappears.

 Did you know… The skin of a bubble is less than one thousandth of a millimetre thick!


EXPERIMENTS TO TRY AT HOME

Make your own bubble solution!

 Commercial bubble solutions are great but they can be expensive, so why not make your own? There are lots of good recipes that work really well but this is the one I usually use! 
You will need… a clean, dry empty plastic bottle (1 litre), 4 tblsp (60ml) washing-up liquid, 2 cups (480mls) clean water, 2 tblsp (30ml) glycerine
What to do: Before you start make sure the bottle, your hands and any measuring utensils are clean and dry. Carefully measure out each ingredient and add, one by one to the bottle, trying not to make the mixture get too bubbly. Once everything has been added stir slowly and carefully. Cap the bottle and leave it in a safe place overnight. The bubble solution is ready to use the next day.
Some tips: When making your bubble solution make sure you use “original” washing-up liquid and not any of the scented varieties! If possible, use bottled or filtered water rather than tap water.


So now what?… Now start making bubbles!! If you don‛t have any bubble wands you can make your own using some pipe cleaners. Try shaping the pipe cleaners into different shapes and see how the bubble will still always end up as a sphere shape.

 Did you know… The biggest free- floating soap bubble ever blown was 105.4 cubic feet. It could have held 788 gallons of water!


If you really want to scale it up make extra bubble solution and us a small paddling pool and a hoola hoop to make some mega bubbles!


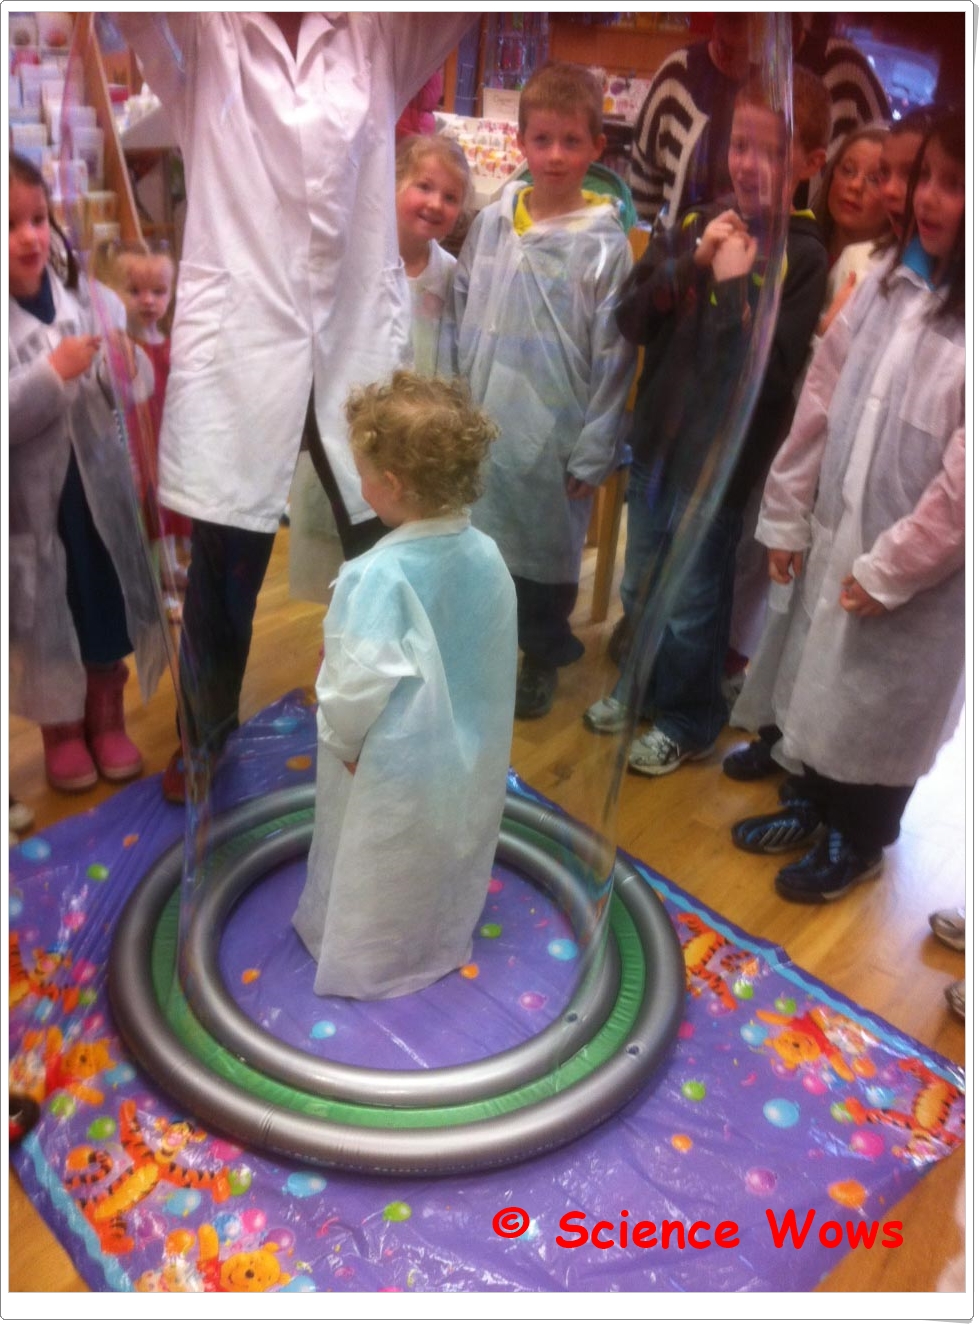
This is a photo of my son in a big bubble made using a commercial bubble ring


Did you know… The world record for the most people inside a bubble was set in 2006 by Sam Heath; His bubble contained 19 girls and boys over five feet tall!!


BUBBLE ART:

You will need.. bubble solution, food colouring, plastic cup, a straw, paper.


What to do: Pour bubble solution into the plastic cup until the cup is about one third full. Add two tablespoons of food colouring to the bubble solution and mix it well. Place the straw into the bubble solution and keep blowing until the bubbles are coming out of the pot.

Lower the piece of paper onto the bubbles to make an imprint (do not let the paper touch the plastic cup).  Lift off the paper and allow your bubble art to dry.

You can repeat the process using different colours of food colouring!


ENJOY!

Sparkly toes

Sparkly toes

My three year old got up from kneeling the other day and started to wiggle and jiggle a little, when I asked him if he was OK he said…

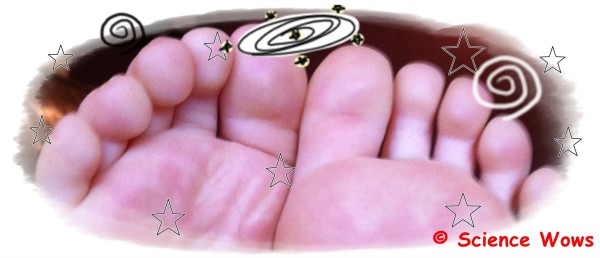
…”Mummy, I’ve got sparkly toes!”


"Mummy I've got sparkly toes"
“Mummy I’ve got sparkly toes”
That has to be the cutest description of pins and needles I have ever heard.  He looked at me a little confused and wanted to know why his toes were sparkling… I gave him a simple explanation but even as I was talking… I could feel a blog coming on!


So what are pins and needles and why do we get them?


Parasthesia is the medical term for pins and needles.  The pins and needles that most of us experience, just as my son did, are a result of pressure on a nerve, restricting its blood supply.  This pressure is usually a temporary pressure caused by us leaning on a limb or part of the body in an awkward way.
This pressure on the nerve restricts its supply of blood and therefore prevents it from “charging up” and “firing off” in the usual manner.  The signalling pathway gets interrupted resulting in the nerve firing off incorrectly or at a modified rate… and we feel this as a fuzzy, tingling, spiking sensation.  If the nerve is suppressed for too long its signalling function stops all together and the area becomes numb.  These sensations can usually be quickly and easily reversed by simply changing position and moving the area that is affected, thereby returning blood supply to the nerves.


A closer look


So now we have a general understanding we need to know how nerves operate to explain the phenomenon a little further.
Nerves carry messages around the body; these messages can be transferred from one part of the body to another or from a part of the body to the brain, or vica versa.  Nerves are made up of bundles of cells called neurons.

  • Unlike most cells in the body, neurons do not regenerate, this makes them among the oldest cells of the body
  • The longest cells in the body are neurons
  • Neurons are very specialised cells: they transmit electrical signals (nerve impulses)
  • Nerve impulses travel at a speed of approximately 25 metres per second
  • Neurons have a very high metabolic rate


When the sensation is a little more serious


It is this high metabolic rate that causes the nerves to start to shut down their process.  If the blood supply to the nerve is cut off or reduced (as is the case when we are sitting on a limb) they cannot produce enough energy to keep recharging themselves so the smallest neurons start to operate more erratically.  These small neurons are the ones that transmit signals of pain, hence the first sensation of pins and needles.


Certain medical conditions are associated with prolonged or chronic pins and needles.  The sensation may be due to a trapped nerve or nerve damage or infection.  It may also be due to exposure to certain toxins or medical drug treatments or alcohol.  Chronic parasthsia can be a side effect of diabetes, hyperventilation, vitamin B 12 deficiency or malnutrition.
The sensation of pins and needles usually goes very quickly once the blood supply is re introduced to the area affected, however if the symptoms persist or reoccur it is best to seek medical advice.

Hope you enjoyed the blog, if you have a question, a comment or an idea for a topic you would like me to cover in a future blog please leave a comment!

The Big Rescue

There was a MAJOR drama here on Saturday morning!  I was just having my morning cuppa when my son starting banging at the window and pointing up to the House Martins’ nests just above it.  We knew straight away there was a problem.

All that remained of two House Martin nests

These House Martins are part of the family at this stage, our very “welcome house guests“.  The children get up every morning and check on the nest (by check the nest I mean look up and see if any chicks have their head peeping out or parents flying back and forth).  Anyway, on Saturday something was obviously wrong.  When myself and the hubby got to the door we saw a pile of brown dusty clay on the ground and when we looked up there was nothing left of the two nests we had been monitoring so carefully.  PANIC and DEVASTATION! Was it a natural collapse?  Was it the dreaded Magpies?  There was very little left except this small pile of dust.  While trying to calm the children and work out what had happened we started to look around.  That’s when my hubby spotted him, crouched behind a large plant pot but seemingly healthy and unharmed… one lovely little fledgling!

Our little rescued fledgling!


We were of course delighted to have found him, but now that we had we hadn’t a clue what to do with him and we knew whatever we did, we would have to do it quickly!  So we decided to ring BirdWatch Ireland and seek advice.  The person who answered the call was excellent and obviously used to this kind of thing.  As we had been tracking these birds so much we were able to tell her that this little one was likely close to three weeks old, the age they usually fledge.  She assured us that the nest collapse was very possibly just a natural event (possibly no magpies involved) and that the others might have already fledged.  A little bit of hope, but what were we to do now?

The advice was to put the little one into a small box or container with something to keep it warm and place it as close to the original site of the nest as possible.  Then we had to just walk away and hope that mum and dad would return.  We could see them circling around so we knew there was a chance.  The biggest  problem was that the nests had been built at the apex of a roof of a bungalow with no windowsill nearby to elevate the bird.  
Firstly we placed the bird in a planter with a blanket and the remains of the inner nest material but it was still a very long way away from the original nests.

Temporary dwelling

We remembered that we had an artificial House Martins nest somewhere, bought when we first moved into the house in an attempt to encourage nesting.  With a bit of searching we eventually found it in the shed.  Great… but how were we going to fit it to the wall… and in a hurry?  That’s when hubby realised there was a leftover nail sticking out of the wall near the original nest.  A frantic bit of drilling made a hole in the mounting of the artificial nest then with the help of a short ladder, a lot of stretching and a fair bit of cursing the job was done.  Makeshift but secure!

You can see the marks of the two original nest at the top!
The only thing left after that was to wait, we decided to go out for an hour or two as the sitting around was too difficult!  Two hours later we returned, not feeling too optimistic but to our delight we could see the parents visiting the new nest and apparently feeding the little one who we could hear chirping away.  Three days later and things are still going strong.  We can hear the cheeping and see the parents travelling back and forth to the nest.  This evening hubby and the kids thought they saw a flapping of little wings just over the top of the nest, perhaps little Lucky (well what else could we call him?) is ready to fledge! We shall see tomorrow!

We would like to say a big THANK YOU to BirdWatch Ireland for their quick help and advice!  If you want to follow them just click on the links (Facebook and twitter).

Update 12th July 2013:

I am really glad to report that Lucky is doing very well.  He took his first flight last week and has being going strong ever since.  So well in fact that we see very little of him these days – which is just how it should be.

When we put the “fake” nest up it was a quick and temporary solution… however it seems the House Martins are quite taken with it.  As you can see from the photo, the nest is supposed to sit just under a horizontal eave, but we did not have that option when we put up the nest.  The house martins are filling in the gaps and adding their own extension and roof.  All this sounds really positive for the preparation of a second brood, we only hope that they are not planning to roof it all the way to the point of our roof, that kind of extension would never get planning permission or approval!

“Lucky” planning another flight now that he has “found his wings”… can you see the mud extension being added by the parents?

Mystery Creature revealed – the Harp Sponge

Week 1st to 7th July 2013

There were quite a few correct answers for this week’s Mystery Creature!

photo credit: Emily G. Round via photopin

It was a Harp Sponge (Chondrocladia lyra)!  This deep sea sponge was only recently discovered (2012) off the coast of California .  It anchors itself to the sea bed (at depths of 3,300 – 3,500 metres) with a root like structure called a rhizoid.  The “harp” like structures called vanes, consist of horizontal extensions (stolons) containing a series of equidistant vertical branches.  The sponge can consist of one to six vanes.  Each vertical branch is covered in velcro like hooks that ensnares the sponges prey.  These carnivorous creatures feed on a range of small crustaceans, engulfing the captured prey in a thin membrane that slowly digests it, breaking it down to a size that can be consumed by the sponge.