Fun Friday – Glowing Monster Slime

Fun Friday – Glowing Monster Slime

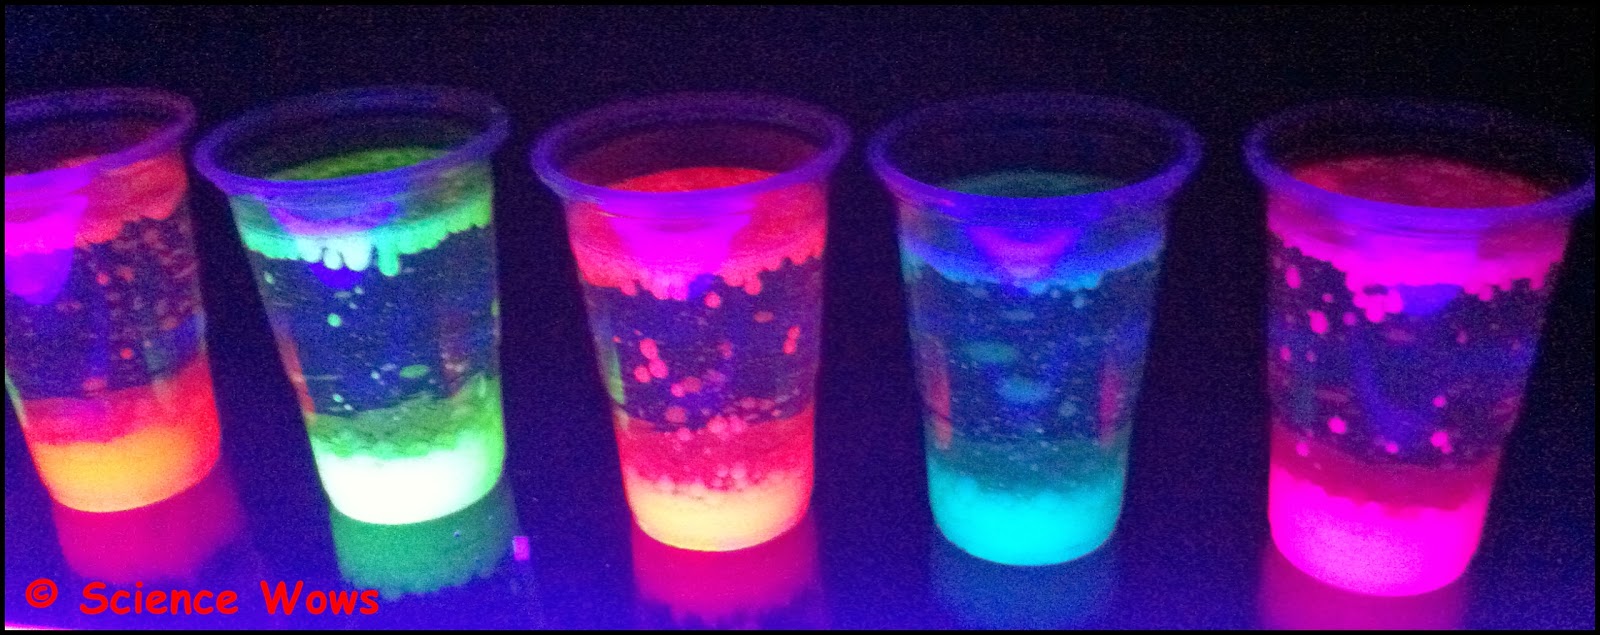
With a name like “Glowing Monster Slime” you just know this experiment is going to be fun! Just look at the photos if you need any convincing!

You will need
You will need

You will need…

  • two small bowls or cups
  • one large bowl
  • PVA glue (white or clear is you can get it)
  • *Borax Powder
  • Fluorescent paint (you can get non-toxic fluorescent paint in most craft shops)
  • something to stir or mix with

*You can pick up the borax powder in your local chemist (See note below)

What you do… 

To the first cup add half a cup of fluorescent paint and half a cup of PVA glue and mix well.

Mix the glue with the flourescent paint

In the other cup add half a teaspoon of borax powder to one cup of water and mix well until all the powder is dissolved!

Dissolve the borax in the water

Now for the fun bit… pour the glue mixture into the bowl then add the borax solution, mixing all the time.

Mix together the glue mixture ans the borax solution

After a while you can use your hands to mix and mould until you have one big lump of slime and there is little, or no liquid left!

The fun bit
The fun bit

You can store your slime in a ziplock bag or clean jar, it lasts a very long time once you do not let it dry out. You may notice a small layer of liquid separating off the top of the stored slime. This can just be poured off and the slime will become a little more rubbery and less sticky.

When you have finally finished playing just store away

If you have a UV light (black light)** you can make this experiment even more fun by checking out how your slime glows in the dark once the lights go out and the UV light is turned on.

Sooo much fun!
Sooo much fun!

So what is happening?…

Congratulation… you have just experimented with polymers!! In simple terms a polymer is a substance made up of lots of molecules arranged in long chains.  If you imagine that the glue is like cooked spaghetti, it slides and slips around the place quite easily.  When we add the borax to the glue it causes some of the molecules in the glue to stick together making the glue more rubbery and less liquid!  Imagine if you took those strands of spaghetti and tied them together in places, the strands would not be able to slip and slide around nearly as much! The borax and glue mixture is just like your knotted spaghetti!

*Where can I get Borax powder?

In Ireland you need to buy Borax powder in a pharmacy.  The production is a little erratic and the larger volumes are no longer available!  You should be able to get a 100g tub in any pharmacy and it costs between €2 and €3.

**Where can I get a UV light?

This experiment is lots of fun without the UV light but the glow in the dark bit really does take it to a different level. My youngest nearly burst waiting for the night to fall so we could do that part of the experiment. If you are considering buying a UV light you should be able to get one fairly cheaply. I got mine from Maplin. I will be sharing lots more glow in the dark experiments, so if you do get one remember to check back here for some more ideas.

I hope you enjoy this as much as we did and please let us know if you do try it out!

UPDATE 2017: Borax powder is no longer as readily available in Ireland.  here is one alternative, using very simple ingredients… check out this post on how to make silly putty.

Or check out our Ultimate Slime Guide for lots of fantastic slime recipes using contact lens solution or laundry detergent.


Anything that glows…

Anything that glows…

Halloween season is a bit mad in this science filled house as you may have guessed by now.  There have been more experiments than dinners in the kitchen the past week… we have been repeating old favourites, modifying others and trying out new ones.. and all because it is Halloween.

We love things that glitter and glow and this time of years allows us to really indulge this side of science.  I thought I would share some new favourites with you here, in case anyone wants to add some glowing fun to their Halloween parties or games!

Glowing lava lamps:

We love making lava lamps but made a few modifications to add a bit more glow to this favourite!

You will need:

An empty plastic bottle or a clear plastic cup
Water
Vegetable oil
A funnel
Florescent paint (or glow in the dark paint*)
Alka Seltzer (or similar antacid tablets)
A UV light (also called a black light) if possible

What to do:

  1. Put a small amount of water (about an inch or two) in the bottom of the plastic bottle or cup.
  2. Add some fluorescent paint to the water and mix.
  3. Using the funnel pour the vegetable oil into the bottle, filling almost to the top.
  4. You will see that the water and oil settle into two layers, with the water at the bottom.
  5. Break up the Alka Seltzer tablets into smaller piece, and, if you have a UV light, turn it on and turn off the regular light.
  6. Add some pieces of the Alka Selzer tablet to the bottle to start off your lava lamp.
  7. Once the bubbles stop rising you can add more tablets to keep the lava lamp going.
This is what we did:
 
We had lots of different colours and types of fluorescent paint so, of course, we had to try them all!
We added fluorescent paint to water in each cup and then we mixed it in
Then we added a layer of vegetable oil to each
Then we turned on our UV light…
…And turned off all other lights. We added the Alka Seltzer and watched in delight!

You get a better idea from our videos…

So what is happening?

The Alka Seltzer tablets drop to the bottom of the bottle and dissolve in the water.  These tablets contain an acid (citric acid) and a base/alkali (Sodium hydrogen coarbonate) in powder form.  When these dissolve in water the acid and the alkai start to react together and form carbon dioxide gas.  This gas forms bubbles with the water.  The bubbles are lighter than the water and oil so they travel up the bottle to the top.  Once they reach the air they burst and the water droplet is now heavier than the oil and drops back down to the bottom of the bottle again.

Notes:

We tried both flourescent and glow in the dark paints for this experiment.  We found the flourescent paint worked best, but if you have a good glow in the dark paint feel free to try this out with the lights off!

This is our fluorescent lava lamp in daylight…
still pretty cool we think!

If you do not have a UV light then try this experiment in the daytime with plenty of sunlight. 

The fluorescent paint is still very bright and gives a pretty cool effect.

More glow in the dark experiments tomorrow so remember to check back! 
Fun Friday – Carve a Heart of Hope Pumpkins

Fun Friday – Carve a Heart of Hope Pumpkins

Continuing on with the Halloween theme we are talking PUMPKINS today; Of course in this house we don’t just carve them… Oooh Noooh… we like to see what else we can do with them… exploding, glowing, oozing… all in the name of SCIENCE!

But first…

But before we all don the lab coats and goggles I wanted to draw your attention to the Carve a Heart of Hope for Halloween Campaign, run by World Vision Ireland.

World Vision Heart of HopeWorld Vision Ireland is a small part of the global World Vision organization, providing long term support to children in six African countries; Mauritania, Kenya, Swaziland, Tanzania, Uganda and Sierra Leone.  They also provide emergency support where needed and are actively supporting the Syrian crisis at the moment.

This Halloween World Vision Ireland are running a campaign to raise awareness of the work that they do.  They are asking people all over Ireland to carve a heart of hope into a pumpkin and place it in their window as a sign of support of their Survive to 5 campaign.

(Click on the links above if you want to find out more about this campaign).

Back to Pumpkins…

So what did we do with our pumpkins? Well first we carved them…
Then we added a bit of glow in the dark paint… because we are just loving anything that glows at the moment!


Then we turned our attention to the oozy, exploding bit…

If you want to try this at home you will need…

What you need:
A carved pumpkin (use a small one)
250 mls 6% Hydrogen Peroxide
2 teaspoons (or 2 sachets) dried yeast
2 Tablespoons warm water
Washing up liquid
Food colouring (optional)

What to do:
Place a small plastic container inside your pumpkin (large enough to contain 300 mls but small enough to leave plenty of room between the container and pumpkin lid). Carefully pour in the 250 mls hydrogen peroxide.  Add a BIG squirt on washing up liquid. A about 5 drops of food colouring if using.

In a separate bowl mix the 2 teaspoons of dried yeast into the warm water. Carfeully add this to the hydrogen peroxide mixture inside the pumpkin, replace the lid and then stand back and enjoy!

What is happening:
This is an example of a catalytic reaction which really just means that something is added to the reaction to make it happen a lot faster, but that it is not chemically changed by the reaction. The something added is called a catalyst.  The yeast is the catalyst it this reaction… it splits the hydrogen peroxide into water and oxygen without getting chemically changed itself.  The oxygen produced then combines with the washing up liquid to produce a LOT of foam!

What to do with the bits you don’t use for Science?… Eat them!

Don’t forget about the lovely fleshy parts of the pumpkin, you did keep them before you started experimenting, right?  Here are some links to some great recipes, from some of my favourite bloggers, to put that pumpkin to good use…

  • Pumpkin Bread… a yummy alternative to Banana Bread; this one is by fellow Irish Parenting Blogger, Christine, more often found blogging at Awfully Chipper.
  • Or you could just download the lovely Pumpkin Pack as part of the Carve a Heart of Hope Campaign for a great Pumpkin soup recipe from Donal Skehan.

Happy Halloween… and stay tuned for more Halloween fun… lots of glowing, bubbling, exploding experiments coming up in the next few days!