I know I haven’t been blogging much lately, I am trying to work on a little something else that I have wanted to do for a very long time. If I ever get the other project finished I’ll be sharing it right here so watch this space (not literally, it’s taking me a LONG time!).
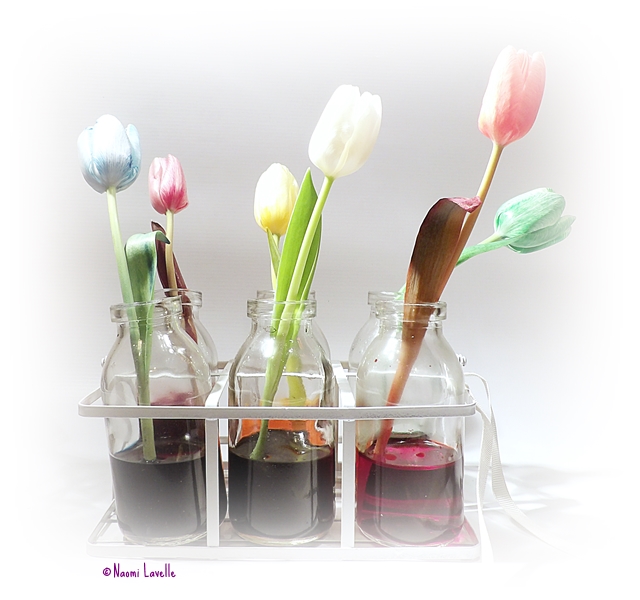
There is still plenty of science going on in the background though, as is common enough around here. This week we repeated an old favourite, an experiment demonstrating water flow and transpiration in plants… our coloured flower science experiment. I spotted a bunch of pretty white tulips in my local super market and that was all the reason I needed. I had also spotted a set of little bottles while away in Westport last weekend and had to buy them for this experiment, which, I think, elevates my geek status to a whole new level.
I have blogged about this topic before, so if you want more information you can check out this post.
YOU WILL NEED:
- Some white flowers*
- Food colouring (I usually use the Goodall’s ones, available in most supermarkets)
- Water
- Glasses, cups or other containers, one for each colour you will use
*This will work with all (or almost all) white flowers but it works better with some than others. You can of course use other coloured flowers, daffodils are a popular choice. I have achieved good results with roses, carnations, oxeye daisies and some Chrysanthemums. You can choose the flowers based on what you want to achieve but if working with children (particularly young children) or doing this as a classroom project them I would definitely recommend the tulips. The results are rapid so children will be able to see the colour arriving into the flowers within a fairly short time frame.
WHAT TO DO:
Choose how many different colours you want to use. Place one colour into each glass and add water. I usually use at least 10 mls of food colouring to 20 mls of water (if unsure use a 50:50 ration of food colouring to water).
Choose your flowers, one for each glass, and trim them to the desired length. You will get a more rapid result with a shorter stem.
Then simple place a flower in each glass and wait! With these tulips I began to see a result within less than an hour. I set this experiment up overnight and went from this…
… to this…
WHAT IS HAPPENING:
Water is transported up the stem of the flower through little tubes called xylem. The coloured water will travel through the xylem all the way up the stem to various parts of the plant and right up to the flower. The coloured water stains the plant as it moves through it and this is most apparent when the white flowers change colour. The water ultimately evaporates out of the plant through little pores called stromata. This process is called transpiration and is much like perspiration in humans.
OTHER SUGGESTIONS:
If you want to take this one step further you can try to make a multicoloured flower, like I did with this rose last year. Just click on the image to go to the post with full instructions.
If you try this experiment, or a version of it, I would love to hear how it you get on!


Pingback: 4 Valentine experiments 4 your loved ones - Dr. How's Science Wows
Such beautiful photos!
Thanks … they certainly cheered up my kitchen for a while
Love this post and a great one to teach beginners of all ages
Thanks Dee, it really is a lovely simple experiment, and looks great!
This is seriously cool!
Thanks Tracey
I love this, what a great idea
Thanks Sara
Love this!Will definitely be trying it out thanks for sharing x
I think your minis will love it Aedín