How to make rainbow silly putty

How to make rainbow silly putty

People are always asking me for a slime recipe that doesn’t require borax powder. This is one option, making silly putty. We love this recipe, using just cornflour and washing up liquid (or you can use liquid soap instead); just be careful that you use products that you know won’t irritate your child’s skin.

We thought we’d share this one, in honour of St. Patrick’s Day…. with all the shamrocks and the leprechauns and the rainbows 😉

You will need:

  • Cornflour
  • Liquid soap or washing up liquid
  • A bowl
  • A spoon
  • Food colouring

What to do:

Just click the arrow button on the right of the image below to find out how to make this brilliant rainbow silly putty; it is so easy and my kids loved it!


The results:

We mixed all our silly putty together for the rainbow effect but you can keep the colours separate if you prefer. This silly putty is great to play with, mold it in your hand, stretch it, fold it… it makes a great stress busting tool too! It will last for a week or more if you put it in an airtight container or plastic bag but we usually just make a new batch each time.

Let me know if you try this yourself! We have had lots of fun working on other slime recipes and will be sharing them soon so remember to check back or follow the blog to make sure you don’t miss any posts! 

Can water go uphill? A rainbow water experiment

Can water go uphill? A rainbow water experiment

Can water go uphill? The answer is… yes it can! In some ways anyway; water can travel upwards by a process called capillary action.

Capillary action can be described as water climbing upwards due to weak forces created between the water molecules and the material the water moves up along, or through. In the experiment below the water travels up the paper towel, forming these forces with the paper towel as it creeps upwards.

For this experiment you will need…

  • six clear cups or bottles
  • six pieces of paper towel, folded length-ways into long strips
  • A jug of water
  • Food colouring… red, yellow and blue

What you do…

We arranged our six bottles in a circle (but you could do this in a straight line too, if you want to create the same colours as us, you will need seven bottles in a straight line, with one colour repeated… think about it 😉 )

Half fill every second bottle with water, leave the other bottles in between empty.

Add a few drops of food colouring to each bottle containing water, red in one, yellow in the next and blue in the next.

Now take a piece of the folded paper towel and place one end into the bottle containing red-coloured water, and the other end into the empty bottle beside it; make sure the paper towel sits into the coloured water.

Take another paper towel and place one end in the empty bottle (that is now connected to the red-coloured water bottle) and the other end into the bottle containing yellow-coloured water.

Repeat this all around the circle so that the paper towel ‘wick’ goes from the yellow-coloured water bottle to an empty bottle and another from that empty bottle to the blue-coloured water bottle; finally place a paper towel ‘wick’ from the blue-coloured water bottle to an empty bottle and another from that empty bottle to the red-coloured water bottle.

When all set up it will look like this…

walking-water-1

walking-water-2

Then all you have to do is wait! You should see the water starting to climb up the paper towel ‘wicks’ within a few minutes. Leave the experiment for a few hours or overnight to get the final result.

Results:

Eventually the water will travel up one side of the paper towel and down the other side, starting to fill the empty bottle. As water comes into the empty bottle from each side, the two colours of water will mix.

The red and yellow-coloured waters will mix in the bottle between them, creating orange-coloured water.

walking-water-4b

The yellow and blue-coloured waters will mix in the bottle between them, creating green-coloured water.

walking-water-3b

The blue and red-coloured waters will mix in the bottle between them, creating indigo-coloured water.

walking-water-5

You will notice that all the bottles have now got about the same amount of water in them. Once this happens no more water will transfer between bottles.

walking-water-7b

walking-water-6

What is happening?

As mentioned above, the water is able to climb up the paper towel due to these forces, called adhesive forces, that form between the water molecules and the paper towel.  This process is called capillary action.

********

On the subject of water, if you ever wondered why our fingers wrinkle in the bath check out my recent Appliance of Science column in the Irish Examiner. 

The erupting snowman – a Christmas science experiment

The erupting snowman – a Christmas science experiment

We have had a lot of fun with this little Christmas science experiment. It is so simple, it is definitely worth a try if you have a few minutes to spare and want to give the kids a good laugh.

Here is what you will need:

Erupting Snowman

  • A small jar, or similar, decorated as a snowman. We covered ours in modeling clay and painted it but you could get the kids to paint a jar or decorate it as they wish. (The jar I used here is 100ml volume but you can alter the size.)
  • Some water (I used 40mls)
  • Washing up liquid (I added about a tablespoon)
  • Baking soda (also know as bread soda or sodium bicarbonate, but NOT baking powder… they are quite different)
  • A teaspoon.
  • Something to stir with
  • White malt vinegar (I used 40mls)

Here is what you do:

  • First add the water and then the washing up liquid.
  • Next add a heaped teaspoon of baking soda.
  • Give it a good stir.
  • Add all the vinegar, quickly,  stand back and watch’s the poor snowman’s brains explode… that’s got to hurt!
  • And once your poor snowman has recovered, you can give him a quick rinse and do it all over again!

The Science bit:

It is all down to the vinegar and baking soda, when the two are added, they react rapidly together and one of the products of the reaction is carbon dioxide gas (CO2). This gas mixes with the diluted washing up liquid forming a white bubbly foam that erupts out the top of the snowman.

Simple! Seasonal! Science!

Happy Christmas.

*****

Looking for some more #science and #craft ideas for the Christmas Season? I have two guest posts on the lovely Where Wishes Comes From blog; Click the links below to pop over and have a look. There is lots more to see over there as Sadhbh is running a Craft Advent special, a different activity every day!

Chromatography Christmas Trees
Ho Ho Ho Santa Sound Tubes


Volcanoes – a bit of science, facts and an experiment to try

Volcanoes – a bit of science, facts and an experiment to try

Who doesn’t love the volcano experiment? We will get to that in a minute, but before you go running for the vinegar and bread soda do you want to learn a little about them?

Firstly, what is a Volcano?

It is basically just a hole in the Earth’s crust. The word Volcano comes from Vulcan, the Roman God of Fire. Most volcanoes occur at weak spots in the Earth’s crust.

Scientists that study volcanoes are called Vulcanologists!

Scientists use a scale to measure the strength of volcanic eruption – it is called the Volcanic Explosive Index (VEI).

The VEI scale ranges from 0 to 8; volcanic eruptions of 8 are called super volcanoes.

photo credit: image49374 via photopin (license)


How about a bit of history?

Mount Vesuvius in Pompeii, Italy erupted in 79 AD killing all the inhabitants of the city. Everything was covered in a thick layer of ash preserving the scene as a snapshot in time.

The last super volcano to erupt was Toba on Summatra in Indonesia, 74,000 years ago. It spewed so much volcanic ash into the air that it blotted out the Sun, causing a volcanic winter that lasted nearly six years.

Krakatoa in Indonesia erupted in 1883 spewing hot ash more than 50km into the air. The force of the explosion was heard as far away as Australia and caused a tsunami.

Ever wonder what comes out of an erupting volcano?

When a volcano erupts it spews out hot liquid rock, dust, ash, rocks and poisonous gases. Magma is hot liquid rock contained under the Earth’s surface. When magma escapes from a volcano it is called lava.

Volcanic bombs are hot lumps of molten rock shot out of a volcano when it erupts. As they shoot into the air they
cool and fall to Earth as solid rock.

Did you know… the largest volcanic bombs recorded were from the eruption of Mount Asama in Japan and were
up to six metres in diameter?

How are volcanoes classifying?

Volcanoes can be classed as…

  • active (erupt regularly)
  • dormant (have erupted within recorded history but not of late)
  • extinct (have not erupted within recorded history)

They can also be defined by their shape:

  • shield volcanoes are dome shaped
  • cinder cone volcanoes have erupted from  one single vent
  • strato or compsite volcanoes are tall with layers of magma and rock

What is Pumice?

Pumice is a type of volcanic rock, formed when frothy lava cools quickly? It is a very light rock that can float on water!

photo credit: Airfall pumice (~1065 A.D. eruption of Medicine Lake Volcano's Glass Mountain eruptive center, northern California, USA) via photopin (license)
Pumice; photo credit: Airfall pumice (~1065 A.D. eruption of Medicine Lake Volcano’s Glass Mountain eruptive center, northern California, USA) via photopin (license)

And the largest volcano is…?

The largest volcano on Earth is thought to be Tamu Massiff off the coast of Japan, and is completely contained under the Pacific Ocean.

The largest volcano in our solar system is Olympus Mons on Mars. It is slightly narrower than Tamu Massiff but has a larger overall mass.

Olympus Mons - image source NASA
Olympus Mons – image source NASA

Finally to the experiment – how to make your own volcano:

You will need: an empty jar, vinegar, bread soda, water, washing up liquid, food colouring and modelling clay

What to do: 

You will use the jar as the volcano. If you want to make it look more realistic you can cover it in modelling clay, shaping it like a volcano and let this dry overnight.

To make the volcano erupt, first add some water into the jar (about one third full). Add a big squirt of washing up liquid and a few drops of red food colouring.

Add one large tablespoon of bread soda and stir well. Place the volcano in a clear plastic basin or deep tray.

Finally add vinegar, filling to near the top of the jar. Stand back and watch the fun!

To get the volcano going again just add more vinegar and bread soda!

What is happening?

The vinegar and bread soda react to form carbon dioxide gas. This gas gets trapped in bubbles formed by the washing up liquid making the lava appear thick and foamy.

Walking on Ooblecks – add it to your bucket list

Walking on Ooblecks – add it to your bucket list

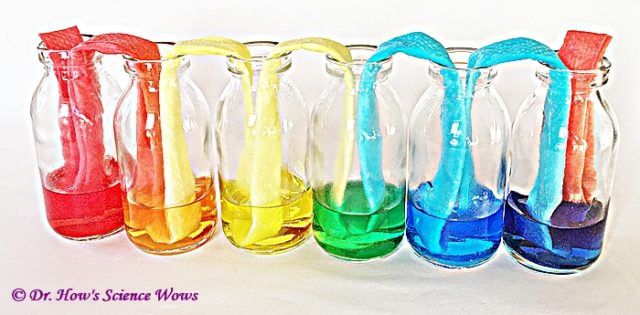
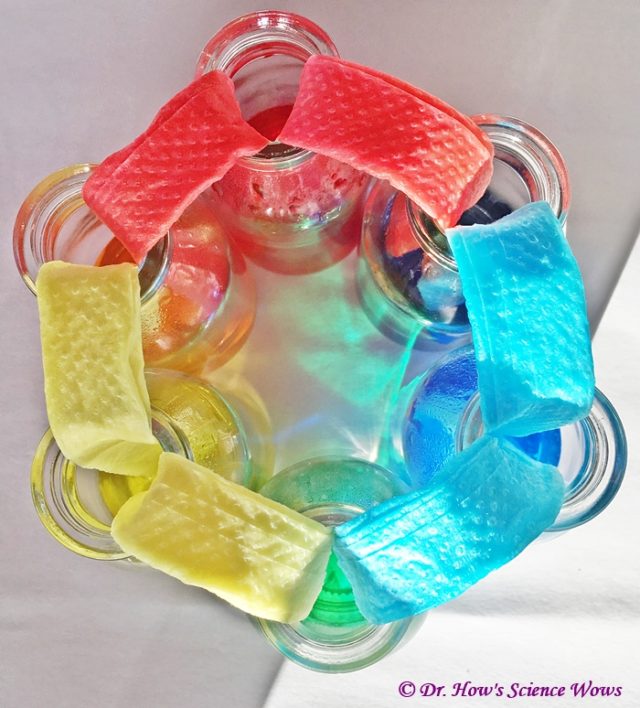
What do you get when you mix cornflour and water together? Those of you that are regulars to this blog will know by  now that you get a Non-Newtonian fluid… commonly called Ooblecks.

Cad a fhaigheann tú nuair a mheascann tú gránphlúr agus uisce le chéile? Má leanann tú an blog seo go rialta, tuigfidh tú go bhfaigheann tú sreabhán neamh-Niútanach nó ‘Ooblecks’.

What is a Non-Newtonian fluid? Well we know that most matter is either a solid, a liquid or a gas, but a Non-Newtonian fluid breaks the rules a little. Sometimes it acts like a liquid and sometimes it acts like a solid, and that can make for a LOT of fun!

Cad atá i gceist le sreabhán neamh-Niútanach? Bhuel,  tá a fhios againn go bhfuil an chuid is mó d’ábhar ina soladach, leacht nó gás ach briseann sreabhán neamh-Niútanach na rialacha beagán. Uaireannta gníomhaíonn sé mar leacht agus uaireannta eile, mar sholadach. Is féidir an-spraoi a bheith agat leis, dá bharr sin! 

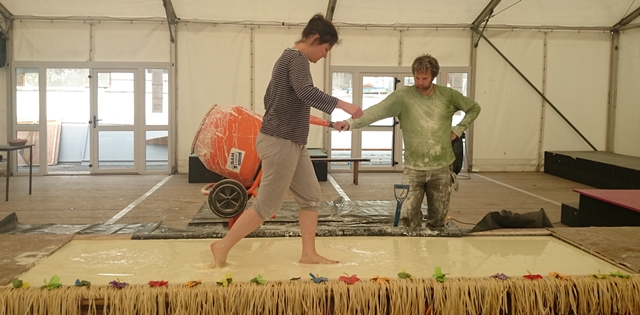
If it is that much fun, why not make a huge vat of it, right? An interesting theory and one that we just had to try! Thankfully everyone over at Meangadh Fibín felt the same way. They are currently filming a fantastic new science series, for children, to be aired in 2016 on Cúla 4, TG4. The series, called Is Eolaí mé (I am a scientist) is all about exploring the curiosity of science; the what ifs? the whys? and the hows? Best of all it is full of great experiments and a real hands-on approach to science.That brings us back to the subject of ooblecks… what can you do with a huge vat of the stuff? A LOT!

Má tá an méid sin spraoi le baint as, nach mbeadh dabhach mór dhe do-chreidte spraoiúil?! Bhí orainn triail a bhaint as agus bhí gach éinne i Meangadh Fibín den tuairim céanna. Tá siad i lár scanánaíocht don sraith teilifíse eolaíochta nua do pháistí, a chraolfar i 2016 ar Cúla4 ar TG4. Is Eolaí Mé is ainm don chlár a fhiosraíonn ceisteanna móra na heolaíochta; cad má? cén fáth? conas? Tá sé lán le trialacha eolaíochta iontacha agus tá cur chuige teagmhálach aige freisin. Tógann sé sin ar ais ag Ooblecks muid… cad is féidir a dhéanamh le dabhach mór de stuif? NEART!

On Friday, in the small hours of the morning, one tonne of cornflour was mixed with a fair amount of water… using a cement mixer and a lot of time and patience.

I lár na hoíche ar an Aoine, meascadh tonna gránphlúr le méid suntasach uisce… ag úsáid meascthóir stroighne, an-chuid ama agus foighne.

Mixer


The result was a trough full of Ooblecks… one metre wide, three and a half metres long and 38 cm deep.

An toradh a bhí ann ná dabhach lán le Ooblecks… méadar leathan, trí go leith méadar ar fhaid agus 38cm domhain.

trough


Two diligent young scientists carried out some quality control testing before the crowd arrived. The crowd in question was a few hundred bemused students at Colaiste Lurgan, Inveran.

Bhí beirt eolaí óga díograiseach ann le rialú caighdeán a chur air roimh a thánaig an slua – cúpla céad macléin mearbhallach ó Choláiste Lurgan, Indreabhán.

testing


Once we got the nod from the young science team it was time to for the fun to begin. Peadar, the shows main presenter, had a test run…

Chomh luath is a raibh an nod ón fhoireann eolaíochta óg, bhí sé in am don spraoi tosnú! Bhí rith tástála ag Peadar, atá mar láithreoir ar an gclár…

Peadar


Then there was ballet, juggling, limbo, hurling and a lot more besides… all on top of the Ooblecks.

Ansin bhí ballet, lámhchleasaíocht, limbo, iománaíocht agus neart eile leis… uilig ar bharr an Ooblecks.

Ballet


It wasn’t long before everyone wanted a go!

Ní fada go raibh gach éinne ag lorg deis triail a bhaint as!

Everyone


As far as we are aware, this is the first time anything like this has been attempted in Ireland; it certainly caught the attention of local media and made the day’s news (Nuacht) on TG4, take a look! (It is at the 10 minute point.)

Chomh fada is atá a fhios againn, ‘sé an chéad uair gur baineadh triail as seo in Eirinn; agus tharraing sé aird na meáin áitiúla freisin – gliogáil ar (Nuacht) TG4 le tuilleadh a fheiceáil. (Ar an marc 10 nóiméad.)

It was a fantastic day with lots of surprises… if you don’t have “walking on ooblecks” on your bucket list then I strongly suggest you add it! I can now tick that box!

Lá iontach a bhí ann le an-chuid iontais… agus muna bhfuil ‘siúil ar ooblecks’ curtha le liosta do mhianta mholfainn duit é a chur leis! Is féidir liomsa tic a chur sa bhosca sin anois!

Me


So what happens if you do sink into that much Ooblecks? You’ll have to watch the programme to find out! Is Eolaí Mé will air in early 2016.

So, cad a tharlaíonn nuair a siúlann tú ar Ooblecks? Beidh ort breathnú ar an gclár le fáil amach. Craolfar Is Eolaí Mé go luath i 2016.

Want the science bit? Ooblecks is what we call a Non Newtonian Fluid… meaning that it does not follow the laws of Newtonian Physics.  When left to rest it looks just like a regular liquid.  However when disturbed by strong hitting, shaking or pulling it acts more like a solid.  It is a phenomenon worth studying and although still a bit of an enigma, scientists think that the material normally acts as a liquid but can produce a sudden, local reaction to rapid impact and stress, reinforcing the area and briefly solidifying the suspension.

Ar mhaith leat an eolaíocht taobh thiar de idir an dá linn? Is  sreabhán neamh-Niútanach é Ooblecks, rud a chialaíonn nach leanann sé rialacha Fisic Niútanach. Nuair a fágtar socar é tá cuma leachtach air. Ach, nuair a suaithtear é tríd é a chraitheadh, a bhuaileadh nó é a tharraingt, gníomhaíonn sé cosúil le soladach. Is feiniméin é gur fiú a staidéar agus cé nach bhfuil tuiscint iomlán air, ceapann eolaíthe go gníomhaíonn an ábhar cosúil le leacht de gnáth – ach gur féidir leis frithghníomhú tobann, logánta a chothú i gcoinne brú agus imbhualadh gasta. Treisíonn sé seo an ceantar agus cothaíonn sé fuaidreán soladach gairid san ábhar.

Ooblecks takes it’s name from the green slime that fell from the skies in the Dr Seuss book “Bartholomew and the Oobleck“.

Tagann an ainm Ooblecks ón sláthach glas a thit ón spéir sa leabhar “Bartholomew and the Oobleck” le Dr. Seuss.


A huge thanks to the lovely Sadhbh over at Where Wishes Come From for translating this blog post for me. There seems to be no end to that lady’s talents! 

Coloured flower science experiment using tulips

Coloured flower science experiment using tulips

I know I haven’t been blogging much lately, I am trying to work on a little something else that I have wanted to do for a very long time. If I ever get the other project finished I’ll be sharing it right here so watch this space (not literally, it’s taking me a LONG time!).

There is still plenty of science going on in the background though, as is common enough around here. This week we repeated an old favourite, an experiment demonstrating water flow and transpiration in plants… our coloured flower science experiment. I spotted a bunch of pretty white tulips in my local super market and that was all the reason I needed. I had also spotted a set of little bottles while away in Westport last weekend and had to buy them for this experiment, which, I think, elevates my geek status to a whole new level.

I have blogged about this topic before, so if you want more information you can check out this post.

YOU WILL NEED:

  • Some white flowers*
  • Food colouring (I usually use the Goodall’s ones, available in most supermarkets)
  • Water
  • Glasses, cups or other containers, one for each colour you will use

*This will work with all (or almost all) white flowers but it works better with some than others. You can of course use other coloured flowers, daffodils are a popular choice. I have achieved good results with roses, carnations, oxeye daisies and some Chrysanthemums. You can choose the flowers based on what you want to achieve but if working with children (particularly young children) or doing this as a classroom project them I would definitely recommend the tulips. The results are rapid so children will be able to see the colour arriving into the flowers within a fairly short time frame.

WHAT TO DO:

Choose how many different colours you want to use. Place one colour into each glass and add water. I usually use at least 10 mls of food colouring to 20 mls of water (if unsure use a 50:50 ration of food colouring to water).

Choose your flowers, one for each glass, and trim them to the desired length. You will get a more rapid result with a shorter stem.

Then simple place a flower in each glass and wait! With these tulips I began to see a result within less than an hour. I set this experiment up overnight and went from this…

tulips1

… to this…


tulips3

WHAT IS HAPPENING:

Water is transported up the stem of the flower through little tubes called xylem. The coloured water will travel through the xylem all the way up the stem to various parts of the plant and right up to the flower. The coloured water stains the plant as it moves through it and this is most apparent when the white flowers change colour. The water ultimately evaporates out of the plant through little pores called stromata. This process is called transpiration and is much like perspiration in humans.

OTHER SUGGESTIONS:

If you want to take this one step further you can try to make a multicoloured flower, like I did with this rose last year. Just click on the image to go to the post with full instructions.

rose


If you try this experiment, or a version of it, I would love to hear how it you get on!


Fun Friday – the Halloween Special – fake blood recipe

Halloween is all about dressing up and sometimes you just need a little fake blood to really set an outfit off. We love making our own and with a little science knowledge you can get just the right consistency and colour that you are after.

You will need...
You will need…

You will need…

  • Smooth Peanut Butter
  • Golden Syrup
  • Washing up liquid
  • Red food colouring
  • Green food colouring


What to do…

This is one of these experiments that does not come with an exact protocol, just add the following ingredients until you are happy with the appearance of it, then apply and freak out all your friends!

When you think you have the fake blood just the way you like it do a little test on a white cloth or tissue and adjust further if necessary.


Fakeblood


If you want to experiment a little more try making your own fake blood choosing your ingredients from the following list:

  • Smooth Peanut Butter
  • Golden Syrup
  • Washing up liquid
  • Red food colouring
  • Green food colouring
  • Blue food colouring
  • Chocolate syrup
  • Cornflour
  • Cocoa powder
  • Ribena
  • Chocolate syrup
  • Tomato ketchup
  • Brown Sauce

So what is happening?…

The trick to making good fake blood is to get the colour and consistency right. The food colouring, washing up liquid, cocoa powder, ribena, peanut butter and ketchup will all influence the colour of the blood. You want to get a dark colour, deep red colour so the chocolate and green food colouring will often give the red a darker effect.

It is not just about the right colour though, the consistency of the blood is important too. The cornflour will thicken the blood and make the colour more transparent, as will the peanut butter, syrup and washing up liquid.

The fun is in mixing and changing until you get your ideal fake blood, then apply and freak out your friends and family, all in the name of Halloween fun.

Enjoy!

Green Eggs and Ham

Green Eggs and Ham

 Do you like 
green eggs and ham 

I do not like them, 
Sam-I-am. 
I do not like 
green eggs and ham. 


dr. Seuss's Green Eggs and Ham
dr. Seuss’s Green Eggs and Ham

I am sure this would suffice as an add on to the coloured egg experiment post but we had so much fun with this I felt it deserved a post all to itself!


We repeated the experiment but this time on two eggs, one of which we coloured red as before and the other one we coloured green… because the children (especially the BIG ones) couldn’t let it go without trying to make “green eggs” and ham!


The first day we dissolved the shell away in vinegar and then yesterday we transferred the eggs a cup of coloured water and left them overnight. We had the fun of checking them out when we got up this morning… and they didn’t disappoint!


Two coloured eggs
Two coloured eggs


A handful of coloured eggs
Squishy eggs
Squishy eggs


The colouring step definitely worked, but we still wanted to cook a coloured egg.

We snipped the membrane of the green egg and scrambled it, and finally we had our “green eggs and ham“!


Green eggs and ham
Green eggs and ham

Doesn’t look too appetizing, does it? But I persuaded the Science Wows team to try it out…


The Science Wows Team tuck in


And how does it taste?…


How did it taste?
How did it taste?


It tasted awful!!!


But we had fun!


I would not eat green eggs and ham. 
I do not like them, Sam-I-am. 


Coloured-bouncy egg experiment

Coloured-bouncy egg experiment

This egg experiment is a new take on an old favourite. We have made bouncy eggs before, we even made them fluorescent! This year we decided to add more colour.

This is a really simple experiment, you probably have everything you need already in your kitchen and it is guaranteed to entertain both the young and the young at heart!


You will need:


bouncyegg3

Clear malt vinegar, a glass or cup, a whole raw egg, food colouring


What to do:


Place the raw egg in the glass and cover with vinegar, making sure the egg is completely covered.

Leave overnight or up to 48 hours if necessary.

After this time, remove the egg carefully and rinse it in a bowl of water.

The vinegar will have dissolved all the shell of the egg, leaving just the egg membrane keeping the structure together. The “naked” egg will be soft and bouncy and a little delicate so do be carefully when washing any remaining shell off.


A bouncy "naked" egg after the first stage of the experiment
A bouncy “naked” egg after the first stage of the experiment


Next place the egg into an empty glass and cover with water, add at least two teaspoons of your chosen food colouring (we used red here) and leave overnight again.

The next day carefully remove the egg from the coloured water, rinse and pat dry (you may find your fingers will get a little stained from the food colouring but it will wash off).


After step 2 of the experiment our "naked" egg has a little more colour
After step 2 of the experiment our “naked” egg has a little more colour


Now you have a coloured, bouncy egg, but be carefully when you bouncy it…


What has happened:

When the egg is in the vinegar you will notice some bubbles forming and eventually a foam will appear at the surface of the vinegar. The eggshell is made up of calcium carbonate. The vinegar (an acid) reacts with the calcium carbonate (a base) producing a salt and a gas called carbon dioxide (these are the bubbles you see). The vinegar will keep reacting with the calcium carbonate until it is all gone, leaving the egg contained in just the cell membrane.

A delicate, but bouncy egg.

When the egg is then placed in coloured water the water will travel into the egg by a process called osmosis. The egg will swell a little with the extra water.

I hope you have fun with this one, and please do let us know if you try it out. We are currently repeating the experiment as my Junior Scientists want to see the eggs with different colours… we will keep you posted!
Fun Friday- Make a simple kaleidoscope

Fun Friday- Make a simple kaleidoscope

The weekend already…Yay! Hope you are doing something fun…. if you are looking for an activity to entertain your children why not try this?… My junior scientists had great fun making these simple kaleidoscopes and learning about light and reflection!

Fun Friday - Make a Simple Kaleidoscope
Fun Friday – Make a Simple Kaleidoscope


Here is what you will need:

  • a sheet of mirrored card* (we found a packed of A4 mirrored card in our local craft shop)
  • a ruler
  • a scissors
  • some felt pens
  • tracing paper/transparent paper
  • a sheet of clear plastic (optional)


What to do…

1. Cut a 6cm strip off the long end of our A4 mirrored card leaving the card 24 cm in length

2. Fold the card in half (mirror side in) so that the short ends meet

3. Open back out the card and next fold the short ends in so that they meet in the middle

4. You should now have a card with three folds and four sections, 6 cm wide

Kaleidoscope1


5. Next fold the card into a triangle (mirrored side in), with one of the strips overlapping

6. Tape this overlapping strip along the edge so the triangle is now secure – this will be the tube of your kaleidoscope

The tube of the kaleidoscope - mirrored surface on the inside
The tube of the kaleidoscope – mirrored surface on the inside


7. Now it is time to prepare the designs for your kaleidoscope… we used the coloured pens to draw designs on a square piece of clear plastic, at least 6 X 6 cm in size.

The design team at work


Some of the finished designs

8. Once finished tape the coloured squares on to a piece of transparent paper (or you can just draw your design directly onto transparent paper if you wish)

9. Now it is time to use your Kaleidoscope… hold the transparent paper with the design up to a window or a light source, look at it through the kaleidoscope… rotate the paper and see how the patterns change

Using the kaleidoscope


We love the results
We love the results

What is happening?

Light travels through the transparent paper into the kaleidoscope where is bounces off each of the three sides before reaching our eyes. As each side is mirrored it reflects the light that bounces off it and also the light bouncing off the other mirrored sides of the kaleidoscope. All this reflecting makes multiple images of different parts of the pattern and create a very interesting effect.

Do have a go it is great fun! 

*Note: if you cannot get mirrored card you can use cardboard covered in aluminium foil. This will work better if you also add a layer of clear plastic on top of the foil… creating a better mirror!