It is a simple and easy Fun Friday experiment today – how to make an ocean in a bottle
All you need for this experiment is…
an empty clear plastic bottle (a 1 or 2L soft drink bottle will work fine)
water
cooking oil (any kind)
Blue food colouring
A funnel
What you do…
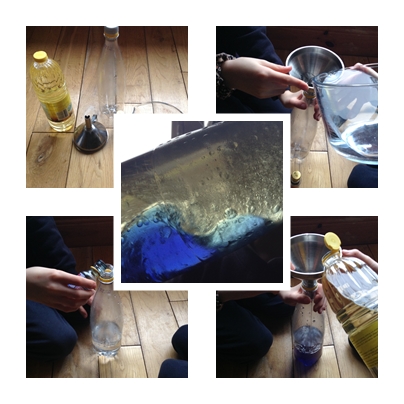
Using the funnel fill the plastic bottle about one third full with water
Add a few drops of food colouring to colour the water blue
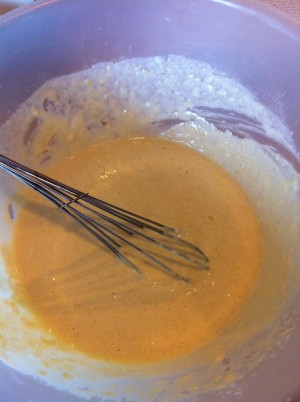
Using the funnel again fill the bottle with the oil (you will notice that the water and oil will quickly settle into two separate layers)
Close the lid tightly on the bottle and turn the bottle on its side
The water layer will be on the bottom of the bottle
If you rock the bottle from side to side you can create a wave like motion of the water, looking just like a little ocean in a bottle; see what kind of waves you can make!
Ocean in a bottle
How does it work…
This is a good experiment to explain density. The oil is less dense than the water so it will sit on top of the water, creating two separate layers. The layer of oil keeps the water contained within the bottom half of the water and makes the movement of the water look like waves where the two liquids meet.
I have discussed density in more detail in this previous post as well as sharing lots more density experiments.
If you get bored of your ocean in a bottle, why not stand it upright again and add some Alka Seltzer tablets to instantly turn it into a lava lamp!
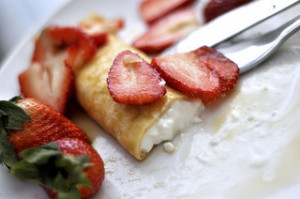
If you have ever wondered about the science of pancakes, their history, why they are round or even the formula for the perfect pancake flip then read on!
I know that pancakes Tuesday is late this year but it still seems to have come around awfully quickly. In this house the pancake does not just feature once a year but every weekend and with that kind of frequency we have covered a lot of questions about this not so humble food.
So if you have ever wondered about the history of the pancake, the science of getting them just right, why they are round or even the formula for the perfect pancake flip (L = 4 H /P- D / 2 if you’re interested) then read on!
…..”WHAT IS THE SCIENCE BEHIND A GOOD PANCAKE, AND WHO’S IDEA WAS IT?”…..
Made in the name of Science
A BIT OF HISTORY…
So, before I delve into the science behind the PERFECT PANCAKE, I thought I’d look at a little bit of history first. The pancake as we know it seems to be accredited to the ancient Greeks, who in the 6th century started combining ground wheat with olive oil, honey and milk – and so the first pancake was born. If we expand on our concept of what a pancake really is we could look back further still to the process of making flat bread from ground grains and nuts mixed with milk or water, dating back to the neolithic period.
WHAT DO WE FIND IN A MODERN PANCAKE?
If we start within Europe a modern pancake can be classified as the round flat variety similar to the french crepe which contains some form of flour, and a liquid such as milk or water. These flat pancakes usually also contain eggs and butter, and sugar in the sweetened variety. Then we also have the thicker, fluffier pancakes that contain a raising agent, the name and variation of these include drop scones, Scottish pancakes and of course the well know buttermilk pancakes that are most common in America.
In our house the three most common pancakes made are the buttermilk pancakes, drop scones and the sweet flat crepe like ones.
WHAT GOES INTO A PANCAKE…
If we take a closer look at the primary ingredients we begin to see the complexity and science that really goes into making these delights:
FLOUR… this ingredient can be considered the backbone of the pancake as it provides structure
SUGAR….as well as adding the nice sweet taste and contributing to the colour of the pancake, sugar also keeps the pancake from getting to thick and stodgy
EGGS…. the proteins in the eggs add to the structure of the pancake and to the overall flavour
BUTTER/FAT… as with the sugar, the fats keep the pancake tender and prevent them becoming overly stodgy
MILK/WATER… the liquid portion of the pancake adds to the structure and is necessary for certain chemical reactions to occur
RAISING AGENT… as the name suggests, these agents help raise the pancake, making them light and fluffy
You can of course find many varieties with their own local changes and substitutes, potatoes are commonly used as the starch ingredient instead of flour.
First lets take a look at the thin flat pancake or crepe… in this case we will assume they contain flour, milk and sugar. From the above list we can now predict that the flour is the body of the pancake, it provides the structure, but how does it do this? There are two proteins found in flour called glutenin and gliadin. When moisture is added to flour (in this case the milk) these two proteins link together to form gluten. Gluten is a “sticky” protein, this stickiness allows it to form a network and it is this that adds structure to the batter. Finally we come to the sugar which caramelizes with the heat adding sweetness to the mix and contributing to the colour of the pancake as it cooks. The sugar also prevents the pancakes becoming too thick and stodgy by reducing the amount of gluten produced.
So now we move on to the thicker pancakes; the main difference with these is that they contain a raising agent! Yeast is a biological raising agent used in some baking, it produces carbon dioxide gas while digesting sugar and this gas forms tiny bubbles within the yeast. When heat is added during baking these bubbles expand making the bread/cake “rise”.
The main drawback with baking with yeast is that it requires time and who really wants to wait too long for their breakfast? That is why, when using raising agents in pancake mixtures, we substitute the yeast for bread soda and/or baking powder; but who can really tell what the difference is between these two?
Bread soda (also known as baking soda) is pure sodium bicarbonate. Baking powder contains bread soda but it also contains a powdered acid (usually cream of tartar – potassium bitartrate). Bread soda is an alkali/base and will therefore react with an acid (such as the buttermilk used in pancake batter) producing salt, water and carbon dioxide gas…
BREAD SODA + ACID —–> SALT + H20 + CO2
This carbon dioxide gas gets trapped in thousands of tiny bubbles within the gluten making the pancake batter rise on cooking into light and fluffy wonders! (The same process as with the yeast but a lot quicker).
The baking powder has the added advantage of having the acid already present, so once a liquid is added the dry acid and alkali can react in the same manner as above.
So now that we are starting to understand the science of it all how do we use this knowledge to make the best pancakes. before we jump into this one we first have to consider the science of flavour and odour!
THE SCIENCE OF FLAVOUR
The Maillard reaction describes a chemical reaction requiring certain amino acids and sugars and the addition of heat to produce the molecules responsible for the odours and flavour of food. Now there is a science worth studying!
So what does this have to do with our pancakes? Well, Maillard reactions work best in alkali conditions so bread soda is a definite plus is making golden tasty treats. HOWEVER, add too much bread soda and the pancake will brown too quickly and will have an acrid burnt flavour, not to mention the unpleasant taste produced from the left over breadsoda. It is trickier than we think and yes, of course, someone has already done the science bit for us to work out the ideal amount of bread soda required.
WE ARE HUNGRY – SPEED IT UP
You will be glad to hear that speed is recommended when preping pancakes; Although it is good to allow the batter sit for a few minutes to allow the gluten to “relax” (build up a sufficient network) it has been shown that if left too long the bubbles will have burst and the pancakes will be flat and dense once cooked.
SCIENCE IN MY KITCHEN
I decided I had to try some of this pancake science out for myself so turned to my original buttermilk pancake mix from the wonderful NIGELLA LAWSON. This recipe actually uses both baking soda and baking powder (I omitted the banana). I decided to test out two theories…
1. Does the amount of bread soda determine the colour and flavour of the pancake?
2. Does the length of time the batter is left standing really make that much of a difference?
To keep it simple, I decided to keep everything else (including the amount of baking powder) constant.
So I donned my apron in favour of my labcoat and I set to work. I prepared the basic batter mix excluding the addition of bread soda. To digress for a moment, I also followed another golden pancake rule – not to over-mix the batter (a few small lumps of flour allows it better absorb the liquid and produce gluten).
My “slightly lumpy” pancake batter
I divided my basic batter mix between four bowls and then added different amounts of bread soda to each (the first bowl had no bread soda, the second had half the recommended amount, the third had the recommended amount and the fourth had double what was recommended!). Then I let the batter sit for five minutes before cooking the pancakes.
Here are my results… the pancake on the top left had no bread soda, top right had 1/2 the recommended amount, bottom left had the ideal amount and bottom right had twice the recommended amount. You can see how the pancake gets darker with the addition of more bread soda, with the last one being just a bit too dark. The taste test revealed that the one on the bottom left had the best taste (and texture) and that the one with the most bread soda had that unpleasant taste of bread soda!
To investigate my second question I left the same pancake batters sit for two hours before cooking them. As you can see the pancakes cooked after two hours were indeed a lot less light and fluffy and were a bit soggy inside!
The batter for these pancakes was left for five minutes
The batter for these pancakes was left for two hours
WHY ARE PANCAKES ROUND?
Pancakes are round for two main reasons: gravity and surface tension. Assuming that the pancake pan is flat then once the batter is added gravity will pull on all parts of the batter uniformly in all directions, pulling it out into a round shape. Surface tension pulls evenly on the edges keeping them restrained into the round shape.
According to University Professor of Mathematics Frank Smith, the simple mathematical formula for the perfect flip is: L = 4 H /P- D / 2
(L = hand distance from inner edge of the pancake / H = height of flip / D = diameter of pancake)
Dr. Tungate, a senior physics lecturer at Birmingham University, found that “a pancake should be flipped into the air at a speed of 10 miles-an-hour, which means that it takes less than .5 of a second to reach the top of its trajectory.”
AND THEN THERE IS THE SCIENCE OF WHAT YOU ACTUALLY PUT ON YOUR PANCAKES…
… but I think that is a whole other blog! So whatever toppings you choose I hope you enjoy your pancakes today!!
All that Science made me hungry!
And if you still want more….HERE IS AN EXPERIMENT YOU CAN TRY….
This experiment shows two fun ways of inflating balloons, kids will love it, it’s easy to do and it teaches some kitchen science… like the difference between using yeast and bread soda as raising agents in baking!
Keeping with the Halloween Science theme, this week I share a cool experiment perfect for the spooky season!
Make a Spooky Sound Cup!
All you need is…
All you need is ….
a plastic cup
a paper clip
some twine or string
a knife or scissors
a piece of kitchen paper
water
What to do…
What to do…
Tie the paperclip to one end of the twine.
Ask an adult to make a small hole in the base of the cup, using the knife or scissors.
Hold the cup upside down and thread the twine through the hole. The paperclip will stop the twine from coming all the way through.
Fold the kitchen paper in half and then quarter and then dip it in water. You want it wet but not dripping.
Holding the cup in one hand, fold the wet kitchen paper over the twine with the other hand and hold between your thumb and first finger.
Pull the wet kitchen towel down along the twine, pinching between your fingers all the time.
You should notice it makes a really spooky sound.
You can try this experiment without the wet kitchen paper, just wet your thumb and finger instead; Does it make a different sound?
You could also see what happens if you use a different type of twine, or some ribbon, or use a larger cup!
So what is happening?…
As you pull the kitchen paper down along the twine the friction between the two makes the twine vibrate. These vibrations travel through the air and bounced around the walls of the upturned cup – amplifying the vibrations so we get to hear the spooky, screechy sound!
Hope you have some Spooky Fun with this experiment. Stay tuned for lots more over the Halloween Season!
Transpiration is the process whereby water is taken into a plant by the roots, transported up through the plant and released from the leaves as water vapour!
Lets learn more!
Transpiration is a bit like perspiration (sweating) in humans – it helps to keep the plant cool! As the water vapour transpires out of tiny holes (called stomata) fresh water is drawn up from below. This means there is always an unbroken tower of water running from the bottom to the top of the plant at all times. Water travels up the plant through tubes called Xylem.
The constant flow of water through the xylem tubes of the plant is called the transpiration stream; this stream keeps the stem firm so that it can support the weight of the plant.
Plants put roots down into the soil to draw water and nutrients up into the plant.
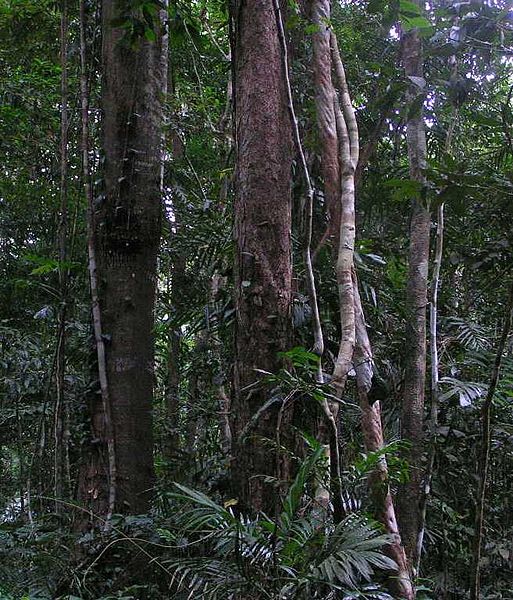
‘Did you know… trees and plants in rain forests help to make rain; if a forest is cut down the area around it may suffer from drought!’
Transpiration accounts for up to 10% of water in the atmosphere! Some trees can loose hundreds of thousands of litres of water in a single day through transpiration! The water vapour trees transpire into the air cools the air!
Transpiration can lift water all the way to the top of the tallest trees!
Stromata
Stomata are tiny holes or pores on leaves, stems and even petals of the plant that allow water out of the plant (transpiration) and gases (like carbon dioxide) into the plant. Most of the stromata of a plant are found on the underside of the leaves.
Stomata can open and close to control the amount of water leaving the plant or the amount of gas coming in.
An experiment to try at home: Tracking the flow of water!
You will need…. white flowers, clear cups and food colouring of your choice
Step 1: Fill cups 2/3 full with water
Step 2: Add different food colouring to each one; I used blue, yellow, green, red
(Note: you need a fair amount of food colouring… at least half a bottle per cup)
Step 3: Cut the stem of four flowers to desired length then add one to each cup
Step 4: Leave for a few hours (or overnight) and see what has happened!
So what has happened?…The coloured water travels up the stem and eventually reaches the flower where it changes the flower’s colour.
What could you change or what other things could you try?… What would you change if you repeated this experiment? You could try it using a variety of different types of flowers to see if one type works better than another. You could vary the amount of food colouring you use.
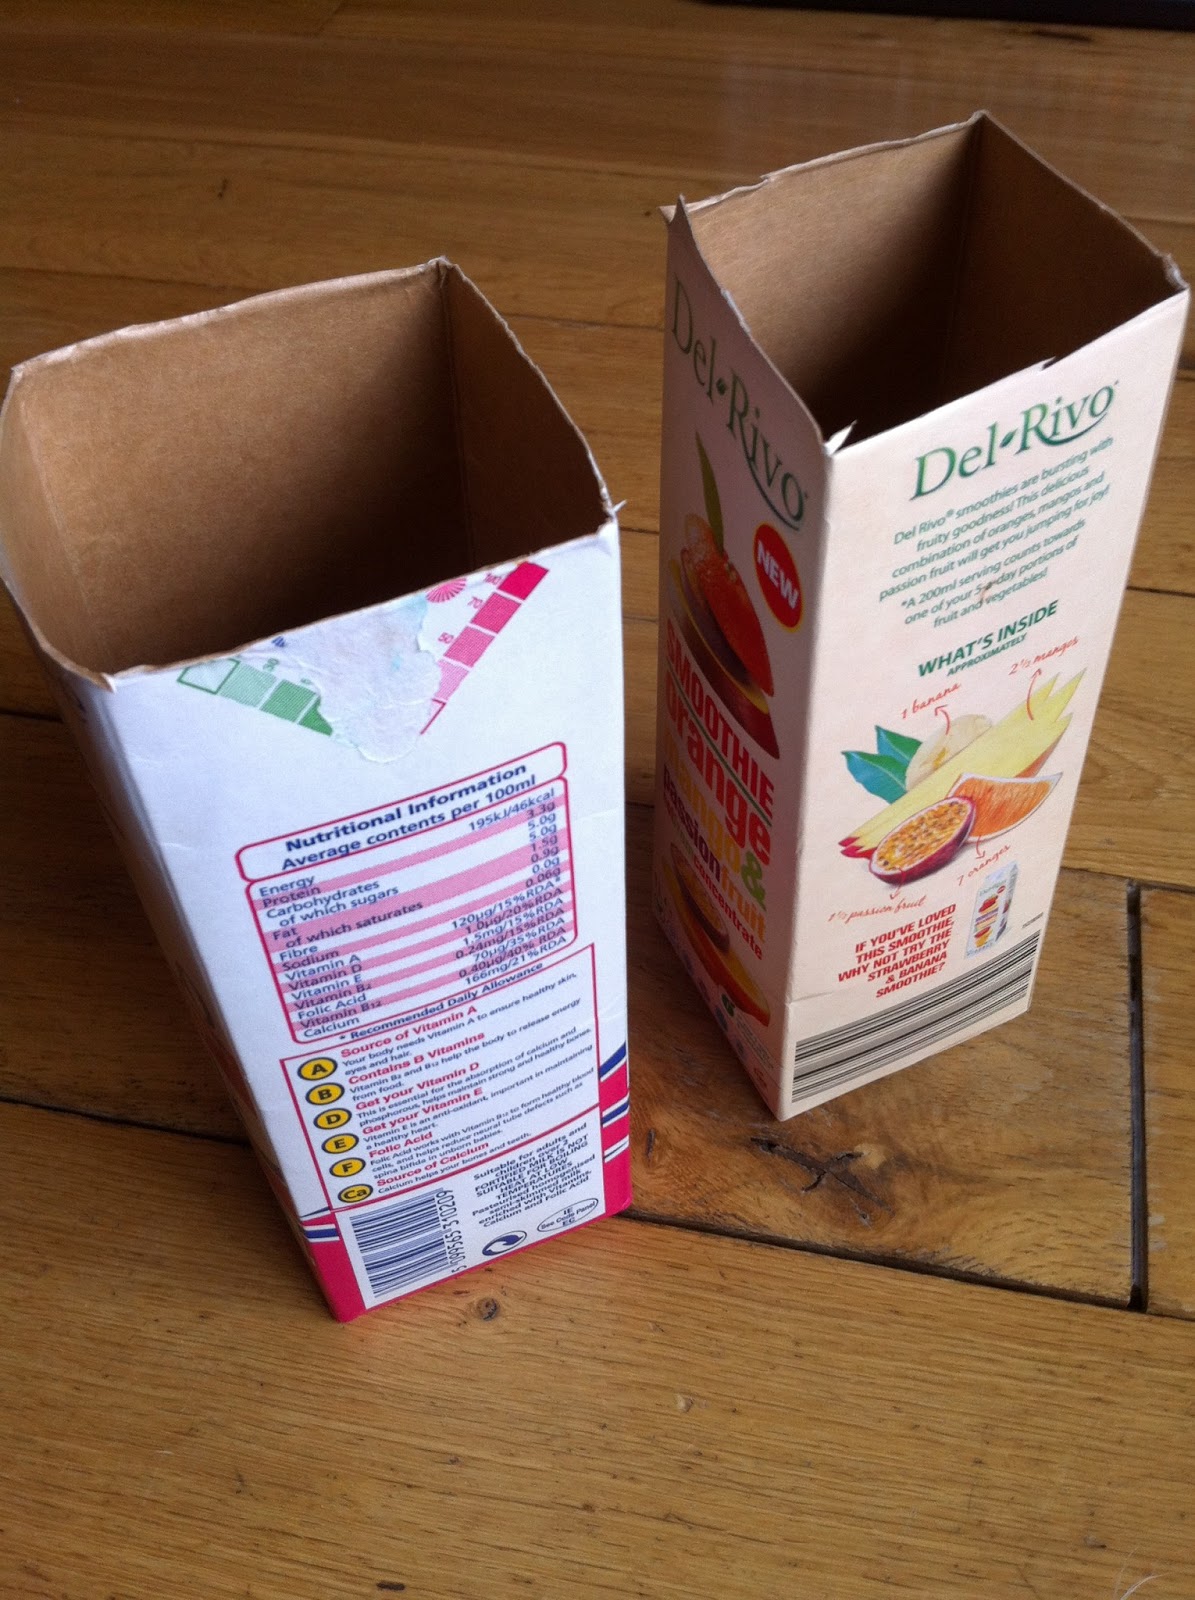
We had fun making this one… a bit fiddly at parts but worth it, the boys love their new periscope! You will need…. 2 clean empty juice/milk cartons (1 Litre) Some duct tape Scissors Pen Ruler 2 small mirrors (I got a little double mirror in a make-up set in The Two Euro Shop (for €1.50) )
What you need
What to do: First, cut the tops off the two cartons and tape them one on top of the other (taping them at the open ends)
Cut tops off
Tape together
Next mark off a square on the top side of one of the cartons with your marker (I made the square 5cm X 5cm); Cut out the square. Repeat this step on the opposite end and side of the other carton… so if the first square is on the bottom right side of your periscope cut the second square out of the top left of the periscope.
Cut a square
Now you want to fit a mirror into each end of the carton so that the reflective side of the mirror is facing you as you look in the hole and each mirror is tilted at an angle of approximately 45 degrees. The bottom mirror is tilted up at an angle of 45 degrees and the top mirror is tilted down at an angle of 45 degrees. I was lucky, my mirrors fitted the exact width of my milk cartons so I was able to place them inside, tilt them as required and then tape them in place. If your mirrors are wider than your carton then mark a line at the side of your carton, cut a slit and slide in your mirror. Repeat for the other mirror then tape into place.
You should be able to look into the bottom hole and see what is reflected through the top hole….
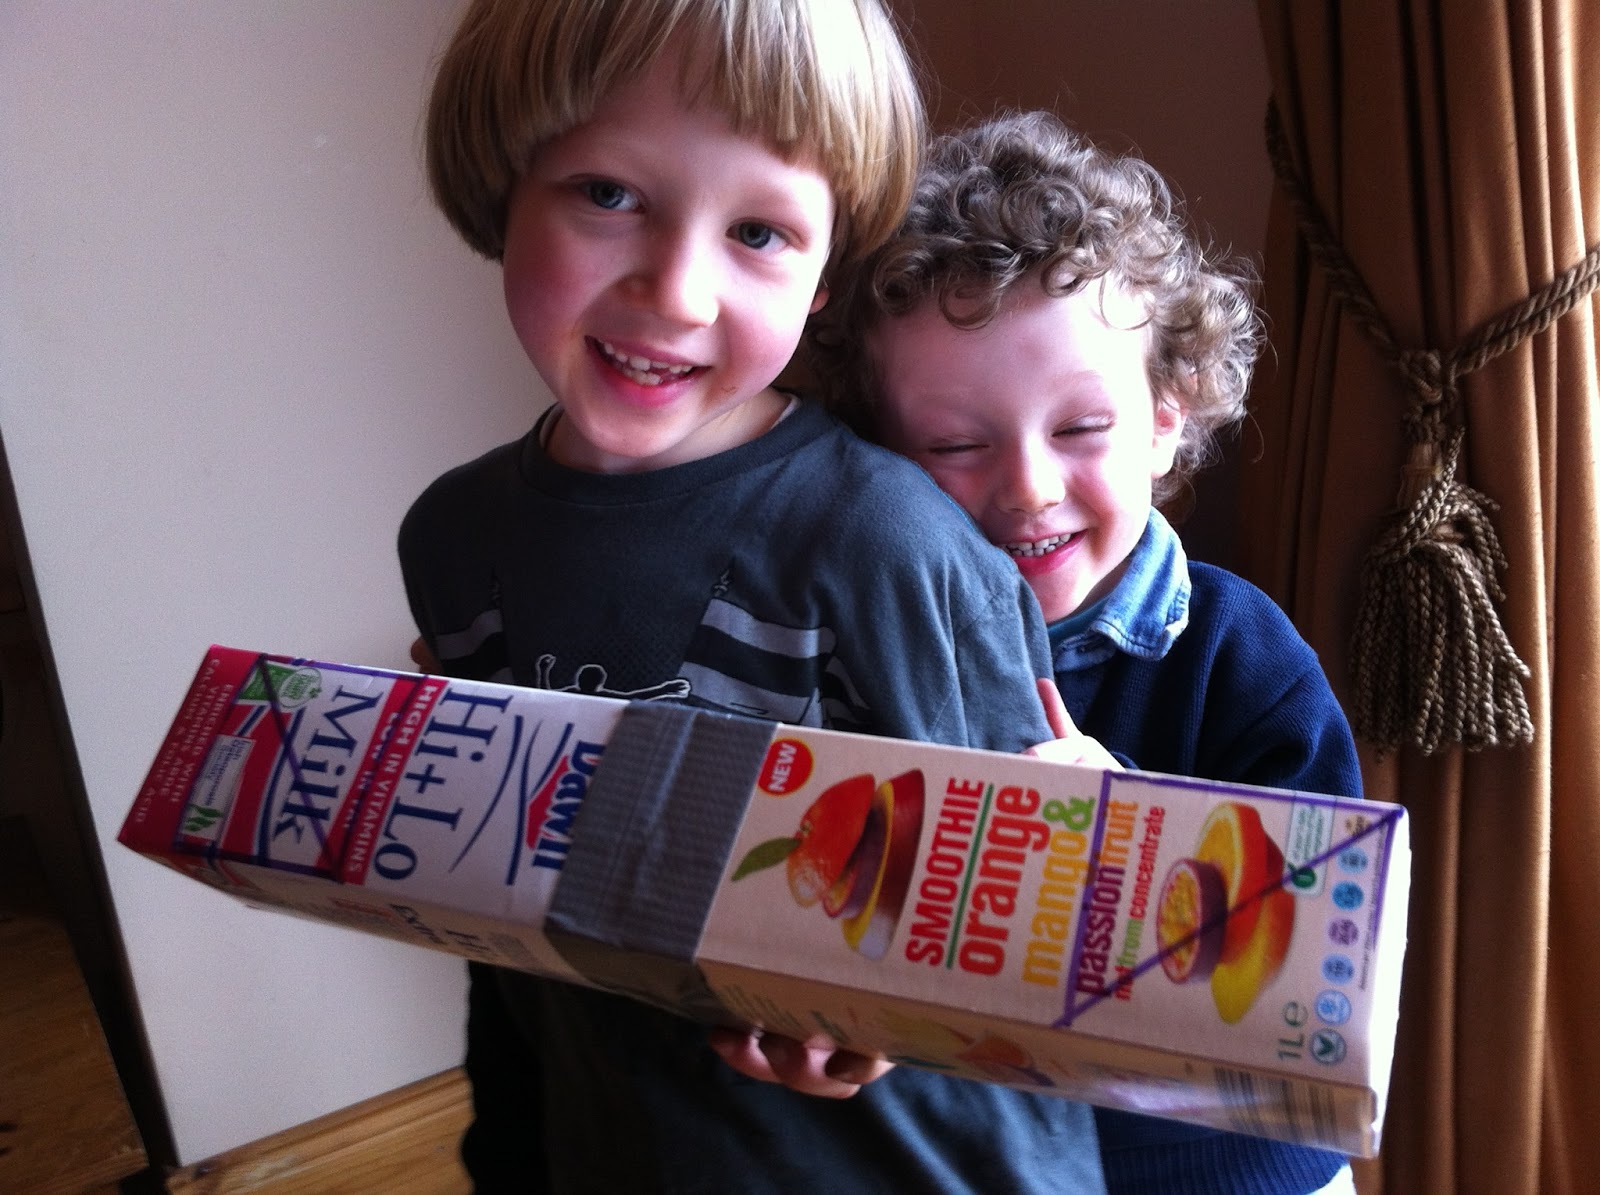
Now all that remains is to decorate your periscope and have some fun…. you can use it to look around things or over things, great for playing spies, which is a very popular game in this house.
Enjoy!
How does it work? The object we see is reflecting light, this light is bounced off the top mirror onto the bottom mirror which bounces the light right onto our eyes!
How it works
FEEDBACK: I love hearing from people who have tried some of these experiment so please let me know if you try this one, or even send me some photos of your finished periscope; If you have any questions just ask!
Here is a simple and fun experiment to try at home – how to make a balloon hovercraft. I was temporarily abandoned by my junior scientists so had to step in front of the camera for a change….. so everybody…. meet Dr. How ;0)
Hope you have fun with this experiment and do please drop me a line or a little comment to tell me what you think or how you got on!
With all the excitement of the Easter bunny we forgot about our last egg- experiment…”the bouncy egg” so I thought it might be a fun one to start off this new blog spot… “Fun Friday”, where I will share a new experiment for you to try!
So firstly, this is how we set up the experiment….
We left the eggs in the vinegar for two days and then removed them and gently washed them in a bowl of water … unfortunately, when I was washing the egg from the plain vinegar experiment, I burst it… Ooops!
No harm done as we substituted the other just to show you how the “bouncy” bit worked!
The result…(we had a very cautious scientist in the video but you can get quite a bounce out of the egg!)
What has happened to the shell?
The vinegar is an acid (acetic acid); it reacts with the calcium in the egg shell (calcium carbonate) and breaks it down, producing a gas as it does so. You may have observed the gas as bubbles being formed, during the experiment. Effectively the vinegar (acid) eats away at the egg shell until it is all gone.
The fluorescent bit
Then for a bit more fun I turned on a UV light! Ok, I know, most of you don’t have one of these lying around at home but as I’m a Mad Scientist I do ;0) …and I was curious to know what would happen if we left it sit in fluorescent vinegar.
The results were Fab!! A fluorescent egg… check it out! (I hope you can hear me in the video, sound is a bit low!)
So there you go, it worked better than I expected… the egg is completely fluorescent…. and bouncy, just for that extra bit of fun!
What is fluorescence?
In case you are wondering “WHAT IS FLUORESCENCE?”….let me explain… it is the emission of light from an object after it has absorbed light (or electromagnetic energy)…. usually the light absorbed has a short wavelength (in this case the UV light) and the light emitted has a longer wavelength.
When I shone the UV light onto the egg it “glowed”, even in daylight it looks bright – just like a fluorescent pen!
My daughter asked me the other day if you cut an earthworm in two will it grow back again? And will you have two worms? Suddenly the whole family is in on the act with talk of geckos tails and why we can’t grow back a limb. So to dispel a few myths and legends I thought I’d take a look for this weeks blog!
The short answer is NO, so please don’t go trying! It is true that the anatomy of the earthworm is very different to our own and if part of a worm is cut off, one part may survive. The part that can survive is the “head” end. First let’s look at some of the unusual features of the inside of an earthworm.
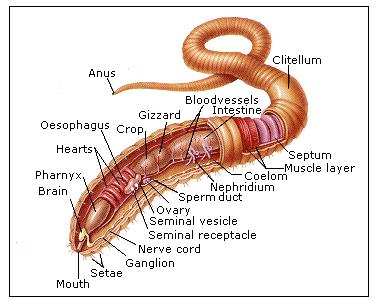
The earthworm’s body is made up of segments called annuli. These segments are stuck together just like a series of rings all lined up; each segment contains little bristle like hairs called setae and these allow the earthworm to move. Earthworms are invertebrates meaning they don’t have any internal “boney” skeleton.
The earthworm does not have one heart as we do… it has FIVE! These hearts help pump the blood through the worm’s body. The worm needs oxygen just as we do but it has no lungs to fill with air, instead it has time pores on it’s skin which absorb oxygen from outside it’s body. In order for this to happen the worm needs to keep it’s body moist, which is why they often feel a bit slimy. Too much moisture though and the worms can drown; when it rains earthworms will move closer to the surface to prevent them from drowning!
Earthworms have a “head” and a “tail” but no eyes, ears or nose, so they can’t see, hear or smell as we can. However their skin is covered with sensors for light and movement so thy can react to too much light (sunshine) or movement (rain falling or soil being disturbed by digging predator).
SO WHAT HAPPENS IF WE CUT AN EARTHWORM IN TWO?
Firstly, cutting up earthworms or any other creature is a very cruel thing so please don’t do it! However if an earthworm’s body was to be cut into two parts its survival would depend on a number of factors:
Where in the body is the earthworm cut? The earthworm would have a better chance of surviving if it’s body is cut closer to it’s tail end. This end does not contain the vital organs. Research by Dr. Thomas H. Morgan (1901) found that the head end of the earthworm may survive if the head end contained at least 16 segments. It is possible that some of the tail end will even be regenerated. Some repair and regeneration is also possible at the head end, but usually only within a small number of segments.
Chance of infection: the earthworm can pick up a bacterial infection just as we can. If the earthworm can seal the cut or regenerate the segment before infection sets in it has a better chance of surviving.
The speed at which the earthworm heals: regenerating part of the body would require an awful lot of energy for the earthworm, the quicker it can heal the quicker it can get back to eating and refuel its body. If the earthworm does not have enough energy to complete the process it will die.
THE ROLE OF EARTHWORMS IN OUR GARDENS
The earthworm is often called “nature’s plough” as it digs through the soil , turning and rotating as it goes. Earthworms are herbivores, they feed on leaves, root and other decaying plant matter. The earthworm deposits this matter through out the soil through its faeces. An earthworm can eat up to one-third of its own body weight in a day!
The burrowing of earthworms helps the soil in two ways, it allows air and water into the soil through the channels it forms and it moves different layers and types of soil around, distributing nutrients and making the earth more fertile. Although earth worms often stay close to the surface of the soil they can burrow down as deep as two metres.
EXPERIMENT: Make your own wormery
A wormery (or worm farm) allows us observe the work that worms do within our soil.
Fill a large see-through container with alternative layers of soil and sand.
Put a layer of leaves and vegetation on the top.
Add enough water to keep the soil damp.
Collect some worms and add them to your wormery.
Cover the outside of your bowl with a large piece of card or paper to block out the light.
Put your wormery in a safe place and check on it every day – remember to keep adding some water to keep the soil moist.
You sould notice very quickly that the different layers of soil and sand are getting mixed together, the work of the industrious worms.
Remember to keep adding leaves and vegetation to the top layer and do let your worms safely back out into the garden once you have finished the experiment!
References:
Morgan, T. H., 1901. Regeneration. MacMillan, New York.
Chris Maynard, 2001. Backyard Science. Dorling Kindersley, US.
With three children in my house I get asked a lot of questions. “Whys?” “What ifs?” “How comes?” are all part of the household daily dialogue. Apparently, the average three year old asks at least 50 questions a day, although I reckon our resident three year old easily doubles this number! I have noticed, of all the many questions my youngest asks, the most frequent one is….
……………………”MAMMY, WHAT’S YOUR FAVOURITE COLOUR?”
Your favourite colour seems to be one of the most defining aspect of your character when you are three years old! Apart from your food preferences, I think it is the first main expression of personal preference. The answer to this question can change at any given moment, but my three year old has been consistent with his favourite colour of yellow and I have to admit it really fits with his personality – but why do different things appear different colours? I thought this week I could share a bit about the science of colour!
To understand the science behind colour we need to consider a bit about the science of light. Light, either from the sun or a light bulb, may appear white to us, but it is actually made up of seven different coloursmixed together; these colours are red, orange, yellow, green, blue, indigo and violet.
Light is a type of energy called electromagnetic (EM) energy. EM energy actually travels in waves, even though we see light as straight lines. Light is the only type of EM energy that humans can see. The wavelength of light determines it’s colour. Light with the longest wavelength is red. Light with the shortest wavelength is violet.
SO HOW DOES LIGHT RELATE TO COLOUR?
When we look at a red flower, what are we really seeing? When light shines on an object, some of that light gets bounced back (reflected) off the object. The rest of the light gets absorbed by the object. We see the object as the colour that it reflects. So, when we are looking at a red flower we are looking at a flower that has absorbed all the light that is shining on it EXCEPT red light. It is reflecting red light so that is the colour it appears to the human eye. When an object appears white it is reflecting all the light shining on it and when an object appears black it is absorbing all the light and not reflecting any of it.
Scientist and artists sometimes look at colour in two very different ways; a scientist, observing light, will say that when you combine all the colours you end up with white (as discussed above). An artist may see it all very differently, when we mix paints, for example, if we mix all the colours together we will end up with black!MIXING COLOURS
Image credit: www.gelighting.com
AN EXPERIMENT TO TRY:
You can try this yourself at home: use torches to create the coloured light…fix two different coloured pieces of cellophane (say red and green) over the end of two torches (one colour on each torch). Shine the torches on a white wall or piece of paper. When you overlap the red and green colours you should get yellow! Now repeat with paint – mix red and green paint and what do you get? Not yellow this time but brown!
HOW ARE RAINBOWS MADE?
When light travels through water it slows down and the light bends. Different wavelengths of light bend to different degrees so the light gets split up into its component colours. This is how rainbows are made…
when sunlight travels through drops of rain each colour of light bends to a different angle and the white light is separated out into it’s seven colours.
Photo credit: Eric Rolph
Did you ever notice that usually when you see a rainbow there is a second, more faint rainbow around the first one? This second rainbow forms because some of the light is reflected off the back of the raindrop and bent a second time! These secondary rainbows appear more dark as the light has been bent twice and the colours appear in reverse. Check it out next time you see a rainbow!
HOW DO ANIMALS SEE COLOUR?
Some animals, such as cats and dogs, rely more on what they can hear or smell, than on the colours they see. Their colour vision would not be as good as humans. Like Humans, many primates and marsupials have good colour vision that they may use to allow them to recognise prey or food. Good colour vision is common among fruit eating animals as it allows them determine ripe from un-ripe fruit.
Many species of birds and fish have better colour vision than humans. If you consider how elaborately colourful these animals often are then it is not too surprising to accept that they must be able to see these lovely displays of colour among their own species. Pigeons, for example are thought to be among the best animals at detecting colour and can see millions of different hues.
Reptiles and amphibians are thought to have colour vision equal to, or better than, that of humans.
Many insects can see light (colour) that is not visible to humans. Bees, for example, can see Ultra Violet (UV) light. This allows them to see UV patterns on flowers, leading them to the source of nectar.
Finally, a myth buster…do bulls really “seeing red”? Infact, no they don’t – they are colour blind. The only reason that they charge the red cape is because it is fluttering in front of them!


.JPG)