Ok, this week’s blog inspiration is slightly different to the norm. Usually the idea comes from a question that a child has posed – this time there is a slight deviation, but only slight…. this weeks question came from an adult, but only in the chronological sense – as in fact he is classified as the biggest kid in our house- it was posed by my husband. I was making pancakes the other morning (as I do every weekend on the request of my son) when my husband pondered aloud…”I wonder what the reason behind each ingredient is… and who made the first pancakes”. As I was wondering what next to blog about the two ideas seemed to merge into one, and so was born the question…..
…..”WHAT IS THE SCIENCE BEHIND A GOOD PANCAKE, AND WHO’S IDEA WAS IT?”…..
 |
| Made in the name of science |
A BIT OF HISTORY…
So, before I delve into the science behind the PERFECT PANCAKE, I thought I’d look at a little bit of history first. The pancake as we know it seems to be accredited to the ancient Greeks, who in the 6th century started combining ground wheat with olive oil, honey and milk – and so the first pancake was born. If we expand on our concept of what a pancake really is we could look back further still to the process of making flat bread from ground grains and nuts mixed with milk or water, dating back to the neolithic period.
WHAT DO WE FIND IN A MODERN PANCAKE?
If we start within Europe a modern pancake can be classified as the round flat variety similar to the french crepe which contains some form of flour, and a liquid such as milk or water. These flat pancakes usually also contain eggs and butter, and sugar in the sweetened variety. Then we also have the thicker, fluffier pancakes that contain a raising agent, the name and variation of these include drop scones, Scottish pancakes and of course the well know buttermilk pancakes that are most common in America.
In our house the three most common pancakes made are the buttermilk pancakes, drop scones and the sweet flat crepe like ones.
WHAT GOES INTO A PANCAKE…
If we take a closer look at the primary ingredients we begin to see the complexity and science that really goes into making these delights:
FLOUR… this ingredient can be considered the backbone of the pancake as it provides structure
SUGAR….as well as adding the nice sweet taste and contributing to the colour of the pancake, sugar also keeps the pancake from getting to thick and stodgy
EGGS…. the proteins in the eggs add to the structure of the pancake and to the overall flavour
BUTTER/FAT… as with the sugar, the fats keep the pancake tender and prevent them becoming overly stodgy
MILK/WATER… the liquid portion of the pancake adds to the structure and is necessary for certain chemical reactions to occur
RAISING AGENT… as the name suggests, these agents help raise the pancake, making them light and fluffy
You can of course find many varieties with their own local changes and substitutes, potatoes are commonly used as the starch ingredient instead of flour.
First lets take a look at the thin flat pancake or crepe… in this case we will assume they contain flour, milk and sugar. From the above list we can now predict that the flour is the body of the pancake, it provides the structure, but how does it do this? There are two proteins found in flour called glutenin and gliadin. When moisture is added to flour (in this case the milk) these two proteins link together to form gluten. Gluten is a “sticky” protein, this stickiness allows it to form a network and it is this that adds structure to the batter. Finally we come to the sugar which caramelizes with the heat adding sweetness to the mix and contributing to the colour of the pancake as it cooks. The sugar also prevents the pancakes becoming too thick and stodgy by reducing the amount of gluten produced.
 |
| Image credit: jbeancuisine.com |
So now we move on to the thicker pancakes; the main difference with these is that they contain a raising agent! Yeast is a biological raising agent used in some baking, it produces carbon dioxide gas while digesting sugar and this gas forms tiny bubbles within the yeast. When heat is added during baking these bubbles expand making the bread/cake “rise”.
The main drawback with baking with yeast is that it requires time and who really wants to wait too long for their breakfast? That is why, when using raising agents in pancake mixtures, we substitute the yeast for bread soda and/or yeast; but who can really tell what the difference is between these two?
 |
| Bread soda verse baking powder |
Bread soda (also known as baking soda) is pure sodium bicarbonate. Baking powder contains bread soda but it also contains a powdered acid (usually cream of tartar – potassium bitartrate). Bread soda is an alkali/base and will therefore react with an acid (such as the buttermilk used in pancake batter) producing salt, water and carbon dioxide gas…
BREAD SODA + ACID —–> SALT + H20 + CO2
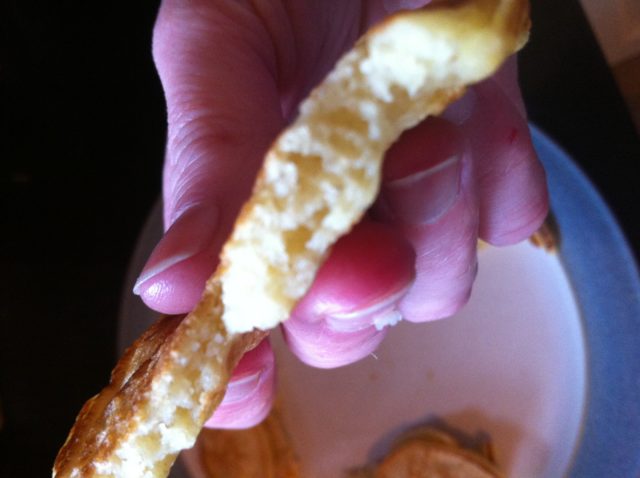
This carbon dioxide gas gets trapped in thousands of tiny bubbles within the gluten making the pancake batter rise on cooking into light and fluffy wonders! (The same process as with the yeast but a lot quicker).
The baking powder has the added advantage of having the acid already present, so once a liquid is added the dry acid and alkali can react in the same manner as above.
So now that we are starting to understand the science of it all how do we use this knowledge to make the best pancakes. before we jump into this one we first have to consider the science of flavour and odour!
THE SCIENCE OF FLAVOUR
The Maillard reaction describes a chemical reaction requiring certain amino acids and sugars and the addition of heat to produce the molecules responsible for the odours and flavour of food. Now there is a science worth studying!
MAILLARD REACTION: Amino Acids + sugar + heat —-> flavour and odour
So what does this have to do with our pancakes? Well Maillard reactions work best in alkali conditions so bread soda is a definite plus is making golden tasty treats. HOWEVER, add too much bread soda and the pancake will brown too quickly and will have an acrid burnt flavour, not to mention the unpleasant taste produced from the left over breadsoda. It is trickier than we think and yes, of course, someone has already done the science bit for us to work out the ideal amount of bread soda required.
WE ARE HUNGRY – SPEED IT UP
You will be glad to hear that speed is recommended when preping pancakes; Although it is good to allow the batter sit for a few minutes to allow the gluten to “relax” (build up a sufficient network) it has been shown that if left too long the bubbles will have burst and the pancakes will be flat and dense once cooked.
SCIENCE IN MY KITCHEN
I decided I had to try some of this pancake science out for myself so turned to my original buttermilk pancake mix from the wonderful NIGELLA LAWSON. This recipe actually uses both baking soda and baking powder (I omitted the banana). I decided to test out two theories…
1. Does the amount of bread soda determine the colour and flavour of the pancake?
2. Does the length of time the batter is left standing really make that much of a difference?
To keep it simple, I decided to keep everything else (including the amount of baking powder) constant.
So I donned my apron in favour of my labcoat and I set to work. I prepared the basic batter mix excluding the addition of bread soda. To digress for a moment, I also followed another golden pancake rule – not to over-mix the batter (a few small lumps of flour allows it better absorb the liquid and produce gluten).
 |
| My “slighlty lumpy” pancake batter |
I dived my basic batter mix between four bowls and then added different amounts of bread soda to each (the first bowl had no bread soda, the second had half the recommended amount, the third had the recommended amount and the fourth had double what was recommended!). Then I let the batter sit for five minutes before cooking the pancakes.
Here are my results… the pancake on the top left had no bread soda, top right had 1/2 the recommended amount, bottom left had the ideal amount and bottom right had twice the recommended amount. You can see how the pancake gets darker with the addition of more bread soda, with the last one being just a bit too dark. The taste test revealed that the one on the bottom left had the best taste (and texture) and that the one with the most bread soda had that unpleasant taste of bread soda!
To investigate my second question I left the same pancake batters sit for two hours before cooking them. As you can see the pancakes cooked after two hours were indeed a lot less light and fluffy and were a bit soggy inside!
 |
| The batter for these was left sit for five minutes |
.JPG) |
| The batter for these was left two hours |
WHY ARE PANCAKES ROUND?
Pancakes are round for two main reasons: gravity and surface tension. Assuming that the pancake pan is flat then once the batter is added gravity will pull on all parts of the batter uniformly in all directions, pulling it out into a round shape. Surface tension pulls evenly on the edges keeping them restrained into the round shape.
THE SCIENCE OF FLIPPING A PANCAKE…
Would you believe that someone has actually looked into the exact science of pancake flipping? How cool is that ….
According to University Professor of Mathematics Frank Smith, the simple mathematical formula for the perfect flip is: L = 4 H /P- D / 2
(L = hand distance from inner edge of the pancake / H = height of flip / D = diameter of pancake)
If that sounds a bit too complicated check this out …
Dr. Tungate, a senior physics lecturer at Birmingham University, found that “a pancake should be flipped into the air at a speed of 10 miles-an-hour, which means that it takes less than .5 of a second to reach the top of its trajectory.”
AND THEN THERE IS THE SCIENCE OF WHAT YOU ACTUALLY PUT ON YOUR PANCAKES…
… but I think that is a whole other blog! So whatever toppings you choose I hope you enjoy your pancakes today!!
 |
| All that science made me hungry! |
And if you still want more….HERE IS AN EXPERIMENT YOU CAN TRY….
Inflating balloons… This experiment shows two fun ways of inflating balloons, kids will love it, it’s easy to do and it teaches some kitchen science… like the difference between using yeast and bread soda as raising agents in baking!
Further reading:
Pancakes served with a side of science.
Celebrate your pancakes with a side of science.
Baking powder verses baking soda.
The history of pancakes.


