An unexpected Christmas guest

We like to get a real tree for Christmas every year, the lovely smell of the pine really adds to the festive feeling! Sometimes we get more than we expected… a few years ago we found a beautiful nest in the tree; this year we found an unexpected visitor… a cute little ladybird.

It is likely that most of our Christmas trees are hiding a multitude of insects in various stages of life cycle and hibernation. In fact a recent article suggests up to 25,000 creatures may be found on one tree alone. These can include mites, aphids, beetles and spiders.  Many, like our little ladybird, may awaken from their hibernation once they are brought into the warmth of the house.  Some in the egg stage of development may hatch but most will just stay resting on the tree and will be none the wiser of their new surroundings, being removed from the house when the tree goes out after Christmas. Even if they do wander from the tree most of these insects pose very little threat to the house or its inhabitants and will often die due to heat and lack of food.
This little guy obviously did waken and decided to take a little walk around his new surroundings. We were glad to see him as we had noticed a real reduction in our sighting of ladybirds this Summer, a casualty of our late and hot weather meant a reduction in aphids and therefore a drop in their food supply. 
Who doesn’t like the ladybirds? Let’s hope the weather is more favourable for these little gardeners friends in 2014.

Here are ten facts about the ladybird that you may not have known…

  • There are about 5000 different species of ladybird in the world
  • Considered a great friend to the farmer and gardener because it eats crop harming aphids, a ladybird can eat up to 5000 insects in its lifetime (an adult may consume 50 aphids a day)
  • The name ladybird makes reference to “Our Lady” as European farmers in the Middle Ages thought they were sent by The Virgin Mary in response to their prayers to eradicate an infestation of aphids that were consuming their crops
  • Ladybirds can be found in many colours, not just red and orange and they can have stripes or other patterns rather than just spots
  • A ladybird’s bright colouring warns potential predators that it may be toxic; as a defense tactic they can secrete a foul tasting yellow oil from joints in their legs
  • A ladybird stays in flight by beating its wings 80 to 90 times a second
  • A female will lay at least 2000 eggs in their lifetime – the larvae hatch within days and start eating immediately
  • Females lay unfertilised eggs as well, these are thought to act as a back up food source for the larvae if normal food supplies are unavailable 
  • Geckos are not the only ones with super hairs on their bodies that allow their gravity defying feats, scientists have recently investigated the molecular structure of ladybird hairs in the hope of one day reproducing their amazing abilities for human purpose 
  • The Harlequin ladybird has invaded Ireland and is a big threat to our 15 native species. Bigger, hungrier and a potential predator this species could really impact the number of ladybirds in this Country. 

Fun Friday – How to make crystal decorations for Christmas

This is definitely one of my favourite experiments…. a little bit of science and a little bit of craft… resulting in some beautiful crystal decorations.

It has become a bit of a Christmas tradition in our house at this stage. Each year we make a new set of decorations to add to last years set, plus they make a lovely homemade gift for family and friends.

Adults and children alike… I highly recommend you try this one! 

So here is what you will need:

Gather all your ingredients

  • Borax powder*
  • Hot water
  • A jug
  • A stirrer
  • A plastic cup or glass
  • Some pipe cleaners
  • Scissors
  • Thread or string
  • A pencil or lollipop stick
  • food colouring (optional)
  • Glitter (optional)

*A little note on Borax powder; you should be able to get this powder in any chemist in Ireland. It will cost anywhere between €2 and €3.50 for this 100 g quantity (which is unfortunately the only size available these days).

Borax is classified as non-toxic by the FDA and is a common ingredient in some washing powder and many skin creams.

It is therefore considered safe to use with children, if the solution splashes on their skin it will do no harm; although it is classified as non-toxic, I would obviously not suggest that anyone actually eat it!

What to do:

Firstly boil the kettle and pour the boiled water into your jug to cool a little (about 10 minutes is good); this bit is definitely for an adult to do!

While you are waiting for the water to cool make your decoration out of the pipe cleaners, it needs to be small enough to fit into your plastic cup without touching off the sides. We are going through a phase of making star shapes at the moment, quite appropriate to the season I think , but feel free to be a little more creative!

Shape your decoration from pipe cleaners… we love star shapes at the moment!

Tie some thread to your shape and tie the other end to the lollipop stick, place the stick across the top of the cup so the pipe cleaner shape dangles in the cup. You may need to adjust the length of the thread until you get it just right. You want to be sure that the shape dangles in mid air and does not touch off the sides or bottom of the cup.
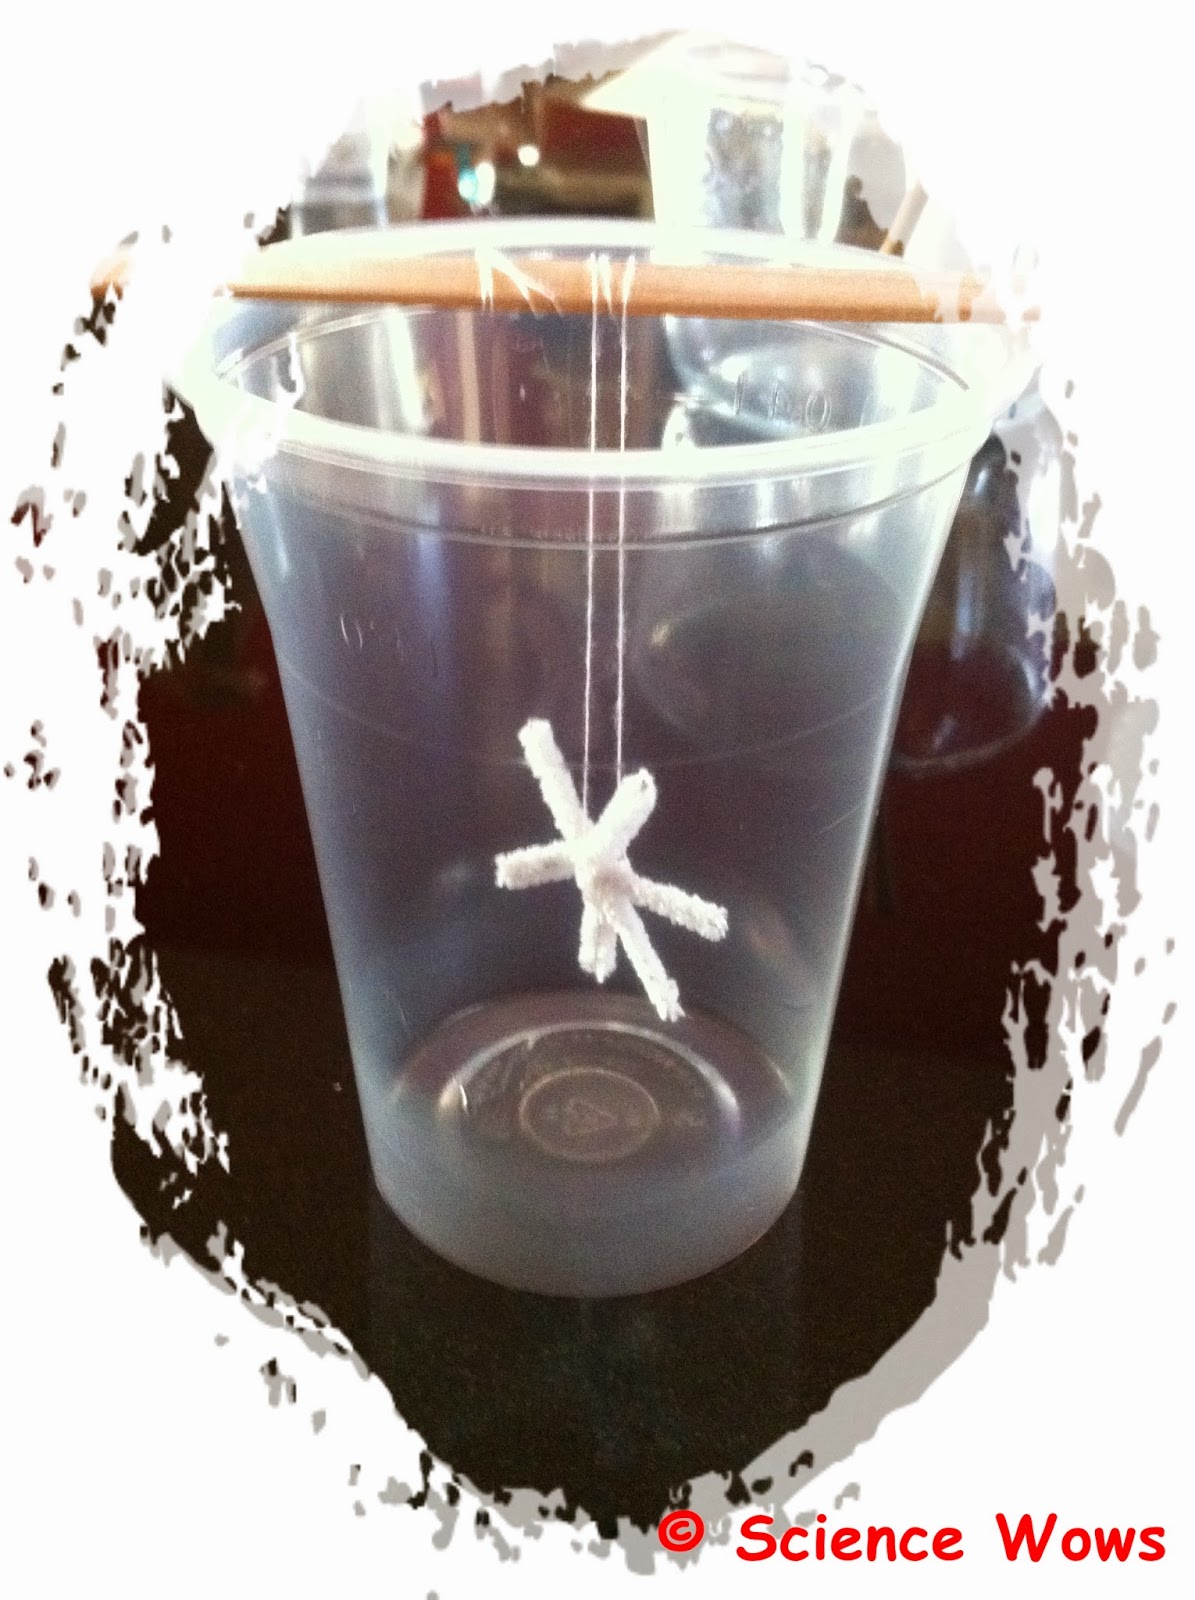
All ready for the Borax solution

Now it is time to prepare the borax solution… you need to add the borax powder to the hot water and stir it in until no more will dissolve in the water. You will know that you have added enough when some of the powder stays at the bottom of the jug, no matter how much you mix. You will need at least two tablespoons of borax powder in 250 ml of hot water, but I would advise adding more if the powder is still dissolving.

When you are happy that no more powder will dissolve in the hot water then pour this borax solution into the cup making sure you cover the pipe cleaner shape completely. If you wish you can add a few drops of food colouring at this point and mix it into the borax solution. You may also want to add some glitter, just sprinkle a little into the cup. I like to use a fine glitter if doing this step as you don’t want bit pieces of glitter dropping to the bottom of the cup in case the crystals form on them instead of the decoration. If I am adding glitter I sprinkle a small amount onto the surface of the solution in the cup them I lift the stick up and down so the glitter sticks to the decoration. I repeat this step a few times until I am happy that the decoration is covered in enough glitter!

And that’s it… all you need now is to leave your cup somewhere safe overnight and wait with patience!

Check it the next day and you will see your decoration is covered in lots of lovely crystals! Remove the decoration from the cup and place on a piece of kitchen paper to dry.

Enjoy!!

The science bit:

This experiment teaches us about making saturated and super saturated solutions and about how certain minerals will form crystals.

If we dissolve the Borax powder in water until no more will dissolve we have created a saturated solution. The water cannot hold any more of the powder. However if we heat the water it will be able to dissolve a little more powder and this is what we do when we add the Borax to the heated water. When we heat a solution to be able to dissolve more material it is called a super saturated solution! However as the water cools it cannot hold all that extra powder any more and the Borax comes out of solution. This time it comes out as a crystal and not a powder and these crystals will form if they have a structure to form on, in this case the pipe cleaner structure.

A crystal is a solid structure made of an ordered 3-D pattern of atoms and molecules. Once they are given enough time and space to grow most minerals dissolved in water will form crystals.

Here is our little Christmas Decoration Making 2013 Album, hope you have as much fun!

We hope you enjoy this experiment and if you do get to try it out let us know how it goes for you, or even better… share photos of your own decorations with us!

Why is snot green?

We have had a recent bout of coughs and colds in this house. You know how it is once you become parents… there is suddenly no subject too gory or vile for conversation. Serious discussions about nappy content, vomit content and the like are par for the course in rearing these little organic beings. Hubby and I had one of these conversation in bed the other night…. yes, 13 years together and romance is obviously still very strong between us!

The chat started out about what level of a cold each child had and ended with himself asking…

“So, why is snot green then!”

Under normal, healthy circumstances we produce mucus in the lining of our nose, sinuses, mouth, airways, lungs and digestive tract.  This mucus is deliberately made by the body and acts to lubricate the airways and also to trap any invading viruses or bacteria, or any dust or other particles. Mucus is made by the cells lining the airways. Our bodies typically make about one to one and a half litres of mucus a day.

Most of the time the mucus in our airways is fairly clear and stringy. However, when the airways come under attack by infection the body sends in its army which includes cells called nutrophils. These nutrophils attack the infecting bacteria or viruses, killing them with their chemical warfare.  They secrete an enzyme that contains iron and it is the iron that gives the mucus its wonderful array of colours from yellow, orange brown and the most common… green!

photo credit: anna gutermuth via photopin cc

Mystery Monday

I haven’t posted any Mystery Creatures in a while, think it is time to get back into this regular slot again so here is this week’s …. do you know what these creatures are?

photo credit: dfinney23 via photopin cc

Here is a hint… they are appropriately named for the season that is in it ;0)

Sound waves help the special effects team on Jurassic Park Movie

photo credit: Scott Kinmartin via photopin cc

Most of us have seen the Jurassic park Movies; Do you remember the scene in the first film when the dinosaurs are introduced for the first time? It is a very powerful scene… they are in the jeep and sudden the rear view mirror starts to shake and the water in some drinking cups, sitting in cup holders, starts to vibrate and form circular wave patterns.  I think it is an excellent scene… building up the idea of something big approaching using very simple visual effects. These effects were not simple to achieve however, it seems the special effects department were baffled as to just how to get the exact ripple patterns in the water that they required.

Eventually inspiration struck as Michael Lantieri (special effects department) sat at home strumming a guitar and suddenly noticed the effect the sound was having on a glass of water… it was his Eureka moment.  Next day he took the idea to work and finally they nailed it! They got the water patterns they desired by placing guitar strings under the dashboard and getting someone to pluck the correct string!

Check out the story in this YouTube clip.

This is a really easy experiment to try at home or in your school… all you need is a guitar, a plastic cup and some water.  Place the guitar on a flat surface, half fill the plastic cup with water and sit it on the body of the guitar (i.e. the wider flat part at the base, not directly on the strings) and start plucking away.  With a little bit of experimentation you see ripple patterns form in the water as you pluck the strings.

Move the cup around a little to see if you can get different effects, or try with more or less water in the cup.  Do you find lower or higher sounds give a better result? Does plucking of one particular string work best or how does it compare to plucking them all together?

Have fun with this one and remember to let me know if you try it out at home or in your school.

The Science of Sound

It is National Science Week this week and I am bringing my “Science of Sound” workshop around schools in county Galway for the next two weeks as part of the Galway Science and Technology Festival.  The fun kicked off today in Gaelscoil Mhic Amhlaigh where we learned about sound, had great fun making, feeling and even seeing sound and its effect on some different materials.

You can expect plenty of “sound” posts on the blog for the next few weeks, as I will be sharing lots of experiments, facts and information… but today I thought I would share five fun facts about Sound!

Did you know

photo credit: jvverde via photopin cc
  • … sound waves travel in water at a speed of nearly one mile a second, which is more than four times faster than sound travels through air?
  • … a bat can detect an object as small as a human hair using echolocation?
  • … thunder is the sound made by lightning? Sound travels in air at a speed of almost one mile in five seconds.  If you count the seconds between seeing the lightning and hearing the thunder you can work out the distance from the source of the thunder! For example, if you count ten seconds between the lightning and the thunder then you can tell the storm is about two miles away!
  • … the loud noise created by a cracking whip is due to the fact that the tip of the whip is moving so fast that it breaks the speed of sound?
  • … the scientific study of sound is called acoustics?

More glowing fun…

I told you we were a little “glow crazy” in our house this Halloween season and I promised you one more glowing blog post, so here it is… we decided to give an old favourite… “rainbow explosions” a new twist and made them glow in the dark. This one was so much fun!

You will need:

Small plastic pots or cups
Vinegar
Bread soda
A number of different fluorescent paints (or glow in the dark paints*)
A plate or tray to contain the experiment
A UV light*

What to do:

This is just like the original Rainbow explosion experiment except we used fluorescent paint instead of food colouring and we added the vinegar to the bread soda instead of the other way around!

  • Line up your plastic cups on your tray or plate… one cup for each colour you have.
  • Add half a teaspoon of bread soda to each cup.
  • Add half a teaspoon of your flourescent paint to each cup, a different colour per cup, and mix into the breadsoda.
  • Turn on the UV light, and turn off your main light, and add vinegar to each pot.
  • Watch the “explosion” of glowing rainbows!

*If you do not have a UV light you can try this experiment in daylight as the fluorescent paints will still give a great colour explosion, or you can use different colours of glow in the dark paint and turn off the lights!!

My three Junior Scientists really enjoyed this one!

We loved how all the colours mixed together!

Have fun and HAPPY HALLOWEEN everyone!

This week’s Mystery Creature…

Week 21st to 27th October 2013

Plenty of correct answers for last week’s Mystery Creature… it was the Patagonian Mara (Dolichotis patagonum).

photo credit: Joachim S. Müller via photopin cc

The Patagonian Mara (also known as the Patagonian Hare or Cavy) are only found in certain areas of Argentina and are classified as a near threatened species. They look like a cross between a rabbit and a small deer but are in fact large rodents, more closely related to the guinea pig. An adult will grow to approximately 70 to 80 cm in length. Their bodies have long powerful hind limbs and they can reach speeds of up to 45 kilometres an hour.

These animals are diurnal herbivores, feeding mainly on grasses.  They prefer shrubby habitats for their provision of shelter from prey but are also found in flat, barren, sometimes sandy plains.  Although they are monogamous they will usually share a communal burrow with other pairs, providing more safety and security for their young.  In the wild the female will usually only have one litter a year, of about two young.  The young are born mobile and with their eyes open.  The young stay in the communal burrow while the parents remain outside.  There is usually at least one adult pair outside the burrow and the female will approach regularly and seek out her own young through calls and smell and lead them to shelter near the burrow for feeding.  Other pairs must wait for feeding to finish and the young to be returned to the burrow before they can approach and feed their own offspring.

Fun Friday -making spooky sounds!

Keeping with the Halloween Science theme, this week I share a cool experiment perfect for the spooky season!

Make a Spooky Sound Cup!


All you need is...
All you need is…


All you need is ….

a plastic cup
a paper clip
some twine or string
a knife or scissors
a piece of kitchen paper
water


What to do...
What to do…

What to do

  1. Tie the paperclip to one end of the twine.
  2. Ask an adult to make a small hole in the base of the cup, using the knife or scissors.
  3. Hold the cup upside down and thread the twine through the hole. The paperclip will stop the twine from coming all the way through.
  4. Fold the kitchen paper in half and then quarter and then dip it in water. You want it wet but not dripping.
  5. Holding the cup in one hand, fold the wet kitchen paper over the twine with the other hand and hold between your thumb and first finger.
  6. Pull the wet kitchen towel down along the twine, pinching between your fingers all the time.
  7. You should notice it makes a really spooky sound.


You can try this experiment without the wet kitchen paper, just wet your thumb and finger instead; Does it make a different sound?

You could also see what happens if you use a different type of twine, or some ribbon, or use a larger cup!


So what is happening?

As you pull the kitchen paper down along the twine the friction between the two makes the twine vibrate.  These vibrations travel through the air and  bounced around the walls of the upturned cup – amplifying the vibrations so we get to hear the spooky, screechy sound!


Hope you have some Spooky Fun with this experiment.  Stay tuned for lots more over the Halloween Season!


A new Mystery Creature…

Week 14th to 20th October 2013

Last week’s Mystery Creature was a… Sunda Colugo (Galeopterus varigatus)!

photo credit: Lip Kee via photopin cc

This cute little animal is often called the Sunda flying lemur… although it is not actually a lemur and it does not fly! With dense mottled fur, small faces and those large eyes, the Colugo is found in South East Asian rain forests.  It is an arboreal creature, moving with stealth and agility among the trees and gliding (rather than flying) from tree to tree with the help of some kite-like skin flaps called the patagium.  This gliding membrane extends from the animal’s neck right down to its fingers, toes and tail.

The Sunda Colugo can glide over a distance of  up to 100 metres,with little loss of elevation in travel. However it does need more open spaces for safe gliding and prefers the tree top canopies of its dense forest habitat.

Despite this agility in the trees and in the air, on land the animal is relatively helpless.

The Colugo is a solitary, nocturnal creature.  The female usually gives birth to a single offspring at a time, which she carried on her abdomen, often protected in a pouch created from her folded patagium.

They are herbivores, eating mainly leaves but also some fruit, flowers, buds, nectar and even tree sap.  They have some specially adapted comb like incisor teeth which are thought to be used for scraping sap off trees.

The mottled patches of fur on the Colugo resemble lichen and act as camouflage for the animal.  They are typically the size of a large squirrel.  

Though it may not look much like us, the Colugo has actually been shown to be a very close relative to humans – its genetic code reveals it to be the closest living relative to primates!