4 Valentine experiments 4 your loved ones

4 Valentine experiments 4 your loved ones

I must admit that I am not a big fan of the commercial side of Valentine’s day but I have no problem with the idea of telling someone you love just how much they mean to you. When I get to couple the sentiment with some science experimenting then my heart really does skip a beat. Check out these cool valentine science experiments that would make some pretty unique (and educational) gifts for the someone special in your life.

  1. Say it with flowers

Who doesn’t love flowers on Valentine’s Day? With a little bit of science you can add an extra twist to this staple gift. Try these CHROMATOGRAPHY flowers…

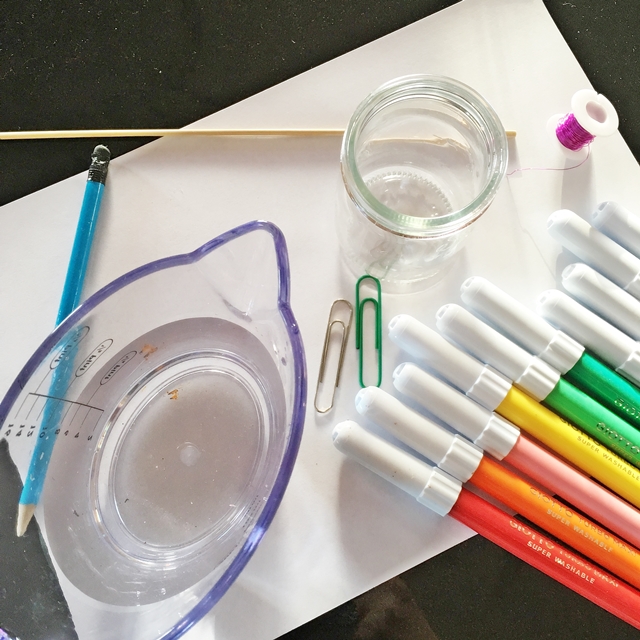
Here’s what you’ll need:

  • Some paper (we used regular white A4 paper here)
  • A selection of water soluble coloured markers
  • A pencil
  • A ruler
  • A paperclip
  • A glass or beaker
  • A jug of water
  • Some wire or pipe cleaners

Chromatography flower 1

What to do:

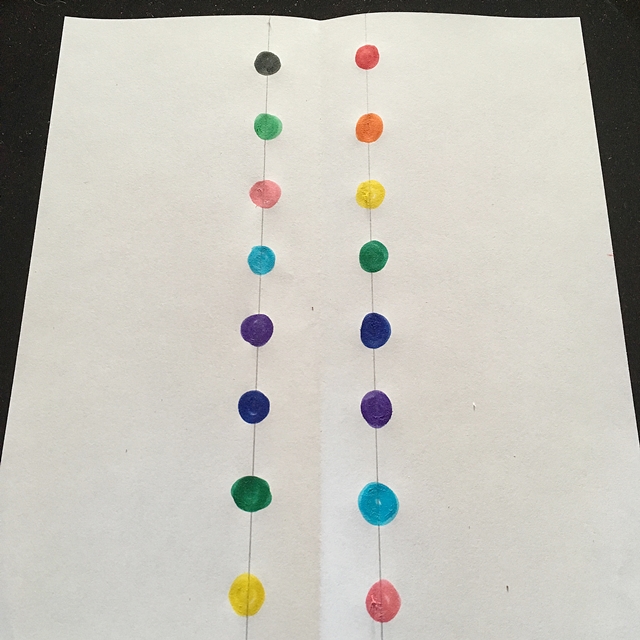
Fold your paper in half down the long side and then open it out again.

Using your ruler and a pencil, draw a line either side of the crease, the line should be about 2 cm from the crease on each side.

Choose the colours you would like to use and place large dots of each colour along these lines, leaving about 1 – 2 cm between each dot. Alternate the colours in whatever way you wish.
Chromatography flower 2

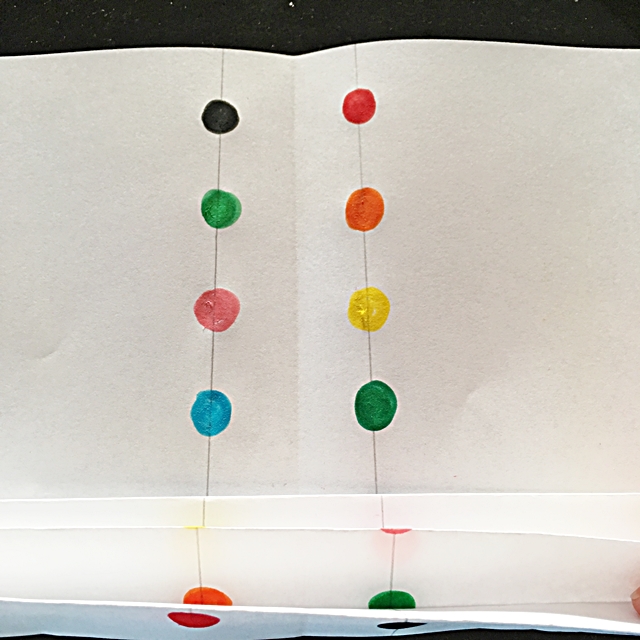
Once you have that done it is time to fold your paper. You need to fold along the shorter side, start at one end and fold the edge of the paper in about 2 cm. Turn over the paper and fold back another 2 cm. Turn over the paper and keep going like this until you reach the other side of the paper.
Chromatography flower 3

Keeping the paper folded, fold it in half and secure with a paperclip.

Trim the tops of the folded paper on each side. I used a serrated scissors but you could just cut into a pointy shape or round off the ends, whatever you prefer.

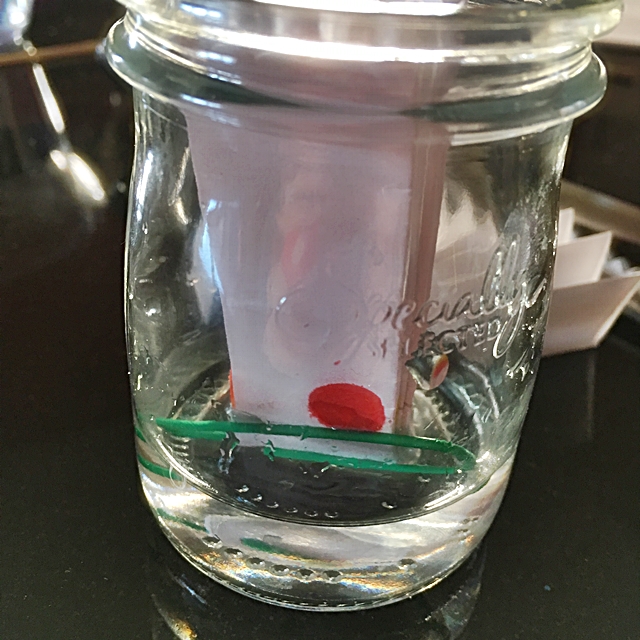
Pour about 1 cm of water into your glass (or beaker) and place the folded paper into the glass, as in the photo below. You want the end of the paper to sit into the water below the dots of markers, you don’t want the water level to reach the dots though.
Chromatography flower 5

Now you just need to wait a while. You should see the water creeping up the paper, spreading out the marker ink as it moves upwards. Once the water reaches the top of the paper you can remove it from the beaker and place it somewhere warm to dry.

Replace the paper clip with a strip of wire or a pipe cleaner, and twist it to close. This will be the stem of the flower.

Once dry it is time to open out the paper, into a flower shape, and see what a colourful CHROMATOGRAPHY flower you have made. You can try different types of paper, blotting paper works really well.

Chromatography flower 6

The science bit:

This experiment used a scientific technique called CHROMATOGRAPHY to separating different chemicals; in this case the chemicals are the inks in coloured markers. As the water creeps up the paper (by a process called CAPILLARY ACTION) it dissolves the different inks that make up the colour. These inks separate out as the water moves upwards and you get lovely streaks of colours through the paper.

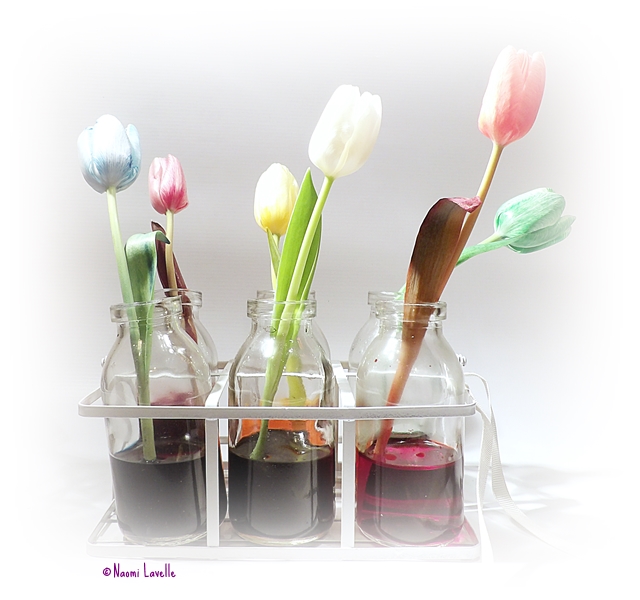
If you prefer real flowers to artificial ones you can still use a bit of science to add some extra colour; Here are two of our favourites (click the images below to find out how to make these beautiful coloured flowers while learning all about TRANSPIRATION!).

rose

Make a multicoloured Rose (click the image to find out more).

tulips3

Or try making a rainbow bunch of flowers, click the image above to go to the blog post.

2. You make my heart spin

I’ll admit these do take an extra bit of time and effort but they are really worth it and give a nice WOW factor. Your Valentine will be amazed with a gift like this… left wondering just how you did it. This experiment requires ADULT SUPERVISION!

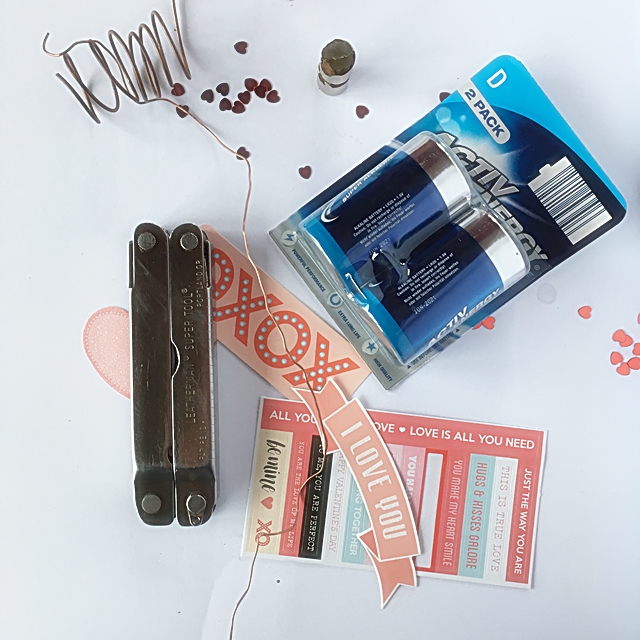
Here is what you’ll need:

  • Some copper wire
  • a pliers
  • a strong scissors or wire cutter
  • A battery (AA work just fine), I used a D battery here
  • A neodymium magnet (these are strong, rare earth magnets, often found in electrical appliances but can be purchased in many specialised shops)
  • Some items to decorate (optional)

Spinning heart

And this is what you do:

You can start by decorating your battery with love hearts or similar stationary if you wish.

Place the neodymium magnet on the base (minus side) of the battery, it will ‘stick’ to the metal.

Now for the tricky bit, you need to make a connection from the positive end of the battery, to the other side (the magnets in this case) to complete an electrical circuit. You can see from the photo and video below that I shaped one end of the copper wire into a heart shape with a little ‘stalk’ to sit on the top of the battery. I then wrapped the remaining wire around the battery and finally, I wrapped the end of the wire around the neodymium magnet (in this case I used two small neodymium magnets, one on top of the other). You will know if the circuit is complete as the battery and copper wire will heat slightly. However in order to get the wire to start to move you need to ensure that the wire is balanced correctly and is not wrapped too tightly around the battery or magnet. It will take a bit of patience and ‘tweaking’ to get this right, but, hopefully you will be rewarded by a lovely spinning heart 🙂

Want to know how it works?

Congratulations, you have just created a HOMOPOLAR MOTOR and, by combining an elctrical current and a magnetic field, working in specific directions, you have generated a force called LORENTZ force, that makes the copper wire move.

To put it as simply as possible, the copper wire connect to the positive and negative ends of the battery, completing a circuit and creating an electrical current that runs through the wire. The neodymium magnet generated a permanent magnetic field. In this set up the electrical current is perpendicular to the magnetic field and this generated teh Lorentz Force which acts on the copper wire, making it move!

NOTE: This experiment requires adult supervision! An electrical current can generate heat and you need to be careful that nothing gets too hot.

3. Gooey with love

Slime may not be the first thing that comes to mind when thinking of a Valentine’s day gift but this one is the prettiest slime I’ve ever made, and it has love hearts and sparkles in it, so what’s not to love. Plus… a few minutes playing with this stuff is time well spent, it is actually a great stress busting exercise, try it and see!

What you will need:

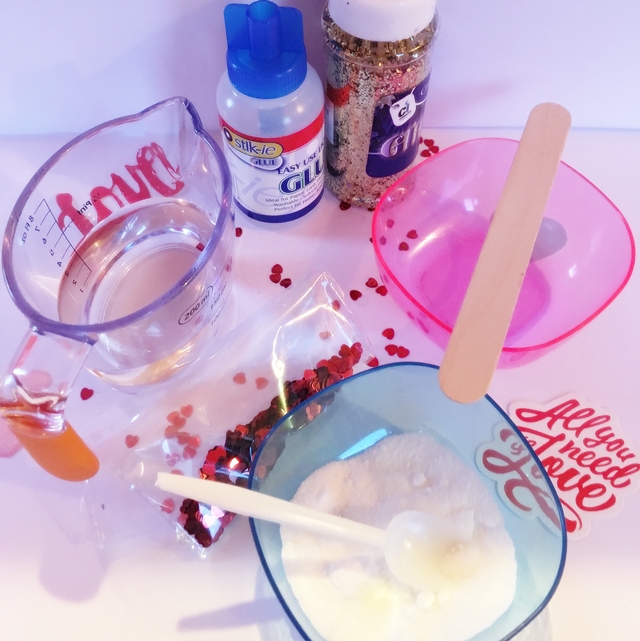
  • A bottle of clear glue
  • A jug of water
  • Bowl and something to stir with
  • A cup or small plastic cup or a second bowl
  • Borax powder
  • glitter and mini hearts (or any decoration of your choice)
Valentine's slime 1

Here is what you do:

Pour a small amount of clear glue into your bowl (we used a 10 ml at a guess). Add the little of the love hearts and glitter, just a small sprinkle of each is fine.

Give all that a good mix and then leave to the side while you make up the borax solution

In the cup (or jug) make up your borax solution; you want to dissolve 1/2 teaspoon of borax powder in a cup measure of warm water (about 240 ml); Stir until fully dissolved.

Still the glue constantly and add a very small amount of borax solution. Keep stirring all the time. As soon as the glue is no longer sticky you can pick it up in your hands and start kneading and molding it, for a few minutes.

I will admit that I had a lot of trouble coming up with a good recipe here. I am used to working with white glue (PVA) which makes great slime. The clear glue can get very rubbery slime which breaks easily. So the trick is to use small amounts and add as little borax solution as possible. Also, once the slime forms at all, take it into your hands and knead it.

You can even roll it into a ball and see how bouncy it is…


I know that borax is not easy to buy in Ireland at the moment so I will test out some alternatives and hopefully have a post next week with some borax-powder-free slime recipes!

The science bit:

Congratulation… you have just made a polymer!! In simple terms a polymer is a substance made up of lots of molecules arranged in long chains.  If you imagine that the glue is like cooked spaghetti, it slides and slips around the place quite easily.  When we add the borax to the glue it causes some of the molecules in the glue to stick together making the glue more rubbery and less liquid!  Imagine if you took those strands of spaghetti and tied them together in places, the strands would not be able to slip and slide around nearly as much! The borax and glue mixture is just like your knotted spaghetti!

4. I Lava you

This is like two science experiments in one. It is an adaptation of this Ocean in a bottle experiment.

Here is what you will need:

  • A clear bottle (plastic is safest) with lid
  • A funnel
  • A bottle of cooking oil (we used vegetable oil)
  • A jug of water
  • Red (or pink) food colouring
  • Glitter and plastic miniature hearts
  • (Antacid tablets, such as Alkaseltzer – and adult supervision!)

What you do:

First add a few drop of red food colouring to the water until you are happy with the colour.

Add about half a teaspoon of glitter and half a teaspoon of miniature hearts to the water and mix well.

Using the funnel, pour the coloured water into the bottle, filling it to about a third full.

Fill the rest of the bottle with oil (using the funnel again) and replace the lid. You will notice that the oil and water remain as two separate layers.

Hold the bottle on its side and tilt it slowly back and forwards, you will see the water moves like a coloured wave, it gives a lovely effect.

If you want to turn this into a Valentine’s lava lamp just stand the bottle back up again, open the lid and pop in half an antacid tablet (like Alkaseltzer) NOTE: these tablets are not for eating and this part must be supervised by an adult.

Pop the lid back on (don’t seal it fully though as gas will build up in the bottle) and watch your lovely lava lamp.

When it stops you can pop in another piece of Alkaseltzer and watch all over again.

The science bit:

This is a good experiment to explain density. The oil is less dense than the water so it will sit on top of the water, creating two separate layers. The layer of oil keeps the water contained within the bottom half of the water and makes the movement of the water look like waves where the two liquids meet.

When we add the Alkaseltzer tablets to the bottle we get a chemical reaction. The tablets contain an acid and a base (or alkali) in powder form. When the tablet sinks down to the water layer the tablet dissolves and the acid and base get to mix together, forming carbon dioxide gas. The gas forms bubbles, and is lighter than the water and oil so the bubbles float to the top of the bottle where they burst, leaving just a drop of water, which is more dense than the oil so it falls back down. This cycle gives a lovely lava lamp effect of bubbles and blobs rising and falling through the oil layer. We are loving this one in our house at the moment. The glitter and love hearts add a really lovely touch to the whole thing.

So there you have it… five of our favourite Valentine experiments, I’m sure you’ll agree, as well as being educational, these would make great gifts for someone you love! We hope you get as much fun out of making these as we did and remember to let us know how you get on!

HAPPY VALENTINE’S DAY!!!

*****

If you’d like to know a little about the Science of Love, check out this post


Fun Friday – Magnets Part 2… learning about the compass and another great game

Fun Friday – Magnets Part 2… learning about the compass and another great game

We can’t get enough of magnets in this house it seems! Last week we shared one of our favourite games and this week it is all about how the compass works, how to make one and another great game to try!


Who invented the first compass


The ancient Greeks knew about lodestone, an iron rich rock that was naturally magnetic. The Chinese are credited with discovering that loadstone would always point towards North if suspended to allow it turn freely. A Chinese Scientist called Shen Kua described the first magnetic needle compass in 1088 AD; his experiments with suspended strips of magnetised iron showed how the strip always points North and how this could be used in navigation.

The arrival of the compass modernised navigation and travel, especially by sea. Before the compass, sailors relied on navigation by the stars but this was tricky on a cloudy night!

Did you know… sailors were forbidden to eat onion or garlic as their breath was thought to interfere with the compass needle?


How to make your own compass


Make your own compass

You will need… a circle of paper, a needle, a magnet and a bowl of water.

……….
What to do… thread the needle through the circle of paper so that nearly all the needle lies on one side of the paper (see below). Stroke the needle 30 times in one direction with one end of a strong magnet.  Lift the magnet between strokes. Float the circle of paper on top of the water in the bowl (needle side up).  The paper should spin around slowly for a few moments and then stop.  The needle should now be pointing North-South.  You can confirm this with a compass if you wish!
……..
So what is happening? The needle contains little particles of iron that are all jumbled up.  When the needle is stroked with the magnet it makes all the iron particles align in the same direction (North-South); the needle is temporarily magnetised!


A really fun game to keep the children entertained


You will need
You will need…


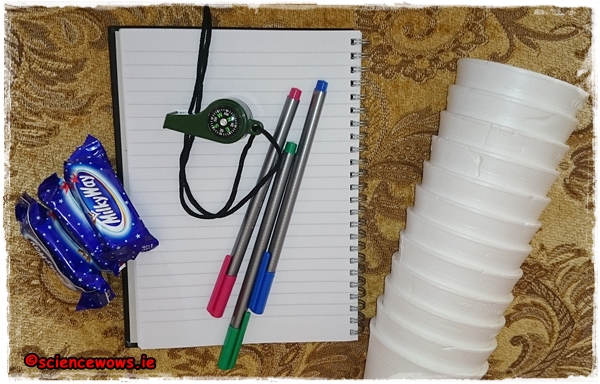
You will need…. some non see through cups or bowls, some treats or treasure to find, a compass, a notepad and a pen.

Setting it up… this is an easy game but it does require a little setting up before you let the children loose! Place the cups (upturned) all around the garden, hiding a treat underneath a few of them. One treat per child.

Decide on a starting point. Map out a route for each child starting at that point and walking X steps North/South/East or West.

Map a different route for each child to a different cup containing the treasure, here is an example…

take 3 steps North

take 3 steps East

take 11 steps North

take 14 steps West

take 5 steps South

take 10 steps East

take 11 steps West


You can make is as long and winding as you like. Remember to get an idea of each child’s step length before you start! Once you have prepared a route for each child you can call them out and let the fun begin.

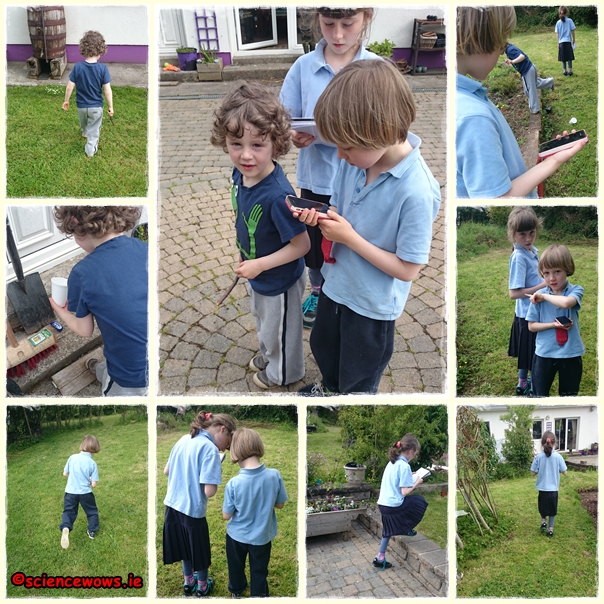
Each child starts at the same point and needs to follow the instructions given to them, using the compass for direction! Once the instructions run out the child lifts the nearest cup to (hopefully) reveal their prize.

All ready at the starting point!

This game is great for teaching children direction, learning how to follow instructions, read a compass and how to work as a team, if you change the rules to teams instead of individuals.


The beauty of this game is that you can make it as simple or as complicated as you like, adjusting each set of instructions to a child’s age so children of different ages can get involved.

Lots of fun for all ages

My children are ten, eight and four and they really loved this, we have plans to make it bigger and better next time!

Whatever way you play it I hope you enjoy!


Fun Friday – Magnets Part 1… a favourite magnet game

Fun Friday – Magnets Part 1… a favourite magnet game

We love magnets in this house. Some rainy days my children like to take out my box of magnets and are happy to play away with them for hours. Recently I brought my magnet collection along to local Beavers Club for the children to explore and learn… and play some great magnet games. This game was a favourite so I thought I would share it with you!

Before you start this game you might want to let the children explore how magnets work, how they attract or repel each other and how all magnets have two sides, a North and a South. Explain the invisible magnetic forces at play. Check out this post on magnets before you get started!


“Herding sheep” magnet game


You will need...
You will need…


For this game you will need some magnets* (two per player), a table, some cotton balls and some duct tape or masking tape.

*We used torpedo magnets for this but any magnets will do once they can attract each other through the table… so the choice of table is important. Wood is good, or plastic, but thin and without many/any crossbeams or bars underneath. We used a light chipboard wallpapering table.


The Set Up...
The Set Up…


 Set Up:


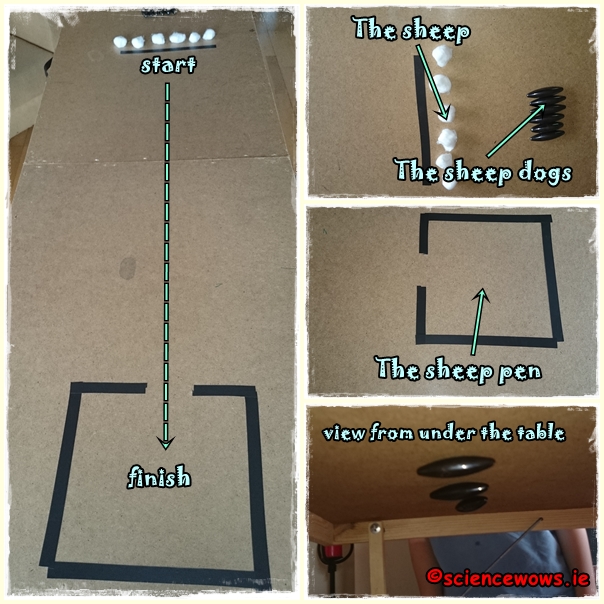
Using the tape mark a starting line at one end of the table and a box with a small opening at the other end; this is the “sheep’s pen”.

Place one magnet from each pair on top of the table and the other under the table… the magnet under the table should be held in place by it’s attraction to the magnet above. Each child is designated a pair of magnets, these represent the sheep dogs.

Place the cotton balls (these are the sheep) behind the starting line.


The aim of the game:


The aim of the game is that the children must “herd” the sheep along the table and into the “pen” at the other end. They can only move the “sheep dog” by moving the magnet under the table! The children keep going until all the sheep are transferred to the pen.

You can use a timer for this game if you wish. Time how long each team takes or get a group of children to try again and see if they can beat their previous time.


Ready-Steady-Go!


Ready-Steady-Go… let the fun begin! I have yet to meet a child (or adult) who does not get totally engrossed in this game!

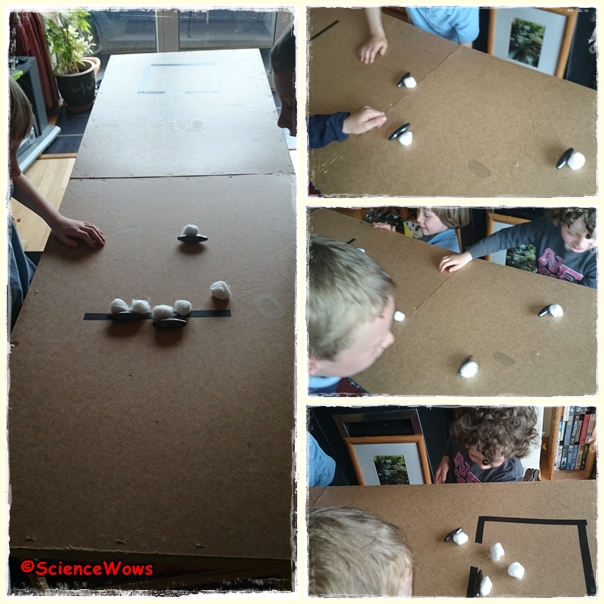
Here is a game in action in our house…


Let the fun begin!
Let the fun begin!


 What do they learn?


This game is great for children’s fine motor skills and coordination, it also teaches children to work as a team. Children learn about the attractive forces between magnets. You can follow on this game by asking the children if they think the magnets would still be attracted through other materials… paper, plastic, glass?


Make it your own:


Once the children get the idea of the game they will probably come up with their own modifications. What else could you try? Adding obstacles along the route? trying magnets of different shapes and strengths? Changing the number of sheep? What about replacing the top magnet with something metal?

The only limit to this game is the child’s imagination… which is usually limitless! I hope you enjoy!

What would you alter? If you come up with a different way to play this game please do let me know!


Eh... which way is North?
Eh… which way is North?


Next week we will share another favourite game and learn a little about compasses too, so see you next Friday for Part 2!

#FunFriday – exploring Magnets

#FunFriday – exploring Magnets

What is a Magnet?


A magnet is an object that can produce a magnetic force around it called a “magnetic field”.  Magnets attract certain types of metals such as iron, nickel and cobalt.


Let’s learn more!


A magnetic field is not visible to the human eye, however iron filings can be used to show the pattern of a magnetic field. The magnetic field around all magnets is strongest at it‛s ends – these ends are called the Poles. One end is called the North Pole and the other is called the South Pole, just like the Earth.

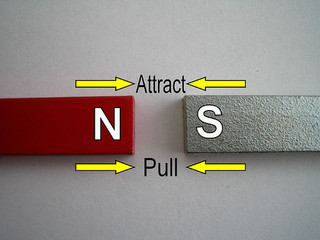
If you put the poles of two magnets together they will either pull together (attract) or push apart (repel); Different poles attract (North and South), similar poles repel!

photo credit: daynoir via photopin cc


Did you know… small iron rocks on the Earth‛s surface are often natural magnets and these are called Lodestones.

The Earth as a magnet


The Earth is one big magnet – it‛s magnetic field is created by the iron that is in the core of the Earth. The Earth‛s magnetic field is strongest at the North Pole and the South Pole.

photo credit: *~Dawn~* via photopin cc
Did you know… many objects is space are magnetic including the Sun!

photo credit: Najwa Marafie - Free Photographer via photopin cc
photo credit: Najwa Marafie – Free Photographer via photopin cc


Did you know… the Earth‛s magnetic field deflects charged particles that come from the sun (Solar Wind) and this creates the wonderful lights called AURORA that can sometimes be seen in the sky.

Magnetic compasses use the Earth‛s magnetic field to determine North, South East and West.


Electromagnets


An electromagnet is a magnet that is produced when an electric current is passed around a piece of iron.  Unlike true magnets, electromagnets are only magnetic while the electric current is switched on!

Did you know… the first person to notice that electric currents produce magnetism was a Danish scientist called Hans Christian Oersted, in 1820.
Some countries have started to use high speed trains called “MagLev” trains that are operated by powerful electromagnets.
photo credit: Erwyn van der Meer via photopin cc


These wheel less trains float on magnetic tracks and can reach speeds of more than 500 km/h.

Two experiments to try at home:

Make a compass:

You will need… a circle of paper, a needle, a magnet and a bowl of water.
What to do… thread the needle through the circle of paper so that nearly all the needle lies on one side of the paper (see below). Stroke the needle 30 times in one direction with one end of a strong magnet.  Lift the magnet between strokes. Float the circle of paper on top of the water in the bowl (needle side up).  The paper should spin around slowly for a few moments and then stop.  The needle should now be pointing North-South.  You can confirm this with a compass if you wish!
So what is happening? The needle contains little particles of iron that are all jumbled up.  When the needle is stroked with the magnet it makes all the iron particles align in the same direction (North-South); the needle is temporarily magnetised!

Make an electromagnet:

You will need.. 1 metre of thin insulated wire, a large iron nail, blue tac, a 1.5 volt battery, paper clips;
What to do… wind the insulated wire tightly around the nail at least 30 times then ask an adult to strip back the insulation from both ends of the wire, exposing about 2 cm of the wire beneath.  Using the blue tac stick one end of the wire to the + side of the battery and the other end to the – end.  Now see if your electromagnet can pick up some paperclips.  If you disconnect the batter the paperclips should fall!!
photo credit: Steve Wilhelm via photopin cc


So what is happening? When the wire is attached to the battery it creates an electric current that runs through the wire, temporarily magnetising the iron particles in the nail. When the battery is disconnected the nail no longer acts as a magnet!


Hope you have fun with these this weekend!  If you have a question or something to add please drop me a note in the comments below!