Science Wows is all about sparking children’s natural interests in Science!
It is learning while having fun!Whatever the event, whatever the venue it is Hands-on Science for children. Party entertainment, school visits, fun days, corporate events …. there are even local science camps during school holidays.
If you can’t explain it to a six year old, you don’t understand it yourself”
That is (apparently) one of Einstein’s many quotes. It took me a while to realise just how true these words are, but once I did I was able to marry a love of writing with a love of science. I discovered that once I broke things down to their most simple components
Dr. How’s Science Wows was set up by me (Naomi) in 2011. My background is biochemistry with a PhD in Molecular Biology; I have worked in the Medical Diagnostic Industry and lectured at third level colleges but the crux of what I do lies in many years working with children; from two to 20 they all have one thing in common…. curiosity!
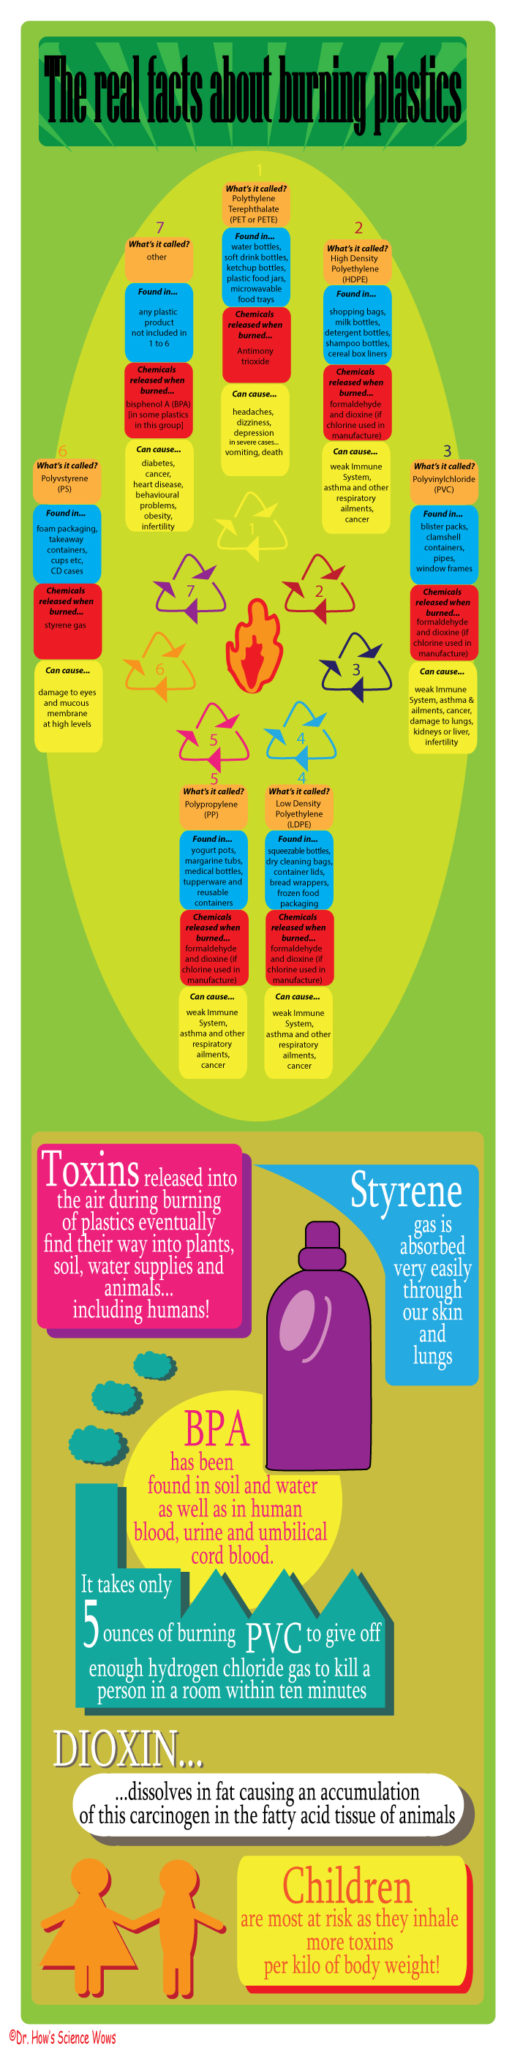
What chemicals are released when we burn plastic and what effect can each one have on our health?
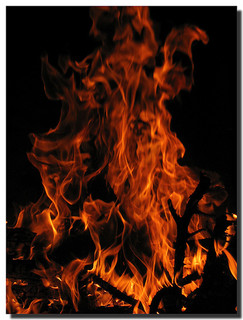
Bonfire night on St. John’s Eve
The weather has been great here in Ireland recently and I love the smell of the warm Summer air in the morning. On Tuesday morning when I stepped outside I did not get the smell I expected. It was a harsh, burning smell and it took me a moment to realise what it could be. The day before was 23rd of June and people around my area often celebrate St. John’s Eve by lighting bonfires and gathering the communities together. To be honest I had never heard of this tradition until I moved to Galway but I think it adds a lovely social element to the community. What I don’t like is the small number of people who use it to burn off their plastic waste… and that was the reason for the smell I got on Tuesday morning.
I should add, I am no saint myself… I have absent mindedly thrown the odd crisp bag or wrapper into the fire at home. What harm can it do, right? Well, I have done a little research and it can do a lot more harm than most of us might think.
The graphics below explain what chemicals are released when each of the seven plastic groups are burned, the effects these chemicals can have on our bodies and some very startling facts!
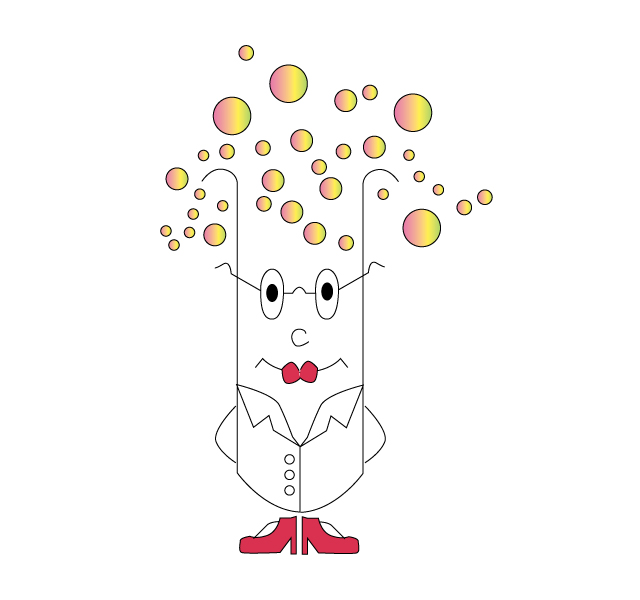
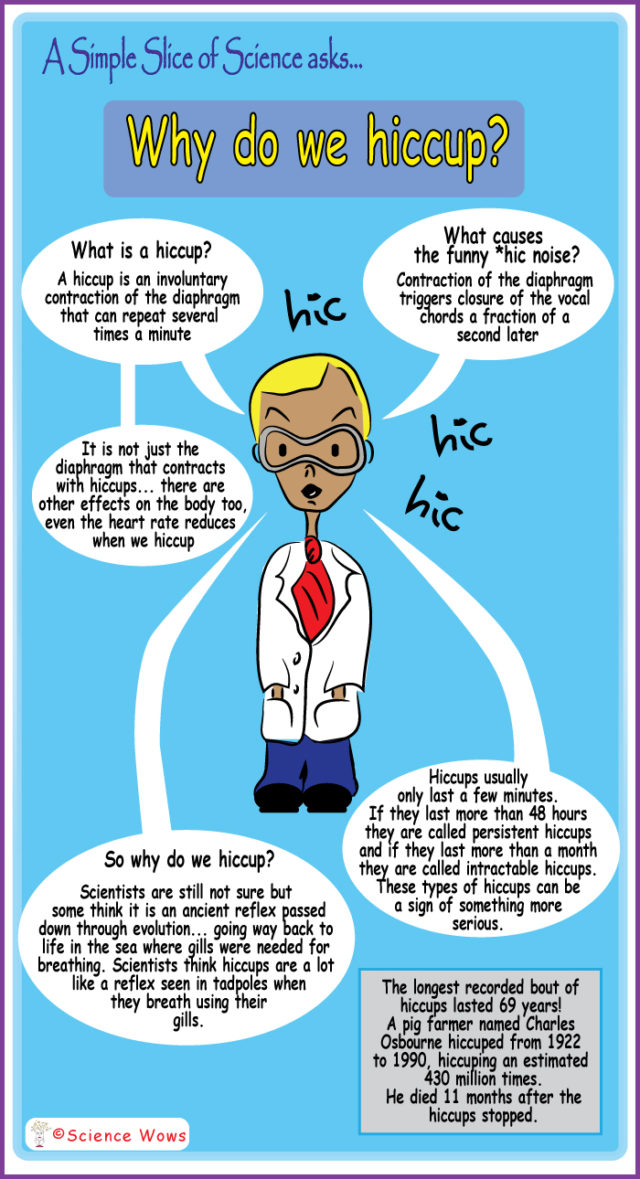
Here is something new to the blog… A Simple Slice of Science! With these posts I hope to answer a little science related question in 30 seconds or less. These posts will be presented by a new character on the blog…. folks, meet Dr. Simple!
Dr. Simple
What can I say about Dr. Simple? Well, he is a bit of a lab coat nerd, you can tell just by looking at him, right? The good thing about Dr. Simple is that he is a man of few words so a perfect candidate for presenting one science topic in 30 seconds!!
In a nutshell… Dr. Simple likes to keep it simple!
I am hoping that A Simple Slice of Science will become a regular spot on the blog, so if you have any science type questions that you wanted answered in a 30 second way, leave your question in the comments below and Dr. Simple will be only too happy to give an ever so simple answer!
First up… Dr. Simple has been struck by a little bout of hiccups! He thought it might be a good opportunity to tell you a little about what they are and how they work… all in 30 seconds!
Why do we hiccup?
I hope you like this new spot, please do leave me a comment telling me what you think, and remember… keep those questions coming!
Last week’s Mystery Creature was the Aardwolf (Proteles cristata). Although a member of the hyena family, the Aardwolf is closer in size to a fox than a hyena, is a more quiet and solitary animal and has a very restricted diet.
A primarily nocturnal animal, the Aardwolf is more likely to be found resting in burrows during the day. Found is Eastern and Southern Africa, their preferred habitat is open grassy plains. At night they hunt for termites, capable of eating up to 300,000 in one night. Unlike the Aardvark they are not equipped for digging theses insects out of their mounds and instead use their long sticky tongue to pick the termites up from the Earth. Although they feed almost exclusively on termites they have been known to eat other soft bodied insects, and very rarely, small mammals and birds.
The Aardwolf is monogamous by nature, a pair will mate for life and the male will play a role in raising the young, usually he will guard the den containing the young cubs. There are usually two to four cubs per litter. They will stay in the company of their parents for about a year, before leaving to find a teritory of their own.
The weeks are just flying by, I can’t believe we are well into June already. Here is another Mystery Creature to keep you guessing this week … do you know this one?
There has been great excitement in our house this week!
We had been keeping a close eye on our broody hen and the clutch of eggs she had under her. Usually when a hen goes broody we let them off to do what they do naturally. A broody hen will build up a clutch of up to a dozen eggs or more before sitting on them for about 21 days until they hatch. This hen had nine eggs under her and we were expecting things to start happening last Tuesday.
Did you know… the term to feather ones nest comes from a broody hen plucking it’s own chest feathers to allow skin to egg contact which is necessary for the correct temperature incubation of the eggs?
We kept checking on her over the weekend and on Monday my husband spotted the first chick had arrived, but was dead when we saw it. We were quite concerned and upset about it but felt it was too late to move mama and eggs indoors for observation.
Tuesday morning and my husband reported another chick, alive this time and sticking it’s head out from under mama’s wing. An hour later and unfortunately things were not good, this chick was dead and another with it. I had read that sometimes a hen will kill the chicks once they hatch and although I didn’t know of anyone who had ever experienced it, it was a possibility here and time to take action.
Our “hatchery”
We don’t own an incubator but managed to borrow a UV light from a friend. We moved all remaining (six) eggs from under mama hen and placed them indoors in a box under the warmth of the light.
Suddenly our home turned into a chick maternity ward… we could hear chirping from three of the eggs and knew that these ones at least were ready to hatch. As we are such a nerdy household we happened to have a little digital monitor that can tell temperature and humidity… we put it to good use in the new hatchery… and I spent the day moving the UV light up and down to control the temperature and spraying a fine mist of water over the eggs to maintain the humidity.
When using an incubator the temperature must be kept between 36 to 39oC and the humidity between 50 to 60%.
The hatching process seemed never ending…. one chick broke a little hole through the egg and then did very little else for the day. Another managed to chip away until he had made a break around the entire top of the shell and then he stopped too.
Eventually, with all the family watching, this chick made its debut. It was very exciting for all of us to watch.
The arrival of the first chick
The activity seemed to rally the second chick because within an hour it had arrived too… about half the size of it’s sibling but still perfect in every way. At 4.30 am the third chick made its appearance. I know this because I got up frequently during the night to check that they were all okay!! At this stage hubby had left for a business trip and I was solo on maternity duty!
I felt if they could make it through the night they had a good chance.
Next morning the children were delighted to see that there was now three little chick alive and well and oh so cute!
The Trio
So let me introduce you to the three youngest member of our “family”….
First to hatch was this little one…
First one to arrive
Next came this tiny little one, small but perfect….
The second to hatch and the smallest
And finally, this little blondie….
Number three: lighter in colour but not in temperament
The chicks are now four days old and growing by the minute! Their real feathers are already starting to appear… growing up fast! As you can see from some of the photos they have feathery feet. This is a feature of the pekin hen. They father is a Pekin, their mother a cross between a Pekin and a Hamberg (both are bantam breed).
Our only problem now is that we still have not decided names for each of them, so we were hoping you could help? We would love some suggestions so if you have any ideas please let us know in the comments below. The children will pick their favourite names in a few days and we will let you know which ones we picked!
We can’t get enough of magnets in this house it seems! Last week we shared one of our favourite games and this week it is all about how the compass works, how to make one and another great game to try!
Who invented the first compass
The ancient Greeks knew about lodestone, an iron rich rock that was naturally magnetic. The Chinese are credited with discovering that loadstone would always point towards North if suspended to allow it turn freely. A Chinese Scientist called Shen Kua described the first magnetic needle compass in 1088 AD; his experiments with suspended strips of magnetised iron showed how the strip always points North and how this could be used in navigation.
The arrival of the compass modernised navigation and travel, especially by sea. Before the compass, sailors relied on navigation by the stars but this was tricky on a cloudy night!
Did you know… sailors were forbidden to eat onion or garlic as their breath was thought to interfere with the compass needle?
How to make your own compass
Make your own compass
You will need… a circle of paper, a needle, a magnet and a bowl of water.
……….
What to do… thread the needle through the circle of paper so that nearly all the needle lies on one side of the paper (see below). Stroke the needle 30 times in one direction with one end of a strong magnet. Lift the magnet between strokes. Float the circle of paper on top of the water in the bowl (needle side up). The paper should spin around slowly for a few moments and then stop. The needle should now be pointing North-South. You can confirm this with a compass if you wish!
……..
So what is happening? The needle contains little particles of iron that are all jumbled up. When the needle is stroked with the magnet it makes all the iron particles align in the same direction (North-South); the needle is temporarily magnetised!
A really fun game to keep the children entertained
You will need…
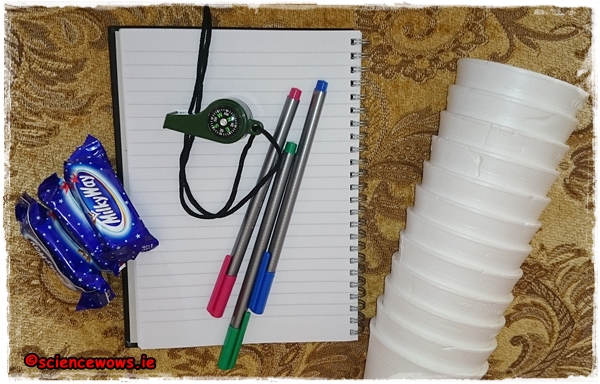
You will need…. some non see through cups or bowls, some treats or treasure to find, a compass, a notepad and a pen.
Setting it up… this is an easy game but it does require a little setting up before you let the children loose! Place the cups (upturned) all around the garden, hiding a treat underneath a few of them. One treat per child.
Decide on a starting point. Map out a route for each child starting at that point and walking X steps North/South/East or West.
Map a different route for each child to a different cup containing the treasure, here is an example…
take 3 steps North
take 3 steps East
take 11 steps North
take 14 steps West
take 5 steps South
take 10 steps East
take 11 steps West
You can make is as long and winding as you like. Remember to get an idea of each child’s step length before you start! Once you have prepared a route for each child you can call them out and let the fun begin.
Each child starts at the same point and needs to follow the instructions given to them, using the compass for direction! Once the instructions run out the child lifts the nearest cup to (hopefully) reveal their prize.
All ready at the starting point!
This game is great for teaching children direction, learning how to follow instructions, read a compass and how to work as a team, if you change the rules to teams instead of individuals.
The beauty of this game is that you can make it as simple or as complicated as you like, adjusting each set of instructions to a child’s age so children of different ages can get involved.
Lots of fun for all ages
My children are ten, eight and four and they really loved this, we have plans to make it bigger and better next time!