Can You Name This Creature?

Can You Name This Creature?

Week 8th to 14th July 2013

This week’s Mystery Creature comes courtesy of my three young children.  They found this little guy while out bug hunting in the garden and took him in to identify him.  They took this photo of him on my microscope at a 20X amplification; it was a tricky shot to get as he kept scampering out of view (we are not used to viewing live insects under our microscope)!
My three Junior Scientists identified it pretty quickly with help from the internet … do you have any ideas what it is?
Fun Friday – Exploring Bubbles!

Fun Friday – Exploring Bubbles!

WHAT IS A BUBBLE?

A bubble is a thin film of liquid filled with air or another gas. Most bubble are made up of soapy water and air.

LET’S LEARN MORE…

No matter what shape a bubble starts off as, it will always try to form a round shape (called a sphere). A sphere is the shape that allows the least amount of surface area – and therefore the least amount of energy is needed to maintain this shape.

If one or more bubbles touch they will loose their sphere shape – the walls of the touching bubbles will merge. If both bubbles are the same size the shared wall will be flat!

The walls of joined-up bubbles always meet at an angle of 120 degrees

photo credit: kaibara87 via photopin cc
photo credit: Jeff Kubina via photopin cc


WHAT COLOUR IS A BUBBLE?

Bubbles reflect colours from their surroundings so at first they may appear rainbow coloured.

As time goes on the colour of the bubble changes until finally the bubble appears colourless – and then it bursts


HOW DOES IT WORK?

The sphere of a bubble is made up of two layers – an inner wall and an outer wall. As light waves hit the bubble they are reflect off both walls. The walls of the bubble gradually weaken and the distance between the two walls reduces until the reflected light waves cancel each other out and the colour disappears.

 Did you know… The skin of a bubble is less than one thousandth of a millimetre thick!


EXPERIMENTS TO TRY AT HOME

Make your own bubble solution!

 Commercial bubble solutions are great but they can be expensive, so why not make your own? There are lots of good recipes that work really well but this is the one I usually use! 
You will need… a clean, dry empty plastic bottle (1 litre), 4 tblsp (60ml) washing-up liquid, 2 cups (480mls) clean water, 2 tblsp (30ml) glycerine
What to do: Before you start make sure the bottle, your hands and any measuring utensils are clean and dry. Carefully measure out each ingredient and add, one by one to the bottle, trying not to make the mixture get too bubbly. Once everything has been added stir slowly and carefully. Cap the bottle and leave it in a safe place overnight. The bubble solution is ready to use the next day.
Some tips: When making your bubble solution make sure you use “original” washing-up liquid and not any of the scented varieties! If possible, use bottled or filtered water rather than tap water.


So now what?… Now start making bubbles!! If you don‛t have any bubble wands you can make your own using some pipe cleaners. Try shaping the pipe cleaners into different shapes and see how the bubble will still always end up as a sphere shape.

 Did you know… The biggest free- floating soap bubble ever blown was 105.4 cubic feet. It could have held 788 gallons of water!


If you really want to scale it up make extra bubble solution and us a small paddling pool and a hoola hoop to make some mega bubbles!


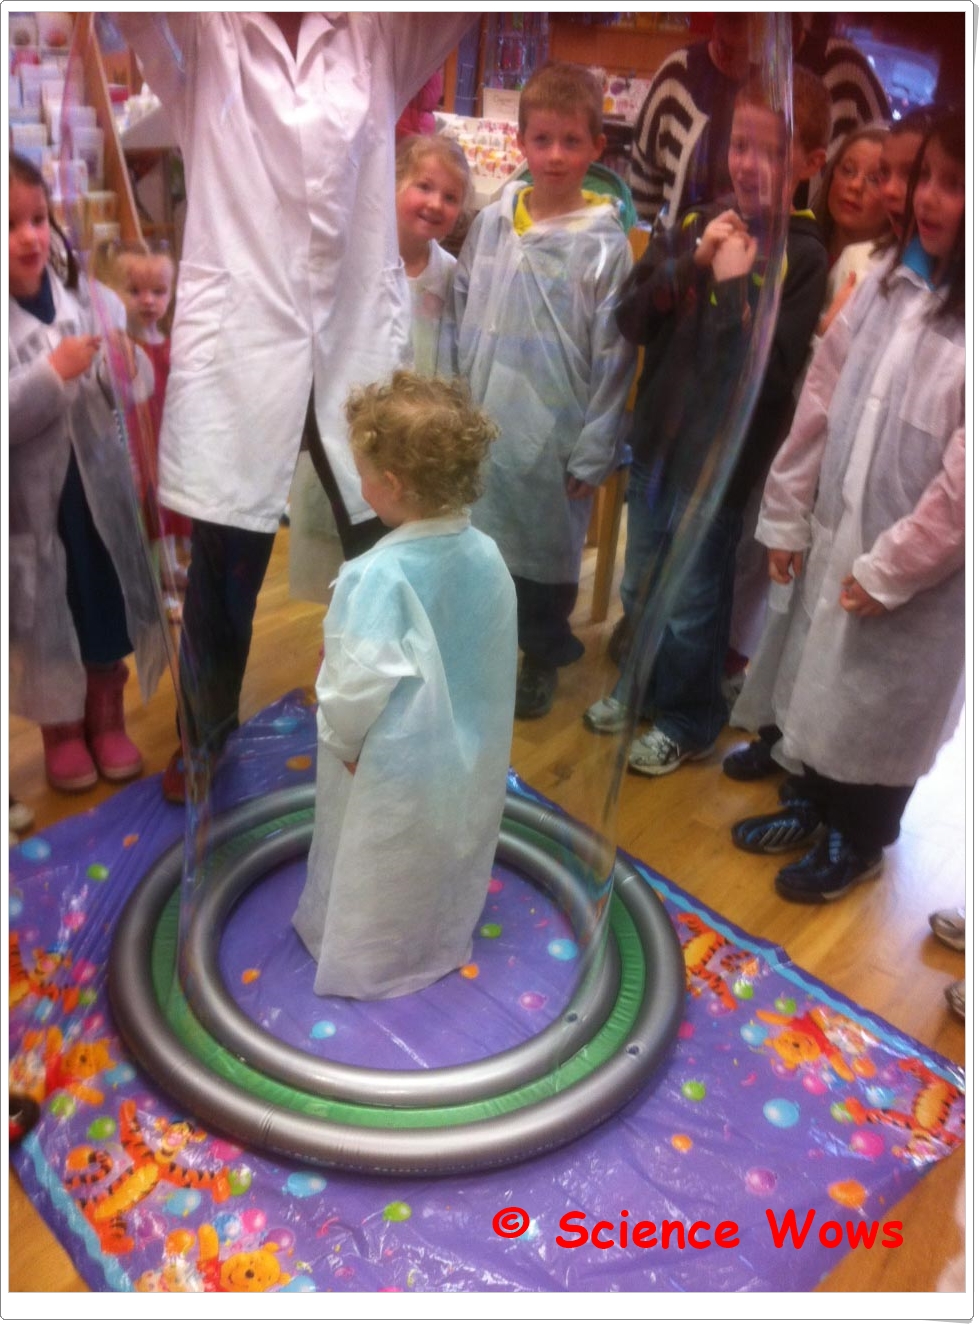
This is a photo of my son in a big bubble made using a commercial bubble ring


Did you know… The world record for the most people inside a bubble was set in 2006 by Sam Heath; His bubble contained 19 girls and boys over five feet tall!!


BUBBLE ART:

You will need.. bubble solution, food colouring, plastic cup, a straw, paper.


What to do: Pour bubble solution into the plastic cup until the cup is about one third full. Add two tablespoons of food colouring to the bubble solution and mix it well. Place the straw into the bubble solution and keep blowing until the bubbles are coming out of the pot.

Lower the piece of paper onto the bubbles to make an imprint (do not let the paper touch the plastic cup).  Lift off the paper and allow your bubble art to dry.

You can repeat the process using different colours of food colouring!


ENJOY!

Sparkly toes

Sparkly toes

My three year old got up from kneeling the other day and started to wiggle and jiggle a little, when I asked him if he was OK he said…

…”Mummy, I’ve got sparkly toes!”


"Mummy I've got sparkly toes"
“Mummy I’ve got sparkly toes”
That has to be the cutest description of pins and needles I have ever heard.  He looked at me a little confused and wanted to know why his toes were sparkling… I gave him a simple explanation but even as I was talking… I could feel a blog coming on!


So what are pins and needles and why do we get them?


Parasthesia is the medical term for pins and needles.  The pins and needles that most of us experience, just as my son did, are a result of pressure on a nerve, restricting its blood supply.  This pressure is usually a temporary pressure caused by us leaning on a limb or part of the body in an awkward way.
This pressure on the nerve restricts its supply of blood and therefore prevents it from “charging up” and “firing off” in the usual manner.  The signalling pathway gets interrupted resulting in the nerve firing off incorrectly or at a modified rate… and we feel this as a fuzzy, tingling, spiking sensation.  If the nerve is suppressed for too long its signalling function stops all together and the area becomes numb.  These sensations can usually be quickly and easily reversed by simply changing position and moving the area that is affected, thereby returning blood supply to the nerves.


A closer look


So now we have a general understanding we need to know how nerves operate to explain the phenomenon a little further.
Nerves carry messages around the body; these messages can be transferred from one part of the body to another or from a part of the body to the brain, or vica versa.  Nerves are made up of bundles of cells called neurons.

  • Unlike most cells in the body, neurons do not regenerate, this makes them among the oldest cells of the body
  • The longest cells in the body are neurons
  • Neurons are very specialised cells: they transmit electrical signals (nerve impulses)
  • Nerve impulses travel at a speed of approximately 25 metres per second
  • Neurons have a very high metabolic rate


When the sensation is a little more serious


It is this high metabolic rate that causes the nerves to start to shut down their process.  If the blood supply to the nerve is cut off or reduced (as is the case when we are sitting on a limb) they cannot produce enough energy to keep recharging themselves so the smallest neurons start to operate more erratically.  These small neurons are the ones that transmit signals of pain, hence the first sensation of pins and needles.


Certain medical conditions are associated with prolonged or chronic pins and needles.  The sensation may be due to a trapped nerve or nerve damage or infection.  It may also be due to exposure to certain toxins or medical drug treatments or alcohol.  Chronic parasthsia can be a side effect of diabetes, hyperventilation, vitamin B 12 deficiency or malnutrition.
The sensation of pins and needles usually goes very quickly once the blood supply is re introduced to the area affected, however if the symptoms persist or reoccur it is best to seek medical advice.

Hope you enjoyed the blog, if you have a question, a comment or an idea for a topic you would like me to cover in a future blog please leave a comment!

The Big Rescue

There was a MAJOR drama here on Saturday morning!  I was just having my morning cuppa when my son starting banging at the window and pointing up to the House Martins’ nests just above it.  We knew straight away there was a problem.

All that remained of two House Martin nests

These House Martins are part of the family at this stage, our very “welcome house guests“.  The children get up every morning and check on the nest (by check the nest I mean look up and see if any chicks have their head peeping out or parents flying back and forth).  Anyway, on Saturday something was obviously wrong.  When myself and the hubby got to the door we saw a pile of brown dusty clay on the ground and when we looked up there was nothing left of the two nests we had been monitoring so carefully.  PANIC and DEVASTATION! Was it a natural collapse?  Was it the dreaded Magpies?  There was very little left except this small pile of dust.  While trying to calm the children and work out what had happened we started to look around.  That’s when my hubby spotted him, crouched behind a large plant pot but seemingly healthy and unharmed… one lovely little fledgling!

Our little rescued fledgling!


We were of course delighted to have found him, but now that we had we hadn’t a clue what to do with him and we knew whatever we did, we would have to do it quickly!  So we decided to ring BirdWatch Ireland and seek advice.  The person who answered the call was excellent and obviously used to this kind of thing.  As we had been tracking these birds so much we were able to tell her that this little one was likely close to three weeks old, the age they usually fledge.  She assured us that the nest collapse was very possibly just a natural event (possibly no magpies involved) and that the others might have already fledged.  A little bit of hope, but what were we to do now?

The advice was to put the little one into a small box or container with something to keep it warm and place it as close to the original site of the nest as possible.  Then we had to just walk away and hope that mum and dad would return.  We could see them circling around so we knew there was a chance.  The biggest  problem was that the nests had been built at the apex of a roof of a bungalow with no windowsill nearby to elevate the bird.  
Firstly we placed the bird in a planter with a blanket and the remains of the inner nest material but it was still a very long way away from the original nests.

Temporary dwelling

We remembered that we had an artificial House Martins nest somewhere, bought when we first moved into the house in an attempt to encourage nesting.  With a bit of searching we eventually found it in the shed.  Great… but how were we going to fit it to the wall… and in a hurry?  That’s when hubby realised there was a leftover nail sticking out of the wall near the original nest.  A frantic bit of drilling made a hole in the mounting of the artificial nest then with the help of a short ladder, a lot of stretching and a fair bit of cursing the job was done.  Makeshift but secure!

You can see the marks of the two original nest at the top!
The only thing left after that was to wait, we decided to go out for an hour or two as the sitting around was too difficult!  Two hours later we returned, not feeling too optimistic but to our delight we could see the parents visiting the new nest and apparently feeding the little one who we could hear chirping away.  Three days later and things are still going strong.  We can hear the cheeping and see the parents travelling back and forth to the nest.  This evening hubby and the kids thought they saw a flapping of little wings just over the top of the nest, perhaps little Lucky (well what else could we call him?) is ready to fledge! We shall see tomorrow!

We would like to say a big THANK YOU to BirdWatch Ireland for their quick help and advice!  If you want to follow them just click on the links (Facebook and twitter).

Update 12th July 2013:

I am really glad to report that Lucky is doing very well.  He took his first flight last week and has being going strong ever since.  So well in fact that we see very little of him these days – which is just how it should be.

When we put the “fake” nest up it was a quick and temporary solution… however it seems the House Martins are quite taken with it.  As you can see from the photo, the nest is supposed to sit just under a horizontal eave, but we did not have that option when we put up the nest.  The house martins are filling in the gaps and adding their own extension and roof.  All this sounds really positive for the preparation of a second brood, we only hope that they are not planning to roof it all the way to the point of our roof, that kind of extension would never get planning permission or approval!

“Lucky” planning another flight now that he has “found his wings”… can you see the mud extension being added by the parents?

Mystery Creature revealed – the Harp Sponge

Week 1st to 7th July 2013

There were quite a few correct answers for this week’s Mystery Creature!

photo credit: Emily G. Round via photopin

It was a Harp Sponge (Chondrocladia lyra)!  This deep sea sponge was only recently discovered (2012) off the coast of California .  It anchors itself to the sea bed (at depths of 3,300 – 3,500 metres) with a root like structure called a rhizoid.  The “harp” like structures called vanes, consist of horizontal extensions (stolons) containing a series of equidistant vertical branches.  The sponge can consist of one to six vanes.  Each vertical branch is covered in velcro like hooks that ensnares the sponges prey.  These carnivorous creatures feed on a range of small crustaceans, engulfing the captured prey in a thin membrane that slowly digests it, breaking it down to a size that can be consumed by the sponge.


Fun Friday – Exploring Light!

What is light?

Theophilos via photopin cc

 Light is a type of energy called “Electromagnetic” (EM) radiation. When we see light we see it in straight lines called rays.

The scientific study of light is called Optics.

All Electromagnetic energy (including light) actually travels in waves.  Light is the only type of EM energy that we can see (this is called the visible spectrum).  Other types of EM radiation include radio waves, microwaves and (Ultra Violet) UV waves.


San Diego Shooter via photopin cc
Did you know… some animals can see light that is not visible to humans?  Bees, for example, can see UV light.  This allows them to follow UV patterns on many flowers which lead them to the source of nectar.


The colour of light

buttersweet via photopin cc
Light travels in waves; the wavelength of light determines its colour.  Light with the longest wavelength is red; light with the shortest wavelength is violet.

Sunlight appears as white light but it is actually made up of all the colours of the rainbow. Sunlight can be split into all of its different colours and that is how a rainbow is made.


Did you know… the brightness of light is measured in lumens? Our eyes are usually comfortable with a brightness up to 3,500 lumens.


How is a shadow made?

halfrain via photopin cc
When light rays hit an object they bounce (reflect) off it.  This is how shadows are made, they are the dark patches behind an object that light cannot get through.


Did you know… the biggest shadow we will ever see is a solar eclipse?

How fast does light travel?

The speed of light is 300,000 kilometres (or 186,000 miles) per second.

Distance in space is measured in light years; it is the distance that a ray of light travels in one year – 9.46 trillion kilometres (5.8 trillion miles).

Did you know… it takes light less than one and a half seconds to get from the Moon to the Earth? It takes nearly eight minutes for light to get from the Sun to the Earth.

only_point_five via photopin cc


Did you know… sunlight can reach a depth of about 80 metres (262 feet) in the sea?


Experiments to try:

1.     Make a rainbow

wangsa via photopin cc
You will need… a plastic container, a piece of white card, a mirror and a sunny day!

What to do… fill the plastic container about two- thirds full with water and place it on the ground outside, in direct sunlight. Place a mirror into the water and prop it up at an angle so the sun shines on it. Hold the white card away from the mirror and move it from side to side or back and forth until you capture the rainbow on the card!

So what is happening?… water bends (refracts) light that passes through it.  Each colour bends a slightly different amount so the colours separate. The separated colours are bounced off the mirror and the image is caught on the piece of white card.

2.     Turn a rainbow into white light!

You will need… a circle of white card, a pencil and some markers or colouring pencils.

What to do… divide the circle of card into seven equal sections and colour each section in a different colour of the rainbow – red, orange, yellow, green, blue, indigo and violet.  Make a hole in the middle of the circle and push a pencil through it.  Then spin the pencil on its point and watch the colour wheel turn white!

So what is happening?… as the colour card spins fast enough our eyes cannot see each colour separately and so we see all seven colours at the same time – when you mix all seven colours of the rainbow together you get white!

What’s in a blink?

Some of the best “gems” we get from our children are those moments before they go to sleep.  Our children are still young enough to want five minutes with Mum or Dad at bed time.  As frustrating and distracting as I sometimes find the task, once I lie down in the bed next to them and tune into their thoughts and ramblings, I am always grateful that I took the time.

In fact, these precious moments have been the inspiration for many of my blog posts here.  This one is no exception… I lay down with my nine year old daughter last night at bedtime and the first thing out of her mouth was…

…”Mom, how many times do we blink in a day?”
Humans usually blink about 10 to 20 times a minute.  A blink flushes the eye with fresh tears, supplying essential nourishment to maintain a healthy eye surface.  This can refresh the eyes, clear away any dust and debris and prevent infection.  Blinking can also brighten and refresh images received by the retina.

How long does a blink last?

A blink typically lasts about half a second.  If you add all this up we actually have our eyes closed for at least 120 minutes a day.  Blinking does serve the necessary purpose of moisturising the ocular surface but apparently the rate at which we blink exceeds the requirement for clearing the eye.  So are there other reasons for this process?
Yes! Recent studies  have shown that blinking also gives our brain a little “nap”, switching from cognitive to non-cognitive focus (from conscious focused mode to day-dreamy imagination mode), a “micro” respite from the task at hand.  This process allows us to “reboot” and refocus!

Do women blink more than men?

When I mentioned to my husband that I was writing this blog on blinking he said “Oh, do you mean how women blink more often than men?”  I went off, a little indignant to double check, and I am happy to report that this one is a myth.  There is no discrimination between the sexes on blinking rate.  Other factors, such as fatigue, environment and medication can of course effect how often we blink.

Blinking and social cues?

Although we tend to blink unconsciously we do still follow certain social cues or natural pauses. An interesting study observing an audience watching a short video found that they synchronized their blinking to occur at points in the video that required less attention or where they were less likely to miss something of importance.

During social conversation we are more likely to time our blinking with pauses in speech, both for the person talking and, a second or two later, the person listening.

The frequency of blinking also depends on the particular type of social interaction and the emotional state of the person.  Blink rate tends to increase after a lie has been told, for example, but remains unchanged when telling the truth.  Stress, anger and anxiety also increase blink rate.  People suffering from depression have exhibited faster blink rates as well as those with certain mental health issues.

What about blinking in other animals?

Some animals (such as the tortoise) blink their eyes independently of each other. Some have a very slow blink rate (such as cats and rabbits).When birds blink their lower eye lid comes up to meet the upper lid, in mammals it is the reverse.An interesting study conducted on the blink behaviour of 71 different species of primates reported a correlation between primate size and increased blink rate.  Of even more interest was the observation that blink rate increased in species that lived in larger greater group sizes and experienced more social interaction.

 Blinking and Art…

I came across an interesting reference to blinking while writing this blog that I thought it was worth sharing.   It refers to the famous Mona Lisa painting by Leonardo da Vinci.  The enigmatic face of Lisa Gherardini captured on the canvas has lead to centuries of speculation as to the secret behind her smile.  It appears that da Vinci used a layering and blurring technique that causes our eyes to re-adjust every time we blink, thus restarting the puzzling scrutiny of that mysterious expression.
The Mona Lisa – image source Wiki Commons

Some favourite Science quotes…

  • Science does not know its dept to imagination
  • Science is a way of thinking much more than it is a body of knowledge
  • Touch a Scientist and you touch a Child
  • Equipped with his five senses, man explores the Universe around him and calls the adventure Science
  • One teaches best by example
  • The capacity to blunder slightly is the real marvel of DNA. Without this special attribute, we would still be anaerobic bacteria and there would be no music
  • If you can’t explain it to a six year old, you don’t understand it yourself

Mystery Creature revealed – Leaf nosed snake

Week 24th to 30th June 2013

How did you do with this week’s Mystery Creature?  A few correct answers… it is the Leaf nosed snake (Langaha madagascariensis)!

photo credit: wil p via photopin cc


These snakes are unique to Madagascar and have these unusual extended “nose” appendages.  The shape of the snout varied between the sexes (sexually dimorphic), the female’s is more broad and serrated and the male’s is longer and more pointy.  The females are typically  grey in colour while the males are usually brown on top and yellow on the underside of their bodies.

photo credit: David d’O via photopin cc

The nasal appendage is present from birth, though it is folded in to expose the egg tooth.

Leaf nosed snakes feed mainly on lizards and frogs and are thought to be ambush feeders.  They are arboreal snakes and are often observed hanging straight down from branches, noses pointing to the ground.  Their shape and colouring camouflage them well.  They are found in deciduous dry forest and rain forests.

Fun Friday – exploring Acids and Bases

Fun Friday – exploring Acids and Bases

I know, I know, I shouldn’t call in Fun Friday when I am posting it on a Saturday, but ignoring the fact that I am a day late with this regular blog post, I hope you enjoy!

Exploring Acids and Bases

What are Acids and Bases?

Acids and Bases are chemicals that occur naturally in lots of different substances.
Acids can be found in things like lemons and vinegar; Bases (also called Alkali) are found in toothpaste or many cleaning products. Bread soda is a base.

Lets learn more!

The Bronsted-Lowry Definition of an acid and a base is…
  • Acids are substances that gives up hydrogen ions (H+).
  • Bases are substances that accept hydrogen ions (H+).
  • These hydrogen (H+) ions can change things in many ways, including taste and colour!

Did you know… that the word acid comes from the Latin word acidus meaning sour!

Lemons contain an acid called
citric acid that gives them that
sour taste!

The pH Scale

The pH scale is a scale that measures how acidic or basic a substance is.
The pH scale goes from 0 to 14. The scale for acids goes from 0 to 7. A very strong acid has a pH of 0. The scale for bases goes from 7 to 14. A very strong base has a pH of 14.
Something with a pH of 7 is said to be neutral (neither an acid or a base). Pure water has a pH of 7.
photo credit: ViaMoi via photopin cc


“Did you know… that bee sting venom contains an acid called formic acid!”

Acids and bases in plants!

An indicator is something that can determine whether a substance is an acid or a base. Many indicators are natural chemicals.
A group of chemicals called anthocyanins are naturally present in a number of different plants such as apples, grapes, the leaves of many trees and flowers such as roses and poppies.
photo credit: Jason A. Samfield via photopin cc

The colour of anthocyanin changes depending upon the acid levels (pH) of the plant. The bright red and pink colours of Autumn are due to anthocyanin and acid levels in leaves (for more on this see my previous
post “Carrots, Cabbages and Cups of Tea“).

Anthocyanin changes colour from red to pink, to purple, to blue, to green as the pH changes from 0 to 14.
photo credit: Parvin via photopin cc

“Did you know… Hydrangea flowers can change colour depending on the pH of the soil. In acidic soils chemical reactions occur to make aluminium available to the plant, turning the flowers blue, in alkaline (basic) soil these chemical reactions cannot occur so the flowers remain pink.”


Experiments to try at home:

Make your own sherbet

You will need… icing sugar, citric acid, bread soda, flavoured jelly crystals, a teaspoon, a tablespoon and a mixing bowl.
What to do… add one teaspoon of citric acid and one teaspoon of bread soda to the bowl. Add three tablespoons of icing sugar and two tablespoons of flavoured jelly crystals. Mix all together then place a small amount on your tongue! The sherbet should bubble a little and you should feel a tingle on your tongue!
So what is happening?… you have just created an  acid-base reaction in your mouth! When the citric acid, bread soda and saliva in your mouth combine they react together to give off a gas, called carbon dioxide, that forms tiny bubbles that you feel fizzing on your tongue!

Cabbage juice experiment

You will need… a red (purple) cabbage, a knife, a saucepan, a sieve, an ice tray, clear vinegar, water and bread soda
What to do… cut up half the red cabbage and add it to a pan.  Ask and adult to cover with water and bring it to the boil then leave to cool.  Once cool pour the cabbage juice through a sieve, collecting the juice in a bowl.  Pour the juice into an ice tray and freeze until it hardens into ice-cubes.
Half fill three glasses, one with water, one with clear vinegar and one with water mixed with half a teaspoon of bread soda. Now drop a cabbage juice ice-cube into each glass and see what happens.
Cabbage Juice ice cube experiment


So what is happening?… red cabbage contains anthocyanin. When the cabbage juice mixes with the acid (vinegar) it turns a red/pink colour; when it mixes with the bread soda solution (base) it turns a blue/green colour.  The water is neutral (pH 7) so it does not alter the purple colour of the cabbage juice.