The science of pancakes

The science of pancakes

If you have ever wondered about the science of pancakes, their history, why they are round or even the formula for the perfect pancake flip then read on!

I know that pancakes Tuesday is late this year but it still seems to have come around awfully quickly. In this house the pancake does not just feature once a year but every weekend and with that kind of frequency we have covered a lot of questions about this not so humble food.

So if you have ever wondered about the history of the pancake, the science of getting them just right, why they are round or even the formula for the perfect pancake flip (L = 4 H /P- D / 2 if you’re interested) then read on!


…..”WHAT IS THE SCIENCE BEHIND A GOOD PANCAKE, AND WHO’S IDEA WAS IT?”…..
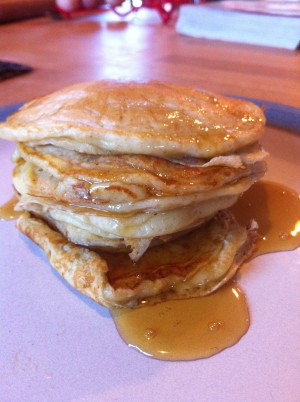
Made in the name of Science


A BIT OF HISTORY…

So, before I delve into the science behind the PERFECT PANCAKE, I thought I’d look at a little bit of history first.  The pancake as we know it seems to be accredited to the ancient Greeks, who in the 6th century started combining ground wheat with olive oil, honey and milk – and so the first pancake was born. If we expand on our concept of what a pancake really is we could look back further still to the process of making flat bread from ground grains and nuts mixed with milk or water, dating back to the neolithic period.


WHAT DO WE FIND IN A MODERN PANCAKE?

If we start within Europe a modern pancake can be classified as the round flat variety similar to the french crepe which contains some form of flour, and a liquid such as milk or water.  These flat pancakes usually also contain eggs and butter, and sugar in the sweetened variety.  Then we also have the thicker, fluffier pancakes that contain a raising agent, the name and variation of these include drop scones, Scottish pancakes and of course the well know buttermilk pancakes that are most common in America.

In our house the three most common pancakes made are the buttermilk pancakes, drop scones and the sweet flat crepe like ones.


WHAT GOES INTO A PANCAKE…

If we take a closer look at the primary ingredients we begin to see the complexity and science that really goes into making these delights:

FLOUR… this ingredient can be considered the backbone of the pancake as it provides structure
SUGAR….as well as adding the nice sweet taste and contributing to the colour of the pancake, sugar also keeps the pancake from getting to thick and stodgy
EGGS…. the proteins in the eggs add to the structure of the pancake and to the overall flavour
BUTTER/FAT… as with the sugar, the fats keep the pancake tender and prevent them becoming overly stodgy
MILK/WATER… the liquid portion of the pancake adds to the structure and is necessary for certain chemical reactions to occur
RAISING AGENT…  as the name suggests, these agents help raise the pancake, making them light and fluffy

You can of course find many varieties with their own local changes and substitutes, potatoes are commonly used as the starch ingredient instead of flour.

First lets take a look at the thin flat pancake or crepe… in this case we will assume they contain flour, milk and sugar.  From the above list we can now predict that the flour is the body of the pancake, it provides the structure, but how does it do this?  There are two proteins found in flour called glutenin and gliadin.  When moisture is added to flour (in this case the milk) these two proteins link together to form gluten.  Gluten is a “sticky” protein, this stickiness allows it to form a network and it is this that adds structure to the batter.  Finally we come to the sugar which caramelizes with the heat adding sweetness to the mix and contributing to the colour of the pancake as it cooks.  The sugar also prevents the pancakes becoming too thick and stodgy by reducing the amount of gluten produced.
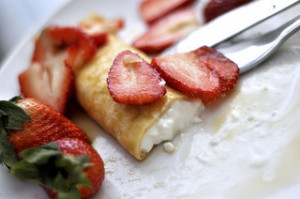
 

photo credit: VancityAllie via photopin cc


So now we move on to the thicker pancakes; the main difference with these is that they contain a raising agent!  Yeast is a biological raising agent used in some baking, it produces carbon dioxide gas while digesting sugar and this gas forms tiny bubbles within the yeast.  When heat is added during baking these bubbles expand making the bread/cake “rise”.

The main drawback with baking with yeast is that it requires time and who really wants to wait too long for their breakfast?  That is why, when using raising agents in pancake mixtures, we substitute the yeast for bread soda and/or baking powder; but who can really tell what the difference is between these two?

Bread soda (also known as baking soda) is pure sodium bicarbonate. Baking powder contains bread soda but it also contains a powdered acid (usually cream of tartar – potassium bitartrate).  Bread soda is an alkali/base and will therefore react with an acid (such as the buttermilk used in pancake batter) producing salt, water and carbon dioxide gas…

BREAD SODA + ACID —–> SALT + H20 + CO2

This carbon dioxide gas gets trapped in thousands of tiny bubbles within the gluten making the pancake batter rise on cooking into light and fluffy wonders!  (The same process as with the yeast but a lot quicker).

The baking powder has the added advantage of having the acid already present, so once a liquid is added the dry acid and alkali can react in the same manner as above.

So now that we are starting to understand the science of it all how do we use this knowledge to make the best pancakes.  before we jump into this one we first have to consider the science of flavour and odour!


THE SCIENCE OF FLAVOUR

The Maillard reaction describes a chemical reaction requiring certain amino acids and sugars and the addition of heat to produce the molecules responsible for the odours and flavour of food.  Now there is a science worth studying!

MAILLARD REACTION:  Amino Acids + sugar + heat —-> flavour and odour

So what does this have to do with our pancakes?  Well, Maillard reactions work best in alkali conditions so bread soda is a definite plus is making golden tasty treats.  HOWEVER, add too much bread soda and the pancake will brown too quickly and will have an acrid burnt flavour, not to mention the unpleasant taste produced from the left over breadsoda.  It is trickier than we think and yes, of course, someone has already done the science bit for us to work out the ideal amount of bread soda required.


WE ARE HUNGRY – SPEED IT UP

You will be glad to hear that speed is recommended when preping pancakes;  Although it is good to allow the batter sit for a few minutes to allow the gluten to “relax” (build up a sufficient network) it has been shown that if left too long the bubbles will have burst and the pancakes will be flat and dense once cooked.


SCIENCE IN MY KITCHEN

I decided I had to try some of this pancake science out for myself so turned to my original buttermilk pancake mix from the wonderful NIGELLA LAWSON.  This recipe actually uses both baking soda and baking powder (I omitted the banana).  I decided to test out two theories…

1.  Does the amount of bread soda determine the colour and flavour of the pancake?
2.  Does the length of time the batter is left standing really make that much of a difference?

To keep it simple, I decided to keep everything else (including the amount of baking powder) constant.
So I donned my apron in favour of my labcoat and I set to work.  I prepared the basic batter mix excluding the addition of bread soda.  To digress for a moment, I also followed another golden pancake rule – not to over-mix the batter (a few small lumps of flour allows it better absorb the liquid and produce gluten).
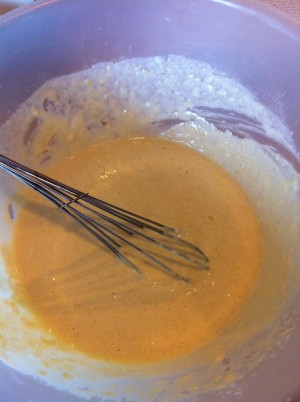
 

My "slightly lumpy" pancake batter
My “slightly lumpy” pancake batter


I divided my basic batter mix between four bowls and then added different amounts of bread soda to each (the first bowl had no bread soda, the second had half the recommended amount, the third had the recommended amount and the fourth had double what was recommended!).  Then I let the batter sit for five minutes before cooking the pancakes.


Here are my results…  the pancake on the top left had no bread soda, top right had 1/2 the recommended amount, bottom left had the ideal amount and bottom right had twice the recommended amount.  You can see how the pancake gets darker with the addition of more bread soda, with the last one being just a bit too dark.  The taste test revealed that the one on the bottom left had the best taste (and texture) and that the one with the most bread soda had that unpleasant taste of bread soda!

To investigate my second question I left the same pancake batters sit for two hours before cooking them.  As you can see the pancakes cooked after two hours were indeed a lot less light and fluffy and were a bit soggy inside!
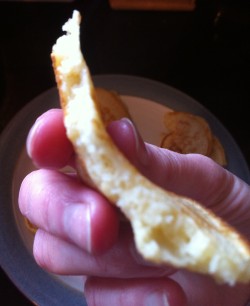
 

The batter for these pancakes was left for five minutes


The batter for these pancakes was left for two hours


WHY ARE PANCAKES ROUND?

Pancakes are round for two main reasons: gravity and surface tension.  Assuming that the pancake pan is flat then once the batter is added gravity will pull on all parts of the batter uniformly in all directions, pulling it out into a round shape.  Surface tension pulls evenly on the edges keeping them restrained into the round shape.


THE SCIENCE OF FLIPPING A PANCAKE…

Would you believe that someone has actually looked into the exact science of pancake flipping?  How cool is that ….

According to University Professor of Mathematics Frank Smith, the simple mathematical formula for the perfect flip is: L = 4 H /P- D / 2
(L = hand distance from inner edge of the pancake / H = height of flip / D = diameter of pancake)

If that sounds a bit too complicated check this out …

Dr. Tungate, a senior physics lecturer at Birmingham University, found that “a pancake should be flipped into the air at a speed of 10 miles-an-hour, which means that it takes less than .5 of a second to reach the top of its trajectory.”


AND THEN THERE IS THE SCIENCE OF WHAT YOU ACTUALLY PUT ON YOUR PANCAKES…

… but I think that is a whole other blog! So whatever toppings you choose I hope you enjoy your pancakes today!!
 

All that Science made me hungry!


And if you still want more….HERE IS AN EXPERIMENT YOU CAN TRY….


This experiment shows two fun ways of inflating balloons, kids will love it, it’s easy to do and it teaches some kitchen science… like the difference between using yeast and bread soda as raising agents in baking!

Further reading:
Pancakes served with a side of science.
Celebrate your pancakes with a side of science.
Baking powder verses baking soda.
The history of pancakes.


Or you might like to check out these great pancake blogs by fellow Irish Parenting Bloggers….


Fun Friday – Carve a Heart of Hope Pumpkins

Fun Friday – Carve a Heart of Hope Pumpkins

Continuing on with the Halloween theme we are talking PUMPKINS today; Of course in this house we don’t just carve them… Oooh Noooh… we like to see what else we can do with them… exploding, glowing, oozing… all in the name of SCIENCE!

But first…

But before we all don the lab coats and goggles I wanted to draw your attention to the Carve a Heart of Hope for Halloween Campaign, run by World Vision Ireland.

World Vision Heart of HopeWorld Vision Ireland is a small part of the global World Vision organization, providing long term support to children in six African countries; Mauritania, Kenya, Swaziland, Tanzania, Uganda and Sierra Leone.  They also provide emergency support where needed and are actively supporting the Syrian crisis at the moment.

This Halloween World Vision Ireland are running a campaign to raise awareness of the work that they do.  They are asking people all over Ireland to carve a heart of hope into a pumpkin and place it in their window as a sign of support of their Survive to 5 campaign.

(Click on the links above if you want to find out more about this campaign).

Back to Pumpkins…

So what did we do with our pumpkins? Well first we carved them…
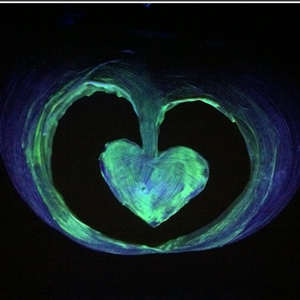
Then we added a bit of glow in the dark paint… because we are just loving anything that glows at the moment!


Then we turned our attention to the oozy, exploding bit…

If you want to try this at home you will need…

What you need:
A carved pumpkin (use a small one)
250 mls 6% Hydrogen Peroxide
2 teaspoons (or 2 sachets) dried yeast
2 Tablespoons warm water
Washing up liquid
Food colouring (optional)

What to do:
Place a small plastic container inside your pumpkin (large enough to contain 300 mls but small enough to leave plenty of room between the container and pumpkin lid). Carefully pour in the 250 mls hydrogen peroxide.  Add a BIG squirt on washing up liquid. A about 5 drops of food colouring if using.

In a separate bowl mix the 2 teaspoons of dried yeast into the warm water. Carfeully add this to the hydrogen peroxide mixture inside the pumpkin, replace the lid and then stand back and enjoy!

What is happening:
This is an example of a catalytic reaction which really just means that something is added to the reaction to make it happen a lot faster, but that it is not chemically changed by the reaction. The something added is called a catalyst.  The yeast is the catalyst it this reaction… it splits the hydrogen peroxide into water and oxygen without getting chemically changed itself.  The oxygen produced then combines with the washing up liquid to produce a LOT of foam!

What to do with the bits you don’t use for Science?… Eat them!

Don’t forget about the lovely fleshy parts of the pumpkin, you did keep them before you started experimenting, right?  Here are some links to some great recipes, from some of my favourite bloggers, to put that pumpkin to good use…

  • Pumpkin Bread… a yummy alternative to Banana Bread; this one is by fellow Irish Parenting Blogger, Christine, more often found blogging at Awfully Chipper.
  • Or you could just download the lovely Pumpkin Pack as part of the Carve a Heart of Hope Campaign for a great Pumpkin soup recipe from Donal Skehan.

Happy Halloween… and stay tuned for more Halloween fun… lots of glowing, bubbling, exploding experiments coming up in the next few days!

Fun Friday -making spooky sounds!

Keeping with the Halloween Science theme, this week I share a cool experiment perfect for the spooky season!

Make a Spooky Sound Cup!


All you need is...
All you need is…


All you need is ….

a plastic cup
a paper clip
some twine or string
a knife or scissors
a piece of kitchen paper
water


What to do...
What to do…

What to do

  1. Tie the paperclip to one end of the twine.
  2. Ask an adult to make a small hole in the base of the cup, using the knife or scissors.
  3. Hold the cup upside down and thread the twine through the hole. The paperclip will stop the twine from coming all the way through.
  4. Fold the kitchen paper in half and then quarter and then dip it in water. You want it wet but not dripping.
  5. Holding the cup in one hand, fold the wet kitchen paper over the twine with the other hand and hold between your thumb and first finger.
  6. Pull the wet kitchen towel down along the twine, pinching between your fingers all the time.
  7. You should notice it makes a really spooky sound.


You can try this experiment without the wet kitchen paper, just wet your thumb and finger instead; Does it make a different sound?

You could also see what happens if you use a different type of twine, or some ribbon, or use a larger cup!


So what is happening?

As you pull the kitchen paper down along the twine the friction between the two makes the twine vibrate.  These vibrations travel through the air and  bounced around the walls of the upturned cup – amplifying the vibrations so we get to hear the spooky, screechy sound!


Hope you have some Spooky Fun with this experiment.  Stay tuned for lots more over the Halloween Season!


Interview Series – Science Wows talk to Jason Tammemägi about creating and producing children’s animation

This post is the first in a new interview series looking at Science and Nature communication through different media in Ireland

 
I really enjoy using different media to communicate Science and Nature topics to people of all ages. I am always very interested in how others communicate in these fields and the methods they use.  I have come across many people who have really caught my interest… their subject, medium and most of all their passion for what they do.
Through this series of interviews I hope to explore how different individuals work in their specialised area, provide a sense of what a career in their chosen field is like and above all, express their passion for what they do and why!To kick off this interview series I spoke with Jason Tammemägi.

Image Credit: Jason Tammemagi
http://jasontammemagi.com/

Jason is a writer, creator and director of many well known children’s television programs.  The creative mind behind such favourites as Fluffy Garden, Roobarb and Custard Too, Ballybradden and, more recently, Planet Cosmo, Jason’s work is familiar to us all.I was delighted to get an insight into the various aspects of Jason’s work and how he uses the
creative media of cartoon and animation to communicate with children.

Hi Jason and thank you so much for agreeing to take part in this interview series.  I have always believed that you can communicate any topic to children if you just present it in the right way and that is why Planet Cosmo really caught my eye.  Moreover it caught the eye of my three year old son, Rohan and when he started to remember and repeat the information he learned from each episode I realised how well it appealed to his young mind.

 
Before I get into the details of what makes such a program so successful I would love to learn a little more about you and what lead you to this career;

How did you start off on a career as a writer and cartoonist…what path did you take? What training was required?
I actually arrived at cartoons via science. I was studying physics, chemistry and maths but, while I have always loved physics, things just didn’t click for me at university level and then someone told me about an animation course. Well, I didn’t even know animation was something you could do for living – nobody had told me! I had been drawing all my life and loved stories so I applied and I got in. Within a week or two I knew this was what I wanted to do.
I studied animation for three years and that’s how I got into cartoons. From there, I worked my way up and moved to directing, designing, writing and creating. With most of those, it was just a case of trying them and then doing everything I could to get better. The initial animation training was the beginning of that journey.
Is this something you always wanted to do?
I had never decided to be an animator as a child. I really didn’t know what I wanted to be.
If you look back to your childhood, is it obvious to you now that this career was a likely path for you?
 
Yes, it makes so much sense now. As a child, I loved to draw, I loved to tell stories, to create and that’s exactly what I get to do now. I just didn’t know as a child that it was real job.
As I mentioned, Planet Cosmo is a big hit in this family, not only for my three year old; his older siblings (nine and seven) really enjoyed it as well.
Where did you get the idea for Planet Cosmo?
 
I was looking for good ways to teach my daughter about space. She was about three and was really taking an interest but I just couldn’t find the right book or show aimed at her level. I know how important it is to feed interests in children or they quickly move on. So I decided to make a show for children about space. A way to entertain them, make them laugh and sing along while also giving them real facts about the planets because, for me, that’s what’s amazing: these are real!
Which do you create first… the characters or the theme?
 
The theme came first. I had the mission. From there, it took quite some time to find just what the show would be and who the characters would be. Early on, it was about a little robot boy, his sister and their dog and it evolved from there. Cosmo became a girl, the sidekick became her Dad and a family was created around them.
How many people are involved in a project like Planet Cosmo?
 
It takes quite a few people to make a show like Planet Cosmo but maybe not as many as you might think. We had a core team of around ten people I think but then there were many others who made important contributions along the way. Everyone who touched the project added something of their own and it would never quite be the same without them.
From the first idea to seeing the final product on screen, how long does a project like Planet Cosmo take?
 
With Planet Cosmo, I think it took over three years and that wouldn’t be unusual. It can take a long time to pull a television show together and then get it made. There are highs and lows in there and the certainty of the show is never guaranteed. So it’s always a special feeling when the show finally hits the screens. It’s a real success to even get a show made at all and even better when you find out afterwards that children love it and it’s really helping bring space to a lot of households.


I really liked how Planet Cosmo managed to engage and capture the imagination of its audience while teaching quite a complex material in a very simple way. 
How did you manage to target the program to the preschool audience so well?
 
Well preschool is really my area. I love how open to ideas preschool children are and I love what entertains them and what they find amazing so I have done a huge amount of work and research into that area. Before making Planet Cosmo, I made 80 episodes of Fluffy Gardens among other things so, when it came to making this show, I had an idea what I doing. But I’m also fortunate enough to have two young daughters. When I began creating the show, my eldest daughter was right in the middle of my target age group. By the time the show was finished, my youngest daughter was there so I always had a preschool child to test ideas on.
Do you test your ideas on your intended audience at different stages of production?
 
Yes, it is easy to get lost in a project and lose sight of those who matter: the audience. So I found it important all the way through to check and test and see what works and what doesn’t. The best way to do that is to show the work to children. They don’t fake their reactions and they know better than anyone when it’s right or wrong.


I know that you are fond of getting involved in every step of a project from creation to development and production;
Can you give us an idea of what is involved at each step?
 
There are so many stages in making a television show and they’re all so different. The beginning is creation: ideas, characters, stories. It is all very free and very creative but then requires focus and hard work to bring it all together into something that can really be a show. You then have to pitch the show and convince others that it’s a good idea in order to get it made. That can be a tough process and it is always a real test of just how strong the show is.
If you’re successful and the show goes ahead, then you are into preproduction (getting everything ready for the show – designs, writing and so on) and then production (the actual animation). The writing is incredibly important because it really sets the template for everything that happens afterwards. You need a fun, strong story or the rest of it doesn’t really matter. But once you have a good story, great animation and great sound can turn it into something wonderful. And yes, I tend to be involved with every part of production and count myself fortunate that I can do that. I think it brings a real sense of identity to a show.
What is a typical day like for you…. Or is there such a thing?
 
How my day is depends on what stage a project is at. I write at home, for example. I need the peace and I get asked far too many questions in a studio! So writing is peaceful and quiet and I do lots of walking around to let ideas swirl in my head before getting them down on the page. Whereas in production, I’m in a studio and it’s all so busy. I usually start very early and make my to-do lists and get a head start on everything I have to do that day. Then once the studio gets going, there is so much to check – going through storyboards to make sure the story is being told well visually, timing them into videos that set up the whole episode, checking animation scenes, checking how they flow when put together and then working on effects to get the final episodes together. At any one time, there are many episodes in various stages of production so there is always a lot to do and the important thing is to keep track of the overall stories because, in production, everything is split off into smaller parts.
So a typical production day is busy!
What are you working on at the moment?
 
I am making an app for kids right now and that’s pretty exciting. It hasn’t been announced yet so I can’t say too much about it but it is going to be fun. I am also developing a couple of new concepts and helping some people out on their own projects. So right now, things are very busy and I will be announcing some of these new projects soon.
You have worked in this area for more than 15 years and have generated a number of other projects and programs. 
Can you tell us a little about some of your favour projects to date?
 
Planet Cosmo is really the show I always wanted to make. It sparks an interest in space and, with it, science and it does so with lots of humour and songs and, for a large part, it’s a science fiction show based around science fact and I love science fiction. It was so much fun to write and I couldn’t be happier with the end result. So that show will be hard to top for me! But Fluffy Gardens will always have a special place in my heart and I know each and every one of those characters so well. It’s a part of me and I still think to this day that the Fluffy Gardens Christmas Special is one of the best things I ever made. It has been shown here every Christmas Day since it was made and I love it every time. It’s just so Christmassy.
Of the other shows I have worked on, well, Roobarb and Custard would be a favourite. It was such an honour to work on that show and to work with its creator, Grange Calveley, and the late great Richard Briers.
Of all the characters you have created do you have a favourite among them and if so why?
 
It is so hard to pick a favourite. Cosmo’s Dad is probably the most fun to write and I really love him because he has a lot of different sides. His silly side is obvious and that makes him very funny but he’s also a good Dad and he’s a good pilot so he has strengths too. He has these little warm moments of fatherhood that I can really relate to myself no matter how silly he is. I will always have a soft spot for Mavis the Pony in Fluffy Gardens too though.
Who is your target audience or does that change for each project?
Most of my work has been for preschool children, although not all (Ballybraddan was for older kids and Managing the Universe was for teens). With preschool, which is the area I really specialise in, I tend to pick a slightly different core age group for each project because a two-year-old is very different to five-year-old even though they all come under the heading ‘preschool’. So Planet Cosmo was aimed at a slightly older preschool child than Fluffy Gardens. I love sticking with preschool but I tend to shift focus within that depending on the project.
From my viewpoint Science communication is on the rise in this Country, with children becoming more and more the target audience;
How do you see this developing in the future and would you like to be involved in another science based project for children?
 
I think if you’re aiming for real positive change, you start by inspiring the children. Not all children will be interested in everything and that’s perfectly okay but you have to give them the chance. Feed the interest while it’s there or they just move on and forget about it. So I love to give children something that is fun first and enjoyable while also expanding their options and introducing them to new ideas. Science is amazing and exciting and covers so many areas that there is lots to explore for children and plenty of areas of science that can make for wonderful entertainment. And for children, I see one of the main ideas behind science being so important for all aspects of their lives as they grow: ask questions, challenge and look deeper. So I see this getting bigger and more important and, yes, I have no doubt I will be involved in more science-based projects in the future.


And the final word…
What is the best thing about what you do?
I get to make children smile and laugh. And I usually get to give them something positive in the process. I’m not sure it gets better than that!
What advice would you give to anyone thinking of a career in your area?
Create. Draw or write or both and keep doing it. See the world around you, how it is and how it works and then plug that into your imagination and see what comes out the other side. From there, find out about college courses in the specific areas you would like to be involved in and try to get in and work at the things that really inspire you. And remember that there are many different paths. The one you start on doesn’t have to be the one you end up on so try to be open about how you get to where you want to be.
What would be your ideal project for the future?
 
I count myself fortunate enough that I have already been given the chance to make my ideal projects. So from here, I want to deliver better. More smiles and laughs and content that might just make a real positive difference not just for children, but for the adults they will one day become.

Fun Friday – making slime!

Here is a fun science experiment that all kids love….. and no matter how many times a child may have done this one, they are always happy to do it again!

HOW TO MAKE SLIME

You will need….

  • two small bowls or cups
  • PVA glue (white or clear is fine)
  • water
  • food colouring (optional)
  • Borax* powder.

*You can pick up the borax powder in your local chemist (See note below)

What you do… 

  • To the first bowl add half a cup of water and half a cup of PVA glue and mix well.
  • If you want to make coloured slime add a few drops of food colouring and mix this in well.
  • In the other bowl add one teaspoon of borax powder to one cup of water and mix well until all the powder is dissolved!
  • Now for the fun bit… pour the borax solution into the PVA/water mix and mix, mix, mix!!! YOU HAVE JUST MADE SLIME!


This experiment is as fun as it looks!

If you want to keep your slime just pop it into a Zip-lock bag and seal it and it will be ready for you next time you want some slimey fun!

So what is happening?…

Congratulation… you have just made a polymer!! In simple terms a polymer is a substance made up of lots of molecules arranged in long chains.  If you imagine that the glue is like cooked spaghetti, it slides and slips around the place quite easily.  When we add the borax to the glue it causes some of the molecules in the glue to stick together making the glue more rubbery and less liquid!  Imagine if you took those strands of spaghetti and tied them together in places, the strands would not be able to slip and slide around nearly as much! The borax and glue mixture is just like your knotted spaghetti!


*Where can I get Borax powder?

In Ireland you need to buy Borax powder in a pharmacy.  The production is a little erratic and the larger volumes are no longer available!  You should be able to get this 100g tub in any pharmacy and it costs about €2.25.

UPDATE 2017: Borax powder is no longer as readily available in Ireland.  here is one alternative, using very simple ingredients… check out this post on how to make silly putty.

Or check out our Ultimate Slime Guide for lots of fantastic slime recipes using contact lens solution or laundry detergent.


Check out next week’s Fun Friday post for more slime recipes to try at home!

Fun Friday – Exploring Density

What is Density?

Density is the mass of an object per unit volume.  A bit of a mouthful but this is how I explained it to my own children today….

…imagine you have a pebble and a marshmallow of the same size and shape… which one do you think is heavier?

My three year old got this straight away… “the pebble of course Mum” (with a “silly question” look that I am use to at this stage).

The Fun Friday Science Team!

So if they are the same size (volume) then why does one weigh so much more than the other?  If you remember that everything is made up of molecules… the heavier object simply has more molecules packed more tightly together (a greater mass); the molecules in the lighter object (in this case the marshmallow) are much more loosely packed together (a smaller mass)!

The pebble is said to have a greater density than the marshmallow.

A bit of History:

A Greek scientist called Archimedes (250 BC) is credited with discovering the concept of density.  The story goes that Archimedes was given the task of determining if the newly minted King’s gold coins were genuine (or if they had been mixed with silver).  Archimedes was pondering this idea while lowering himself into the bath.  When he noticed how his body displaced a volume of water he realised he had cracked it!  If he compared a coin of pure gold with the newly minted ones he could check if they displaced the same amount of water i.e. that their densities were the same.  Turns out they were not and the King was beings duped!

They say that Archimedes was so excited when he realised the solution that he jumped out of the bath and ran all the way home naked shouting “Eureka, Eureka”…. (“I found it, I found it” in Greek).

Here are some experiments on density that you can try at home…

The children and I spent the afternoon trying out these cool experiments that are easy to do at home.  Hope you get to try some too!

1. Make a density rainbow

You will need:

A clear glass, golden syrup or honey, maple syrup, milk, washing up liquid, water, food colouring, cooking oil or baby oil, a clear alcohol (we used isopropanol but you could use methylated spirits or vodka – with adult supervision!), funnels, a dropper or a spoon.

What to do:

Place some water in a glass and add a few drops of food colouring and mix. Place some alcohol in another glass and add a few drops of a different food colouring. Mix.

Carefully add each layer in the following order….

  1. golden syrup
  2. maple syrup
  3. milk
  4. washing up liquid
  5. coloured water
  6. baby oil (or cooking oil)
  7. coloured alcohol
Try to add each layer carefully down the side of the glass, using a spoon, a dropper or a funnel (as below).  Make sure each liquid makes a complete layer that fully covers the layer underneath.  If the layers mix a little, allow to settle before adding the next layer.
Add each layer carefully down the side of the glass
Two junior scientists admiring their work!
We think it looks lovely!


What is happening:

We added the most dense material first (the golden syrup) and then the next dense and so on.  So each layer is a little lighter or less dense than the previous one and therefore floats on it.

You can of course add other things are leave some of these layers out!

2. Lava lamp in a glass

You will need: a clear glass, sunflower/vegetable oil, water, food colouring, some effervescent tablets such as AlkaSeltzer.

What to do: Place water in the glass to about one third full.  Add a few drops of food colouring to the water and mix. Gently pour the oil down the side of the glass filling the glass to almost the top.  If the oil and water mix a little don’t worry, just wait a while until the two layers separate out with the oil sitting on top of the water. Break the tablet into pieces and add one or two pieces to the glass…. I will let Caer explain it to you (with a little prompting from her brother)!

What is happening:

When the AlkaSeltzer tablet reaches the water layer it starts to dissolve and fizz, releasing a gas called carbon dioxide.  This gas forms in small bubbles surrounded by water, they start to rise to the top of the glass because the gas is lighter (less dense) than the water and oil.  The bubbles pass all the way through the oil layer to the top of the glass where the bubble eventually bursts, releasing the carbon dioxide gas.  Once the gas is gone the bubble is just water, which is heavier (more dense) than the oil so it starts to drop down again.  The process continues until all the carbon dioxide has escaped to the top.  Adding more AlkaSeltzer starts it all off again!

3. Fireworks in a glass

You will need: A glass, water, food colouring and sunflower (or vegetable) oil

What to do: Fill the glass with water to about two thirds full.  Carefully pour a layer of oil on top of the water to fill the glass.  Add drops of food colouring to the top of the oil layer and watch as they slowly drop down and enter the water layer.  They streak through it like some mini fireworks!

Add the drops of food colouring to the top of the oil…
…and wait for the fireworks display to begin!

What is happening:

Food colouring and oil do not mix so the drops will fall until they meet the water layer.  Food colouring dissolves in water, the colour diffuses out into the water as the drops fall to the bottom of the glass, giving a lovely fireworks type display!

Hope you enjoyed this week’s Fun Friday as much as we did.  If you have any comments, questions or suggestions please leave a comment below, I always love the chat and feedback!  

Have a great weekend!

Fun Friday – Exploring Bubbles!

Fun Friday – Exploring Bubbles!

WHAT IS A BUBBLE?

A bubble is a thin film of liquid filled with air or another gas. Most bubble are made up of soapy water and air.

LET’S LEARN MORE…

No matter what shape a bubble starts off as, it will always try to form a round shape (called a sphere). A sphere is the shape that allows the least amount of surface area – and therefore the least amount of energy is needed to maintain this shape.

If one or more bubbles touch they will loose their sphere shape – the walls of the touching bubbles will merge. If both bubbles are the same size the shared wall will be flat!

The walls of joined-up bubbles always meet at an angle of 120 degrees

photo credit: kaibara87 via photopin cc
photo credit: Jeff Kubina via photopin cc


WHAT COLOUR IS A BUBBLE?

Bubbles reflect colours from their surroundings so at first they may appear rainbow coloured.

As time goes on the colour of the bubble changes until finally the bubble appears colourless – and then it bursts


HOW DOES IT WORK?

The sphere of a bubble is made up of two layers – an inner wall and an outer wall. As light waves hit the bubble they are reflect off both walls. The walls of the bubble gradually weaken and the distance between the two walls reduces until the reflected light waves cancel each other out and the colour disappears.

 Did you know… The skin of a bubble is less than one thousandth of a millimetre thick!


EXPERIMENTS TO TRY AT HOME

Make your own bubble solution!

 Commercial bubble solutions are great but they can be expensive, so why not make your own? There are lots of good recipes that work really well but this is the one I usually use! 
You will need… a clean, dry empty plastic bottle (1 litre), 4 tblsp (60ml) washing-up liquid, 2 cups (480mls) clean water, 2 tblsp (30ml) glycerine
What to do: Before you start make sure the bottle, your hands and any measuring utensils are clean and dry. Carefully measure out each ingredient and add, one by one to the bottle, trying not to make the mixture get too bubbly. Once everything has been added stir slowly and carefully. Cap the bottle and leave it in a safe place overnight. The bubble solution is ready to use the next day.
Some tips: When making your bubble solution make sure you use “original” washing-up liquid and not any of the scented varieties! If possible, use bottled or filtered water rather than tap water.


So now what?… Now start making bubbles!! If you don‛t have any bubble wands you can make your own using some pipe cleaners. Try shaping the pipe cleaners into different shapes and see how the bubble will still always end up as a sphere shape.

 Did you know… The biggest free- floating soap bubble ever blown was 105.4 cubic feet. It could have held 788 gallons of water!


If you really want to scale it up make extra bubble solution and us a small paddling pool and a hoola hoop to make some mega bubbles!


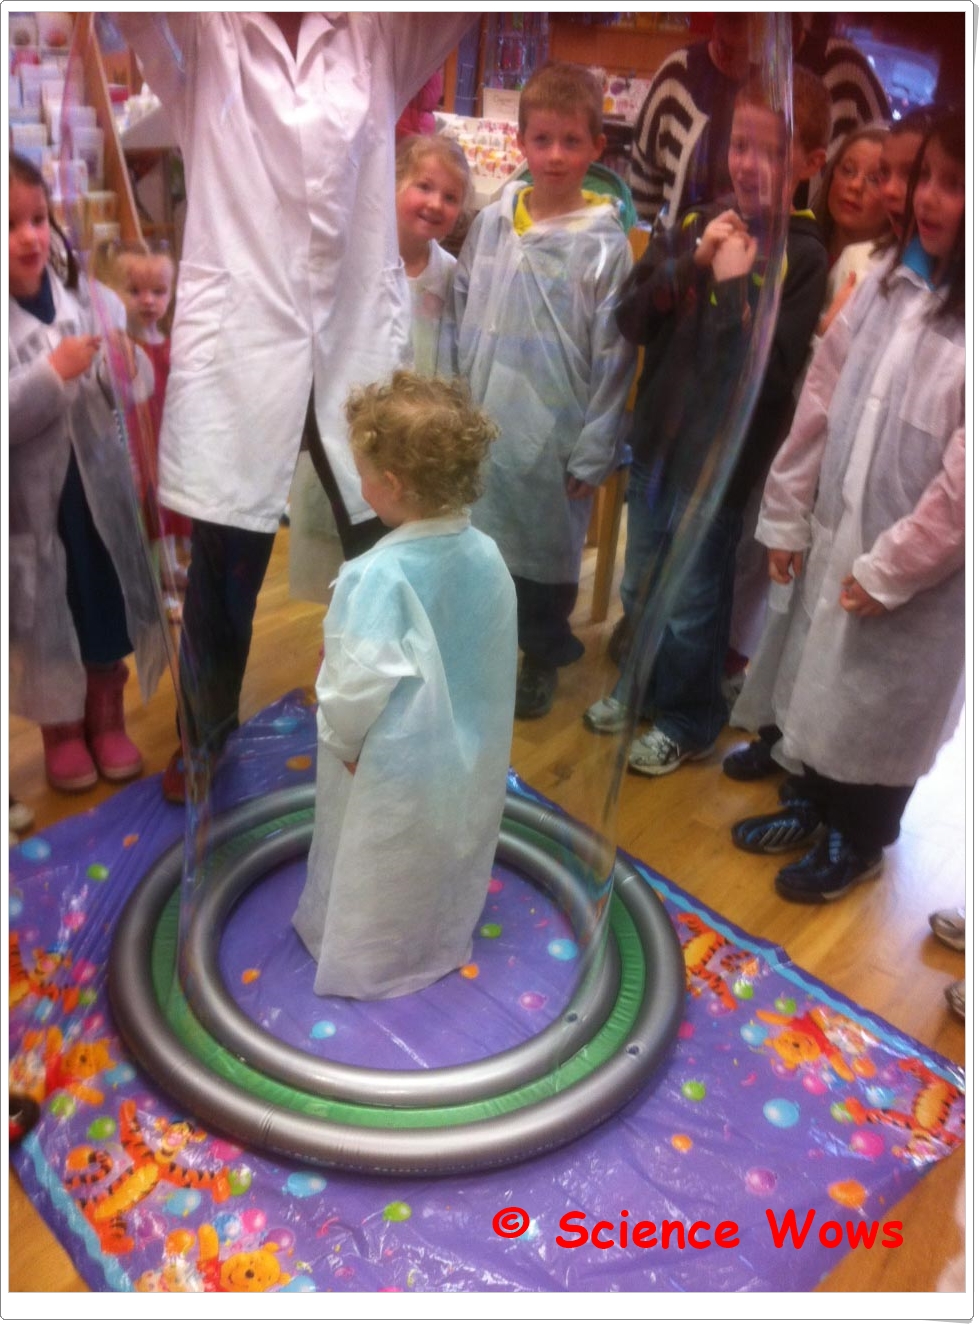
This is a photo of my son in a big bubble made using a commercial bubble ring


Did you know… The world record for the most people inside a bubble was set in 2006 by Sam Heath; His bubble contained 19 girls and boys over five feet tall!!


BUBBLE ART:

You will need.. bubble solution, food colouring, plastic cup, a straw, paper.


What to do: Pour bubble solution into the plastic cup until the cup is about one third full. Add two tablespoons of food colouring to the bubble solution and mix it well. Place the straw into the bubble solution and keep blowing until the bubbles are coming out of the pot.

Lower the piece of paper onto the bubbles to make an imprint (do not let the paper touch the plastic cup).  Lift off the paper and allow your bubble art to dry.

You can repeat the process using different colours of food colouring!


ENJOY!

What’s in a blink?

Some of the best “gems” we get from our children are those moments before they go to sleep.  Our children are still young enough to want five minutes with Mum or Dad at bed time.  As frustrating and distracting as I sometimes find the task, once I lie down in the bed next to them and tune into their thoughts and ramblings, I am always grateful that I took the time.

In fact, these precious moments have been the inspiration for many of my blog posts here.  This one is no exception… I lay down with my nine year old daughter last night at bedtime and the first thing out of her mouth was…

…”Mom, how many times do we blink in a day?”
Humans usually blink about 10 to 20 times a minute.  A blink flushes the eye with fresh tears, supplying essential nourishment to maintain a healthy eye surface.  This can refresh the eyes, clear away any dust and debris and prevent infection.  Blinking can also brighten and refresh images received by the retina.

How long does a blink last?

A blink typically lasts about half a second.  If you add all this up we actually have our eyes closed for at least 120 minutes a day.  Blinking does serve the necessary purpose of moisturising the ocular surface but apparently the rate at which we blink exceeds the requirement for clearing the eye.  So are there other reasons for this process?
Yes! Recent studies  have shown that blinking also gives our brain a little “nap”, switching from cognitive to non-cognitive focus (from conscious focused mode to day-dreamy imagination mode), a “micro” respite from the task at hand.  This process allows us to “reboot” and refocus!

Do women blink more than men?

When I mentioned to my husband that I was writing this blog on blinking he said “Oh, do you mean how women blink more often than men?”  I went off, a little indignant to double check, and I am happy to report that this one is a myth.  There is no discrimination between the sexes on blinking rate.  Other factors, such as fatigue, environment and medication can of course effect how often we blink.

Blinking and social cues?

Although we tend to blink unconsciously we do still follow certain social cues or natural pauses. An interesting study observing an audience watching a short video found that they synchronized their blinking to occur at points in the video that required less attention or where they were less likely to miss something of importance.

During social conversation we are more likely to time our blinking with pauses in speech, both for the person talking and, a second or two later, the person listening.

The frequency of blinking also depends on the particular type of social interaction and the emotional state of the person.  Blink rate tends to increase after a lie has been told, for example, but remains unchanged when telling the truth.  Stress, anger and anxiety also increase blink rate.  People suffering from depression have exhibited faster blink rates as well as those with certain mental health issues.

What about blinking in other animals?

Some animals (such as the tortoise) blink their eyes independently of each other. Some have a very slow blink rate (such as cats and rabbits).When birds blink their lower eye lid comes up to meet the upper lid, in mammals it is the reverse.An interesting study conducted on the blink behaviour of 71 different species of primates reported a correlation between primate size and increased blink rate.  Of even more interest was the observation that blink rate increased in species that lived in larger greater group sizes and experienced more social interaction.

 Blinking and Art…

I came across an interesting reference to blinking while writing this blog that I thought it was worth sharing.   It refers to the famous Mona Lisa painting by Leonardo da Vinci.  The enigmatic face of Lisa Gherardini captured on the canvas has lead to centuries of speculation as to the secret behind her smile.  It appears that da Vinci used a layering and blurring technique that causes our eyes to re-adjust every time we blink, thus restarting the puzzling scrutiny of that mysterious expression.
The Mona Lisa – image source Wiki Commons
Fun Friday – exploring Acids and Bases

Fun Friday – exploring Acids and Bases

I know, I know, I shouldn’t call in Fun Friday when I am posting it on a Saturday, but ignoring the fact that I am a day late with this regular blog post, I hope you enjoy!

Exploring Acids and Bases

What are Acids and Bases?

Acids and Bases are chemicals that occur naturally in lots of different substances.
Acids can be found in things like lemons and vinegar; Bases (also called Alkali) are found in toothpaste or many cleaning products. Bread soda is a base.

Lets learn more!

The Bronsted-Lowry Definition of an acid and a base is…
  • Acids are substances that gives up hydrogen ions (H+).
  • Bases are substances that accept hydrogen ions (H+).
  • These hydrogen (H+) ions can change things in many ways, including taste and colour!

Did you know… that the word acid comes from the Latin word acidus meaning sour!

Lemons contain an acid called
citric acid that gives them that
sour taste!

The pH Scale

The pH scale is a scale that measures how acidic or basic a substance is.
The pH scale goes from 0 to 14. The scale for acids goes from 0 to 7. A very strong acid has a pH of 0. The scale for bases goes from 7 to 14. A very strong base has a pH of 14.
Something with a pH of 7 is said to be neutral (neither an acid or a base). Pure water has a pH of 7.
photo credit: ViaMoi via photopin cc


“Did you know… that bee sting venom contains an acid called formic acid!”

Acids and bases in plants!

An indicator is something that can determine whether a substance is an acid or a base. Many indicators are natural chemicals.
A group of chemicals called anthocyanins are naturally present in a number of different plants such as apples, grapes, the leaves of many trees and flowers such as roses and poppies.
photo credit: Jason A. Samfield via photopin cc

The colour of anthocyanin changes depending upon the acid levels (pH) of the plant. The bright red and pink colours of Autumn are due to anthocyanin and acid levels in leaves (for more on this see my previous
post “Carrots, Cabbages and Cups of Tea“).

Anthocyanin changes colour from red to pink, to purple, to blue, to green as the pH changes from 0 to 14.
photo credit: Parvin via photopin cc

“Did you know… Hydrangea flowers can change colour depending on the pH of the soil. In acidic soils chemical reactions occur to make aluminium available to the plant, turning the flowers blue, in alkaline (basic) soil these chemical reactions cannot occur so the flowers remain pink.”


Experiments to try at home:

Make your own sherbet

You will need… icing sugar, citric acid, bread soda, flavoured jelly crystals, a teaspoon, a tablespoon and a mixing bowl.
What to do… add one teaspoon of citric acid and one teaspoon of bread soda to the bowl. Add three tablespoons of icing sugar and two tablespoons of flavoured jelly crystals. Mix all together then place a small amount on your tongue! The sherbet should bubble a little and you should feel a tingle on your tongue!
So what is happening?… you have just created an  acid-base reaction in your mouth! When the citric acid, bread soda and saliva in your mouth combine they react together to give off a gas, called carbon dioxide, that forms tiny bubbles that you feel fizzing on your tongue!

Cabbage juice experiment

You will need… a red (purple) cabbage, a knife, a saucepan, a sieve, an ice tray, clear vinegar, water and bread soda
What to do… cut up half the red cabbage and add it to a pan.  Ask and adult to cover with water and bring it to the boil then leave to cool.  Once cool pour the cabbage juice through a sieve, collecting the juice in a bowl.  Pour the juice into an ice tray and freeze until it hardens into ice-cubes.
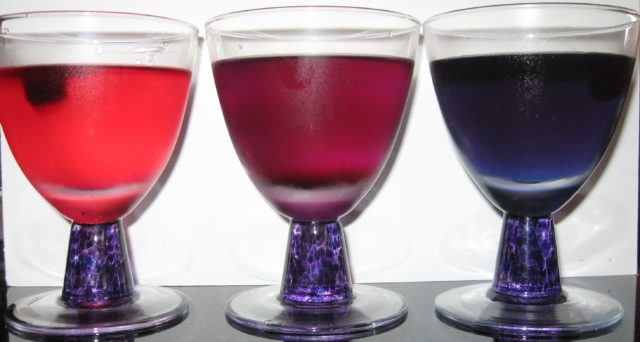
Half fill three glasses, one with water, one with clear vinegar and one with water mixed with half a teaspoon of bread soda. Now drop a cabbage juice ice-cube into each glass and see what happens.
Cabbage Juice ice cube experiment


So what is happening?… red cabbage contains anthocyanin. When the cabbage juice mixes with the acid (vinegar) it turns a red/pink colour; when it mixes with the bread soda solution (base) it turns a blue/green colour.  The water is neutral (pH 7) so it does not alter the purple colour of the cabbage juice.
Father’s Day tribute – and the science behind the bond!

Father’s Day tribute – and the science behind the bond!

It is Father’s Day here in Ireland.  A day to reflect on our own bonds and experiences with that special man in your life that has known you since birth!  My own story is a wonderful one, my Dad and I are very close and my life memories are filled with lots of special moments with him.

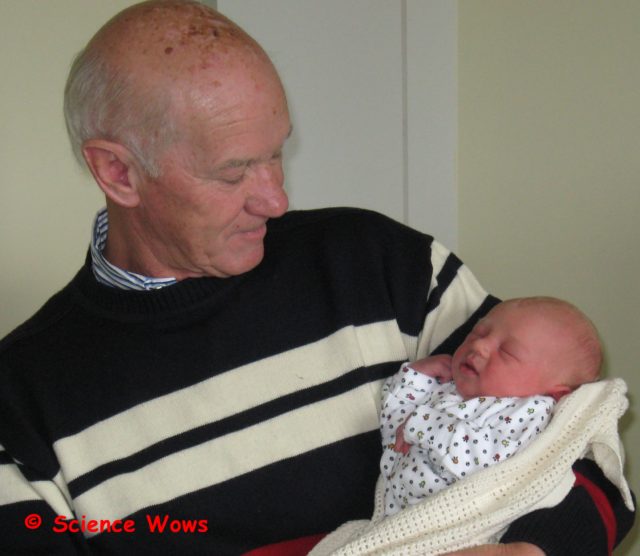
My Dad meeting his 6th grandchild for the first time!

I have a lot to thank him for…

…the weekends he gave up to bring me to yet another horse riding competition or event (only really appreciated this one when I had kids of my own, up until that it never occurred to me that he would have anything else to do ;0)  )
…the lovely way he explained to me how special I still was to him when my little sister was born!
…the day he took off from work and brought me to Galway to see what a nice place it was… this was after I got my “Leaving Cert” results and realised my dreams of becoming a vet were gone… he knew me well enough to know not to try to talk me out of my “depression” but to open my eyes to other possibilities in a different way!  Considering I have now lived in Galway for most of the past 24 years, I think he can chalk that one up as a success!
…the way he stayed up all night reading my PhD thesis when I first showed it to him… and I mean ALL of it… he even had the typos and edits ready for me the next day!
…the way he treated every drawing, every card, every poem I gave him as a child as an amazing work of art… in fact it seems he still has them all!
…the way he is still the one I go to for advice!
…the way the sound of his voice will still make me cry if something has just upset me.
…the way I can see our bond live on with his relationship with my children!

So I thought today would be a good day to reflect on what a wonderful man he is… and to take a look at the science behind the bond between a father and his children.

A lot has changed in a father’s role since I was born.  My Dad was certainly not present at my birth, he was at work and came to see me once he got the call that his first daughter was born!  By the time my own children were born things were very different…my husband was not only present at their births but was actively involved in the whole process, he was my “hypnobirthing” partner and helped me stay relatively calm and focused throughout each birth!

My Dad was also not as “hands on” as most men are now… nappy changing, bottle preping and the like were not really part of his repertoire.  However there is no denying the strength of the bond he has with all three of his children.

The science behind the bonding process between mother and child is more commonly known and understood but there is a definite and undeniable bond formed between father and child also, and although less studied there  are many scientific explanations emerging.

It is now known that expectant fathers may also experience hormonal changes coming up to, during and after the birth of their child.  Studies have shown a drop in levels of testosterone and an increase in prolactin and cortisol levels in men during the weeks coming up to the birth.  These hormones are more commonly associated with expectant mothers.  Prolactin levels are also seen to be higher in fathers than in men with no children, and higher in fathers with young children than with older children.

Studies have also shown an increase in oxytocin levels in fathers after the birth of their child.  This is the hormone that is strongly associated with aiding strong bonding between mothers and their babies.  Fathers have shown an increase in active play and interaction with their infants after receiving oxytocin.

Research is still ongoing into the reasons for these hormonal changes and more importantly the role they play in forming and strengthening the male parental bond.  It is possible they play a role in calming fathers, in increasing their sensitivity to the smell and touch of their young children and in encouraging more play and interaction between father and child.  In other words they may help dampen down the aggressive side of the male and bring out his “inner child”!

Regardless of the science and the research behind it, there is sometimes no need to examine and explain the love, care and affection between a father and his children…

….so today I want to say a big HAPPY FATHER’S DAY  to my wonderful Dad and a big thanks for all the love, support and encouragement he has always given me!  I hope you like my unconventional gift Dad x