Science Wows is all about sparking children’s natural interests in Science!
It is learning while having fun!Whatever the event, whatever the venue it is Hands-on Science for children. Party entertainment, school visits, fun days, corporate events …. there are even local science camps during school holidays.
If you can’t explain it to a six year old, you don’t understand it yourself”
That is (apparently) one of Einstein’s many quotes. It took me a while to realise just how true these words are, but once I did I was able to marry a love of writing with a love of science. I discovered that once I broke things down to their most simple components
Dr. How’s Science Wows was set up by me (Naomi) in 2011. My background is biochemistry with a PhD in Molecular Biology; I have worked in the Medical Diagnostic Industry and lectured at third level colleges but the crux of what I do lies in many years working with children; from two to 20 they all have one thing in common…. curiosity!
Last week the Fun Friday blog was all about density, how less dense liquids will sit on top of more dense liquids and how some liquids such as oil and water do not mix!
Milk and cream are quite like the oil and water mix as they are made up of fat and water. So why do they not separate into two layers like the oil and water we used last week? That is because the fat is broken up into tiny little droplets that float evenly throughout the water. This is an example of an emulsion.
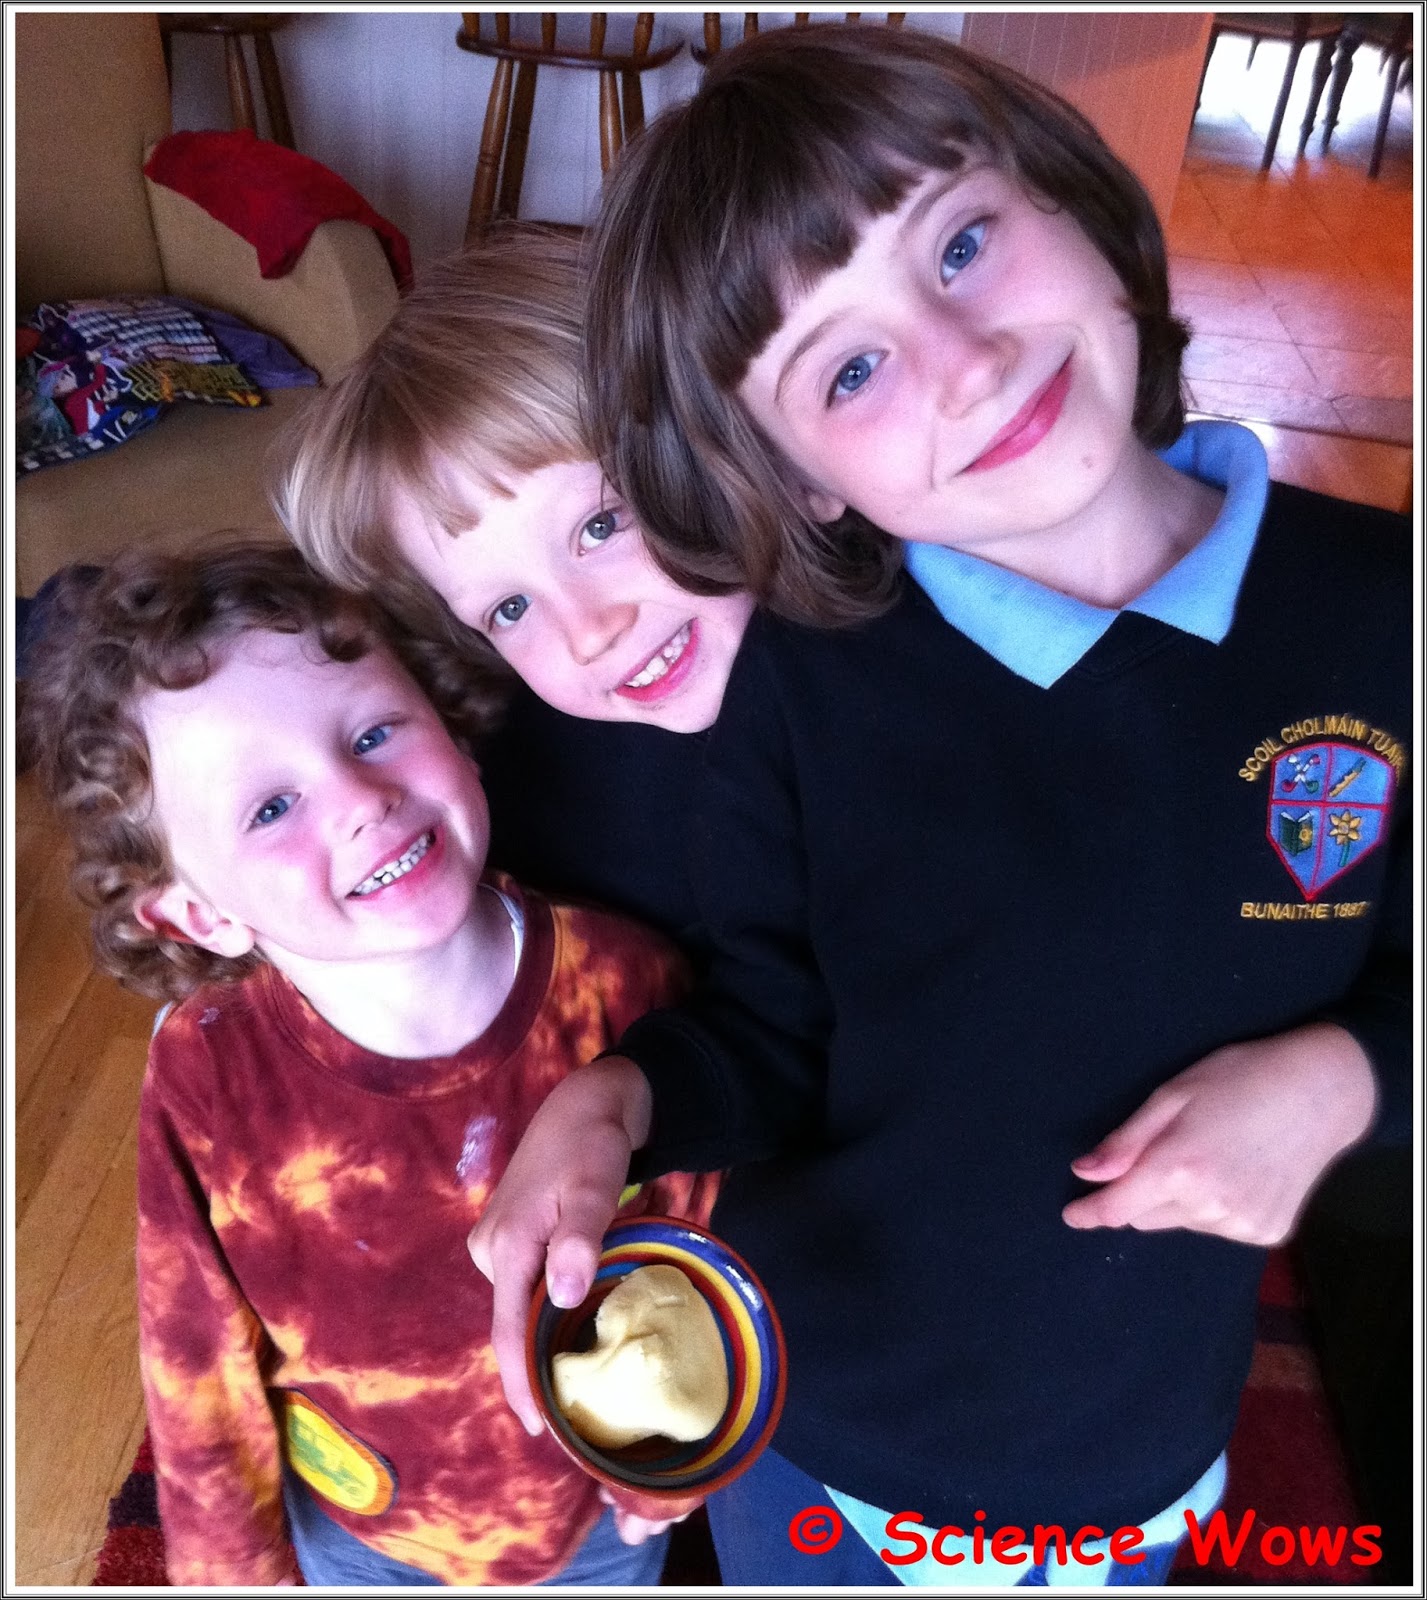
For today’s Fun Friday we separated the fat from the water in cream and made some yummy butter! My Fun Friday Science Team really enjoyed this experiment especially as they got to eat the results… spread thick on their favourite bread!
How to make butter…
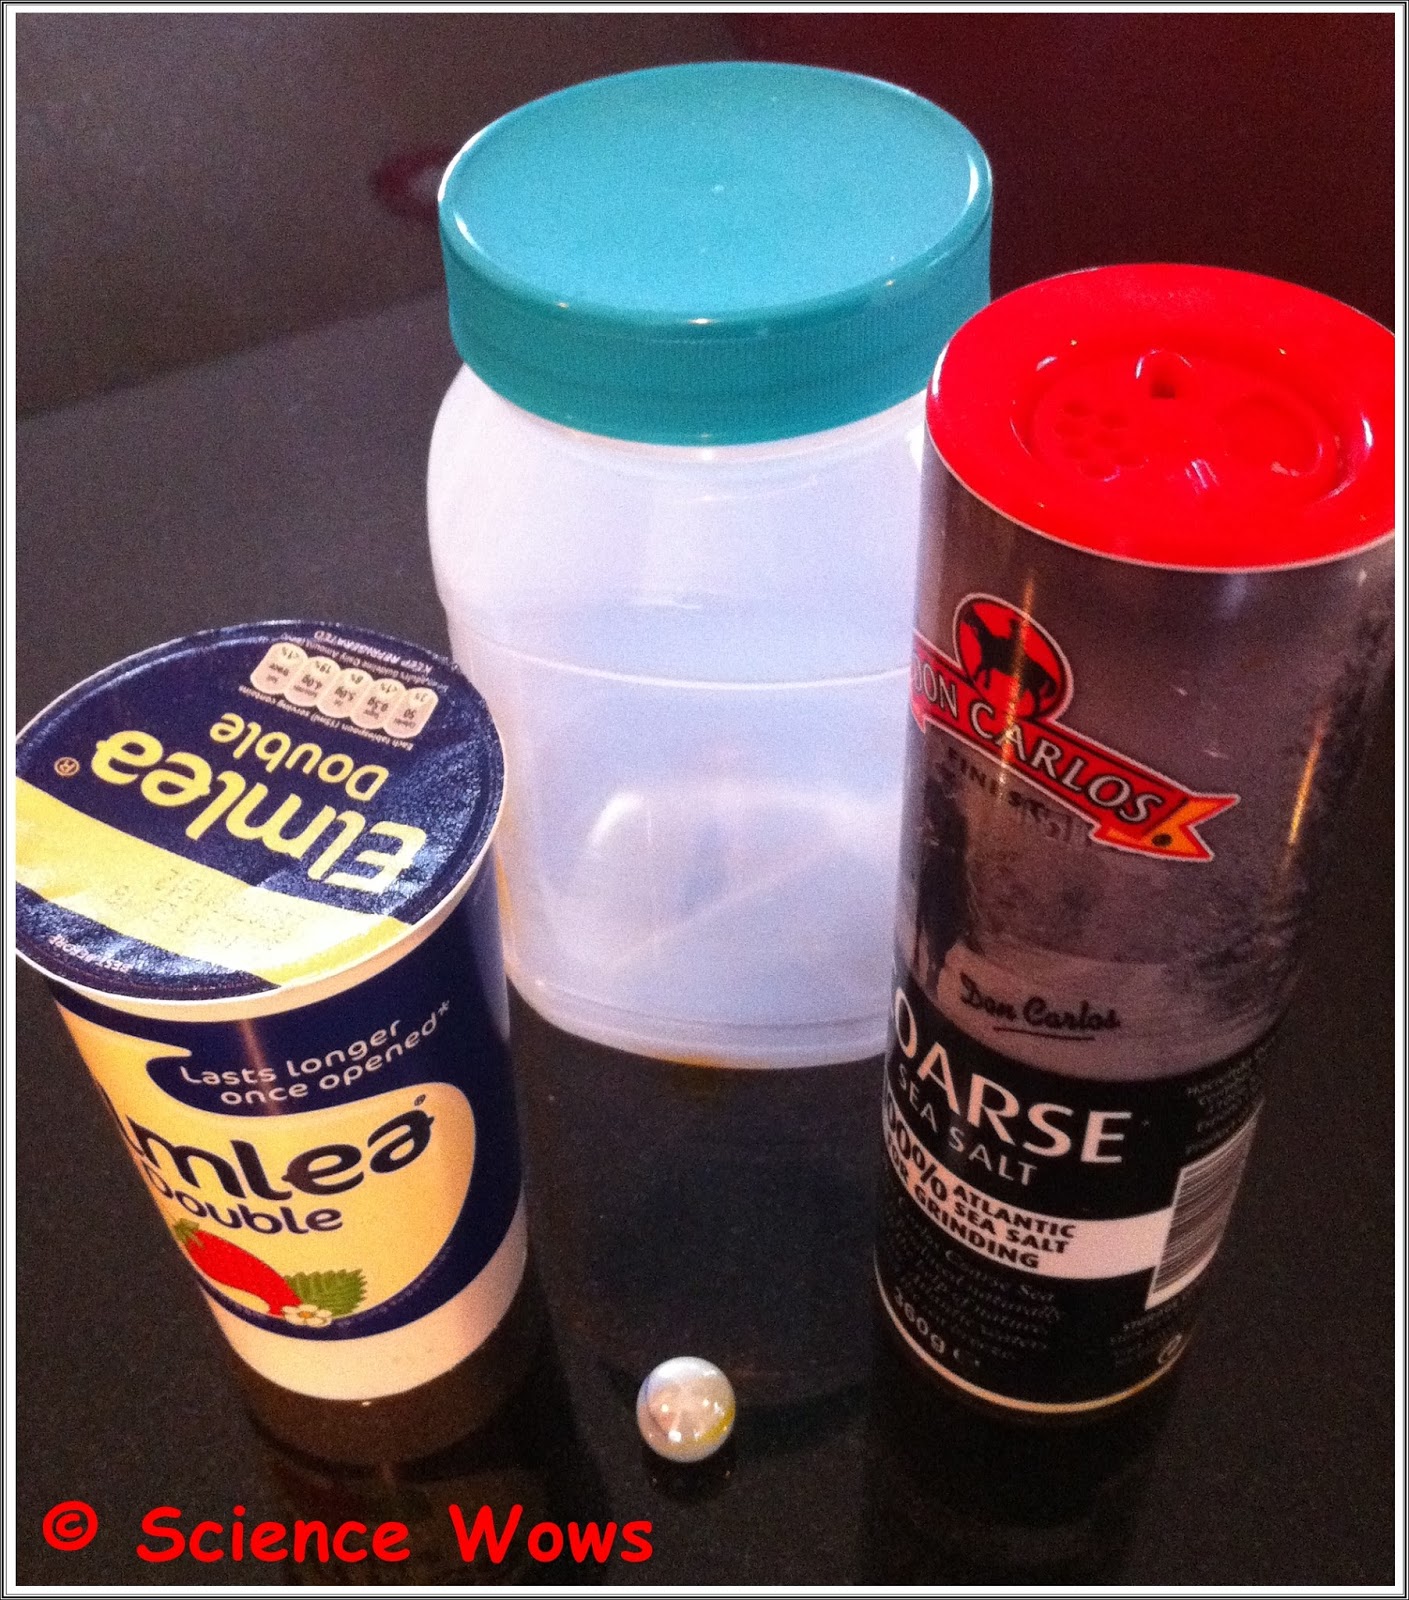
What you will need: double cream, salt (optional) a jar with a screw tight lid (preferable plastic!) and a marble (optional)
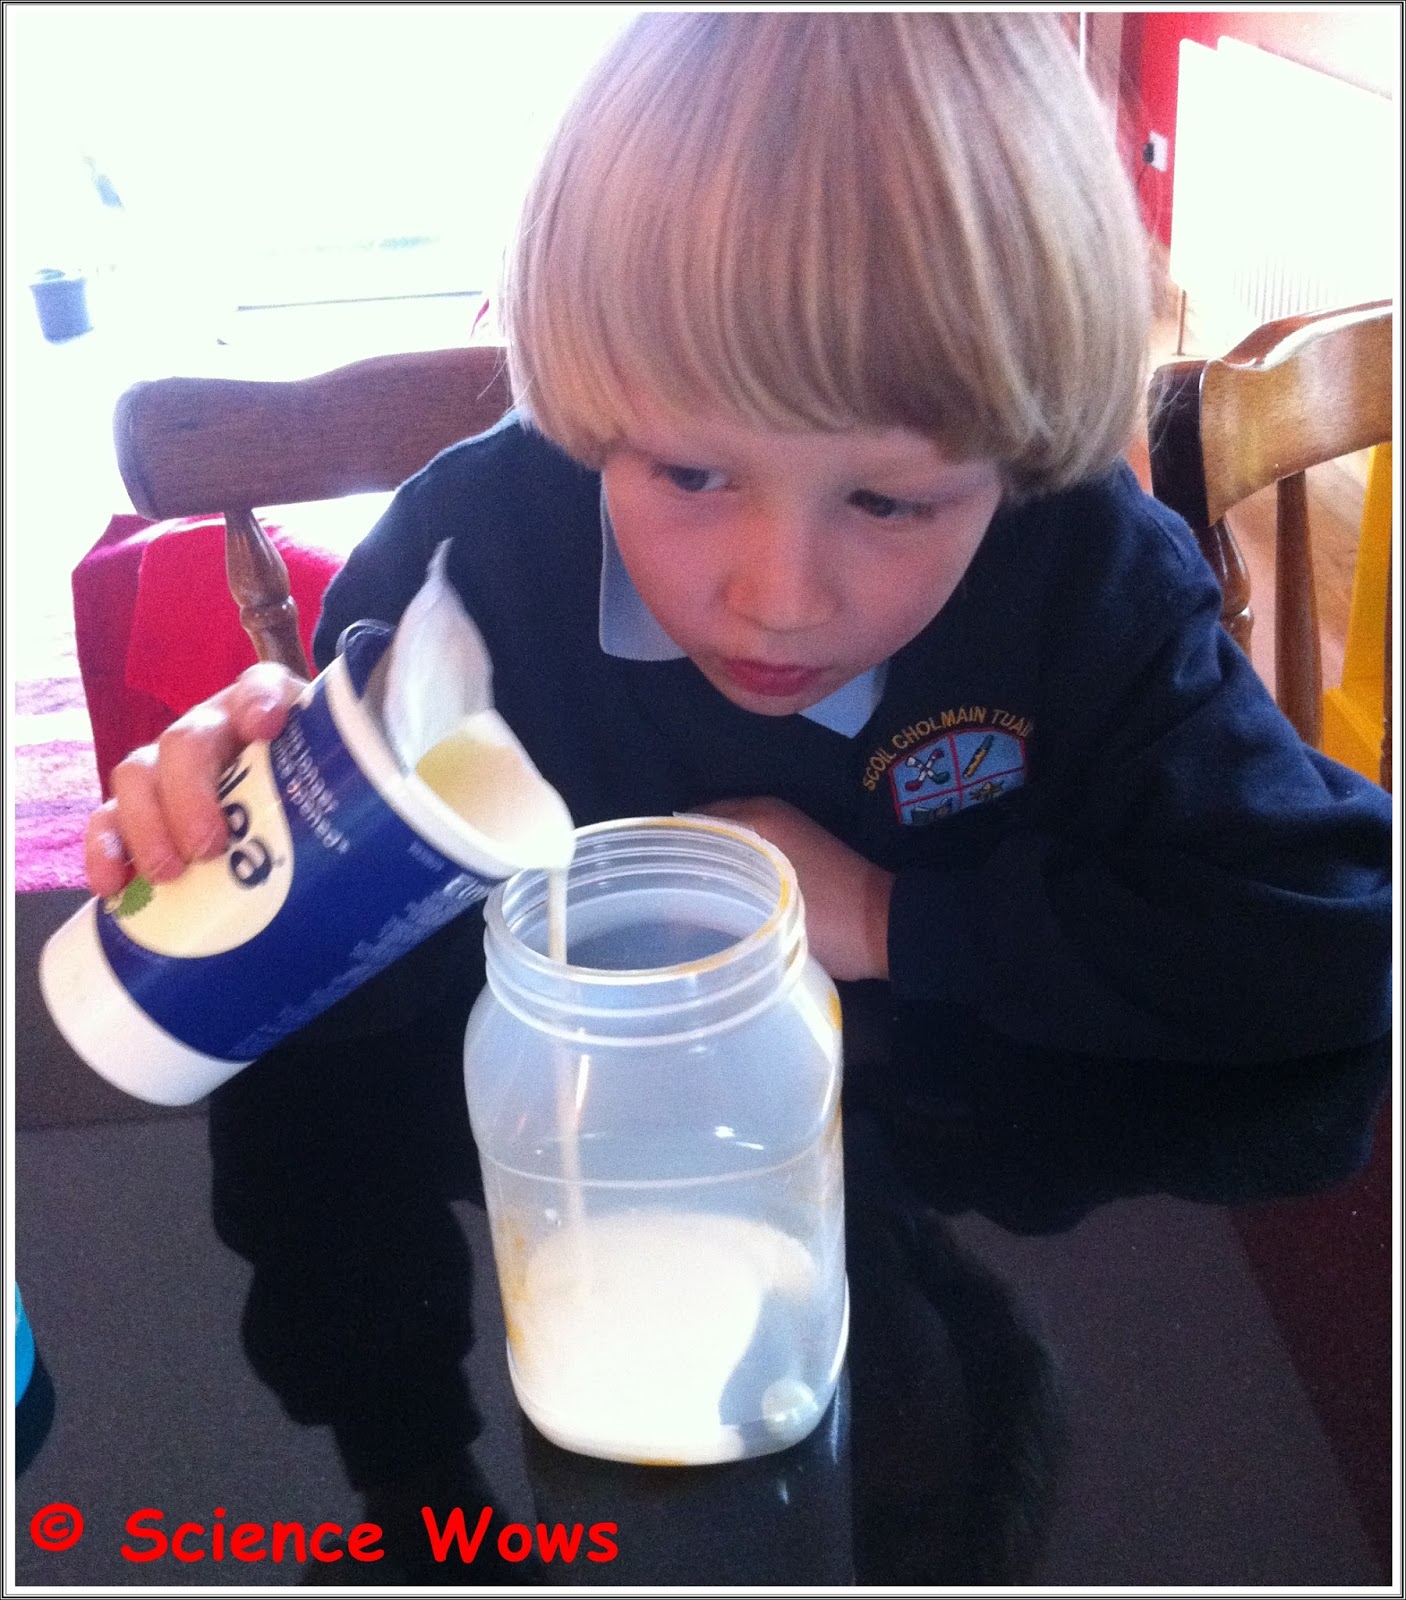
Add the marble (if using) and the cream to the jar (no more than half full).
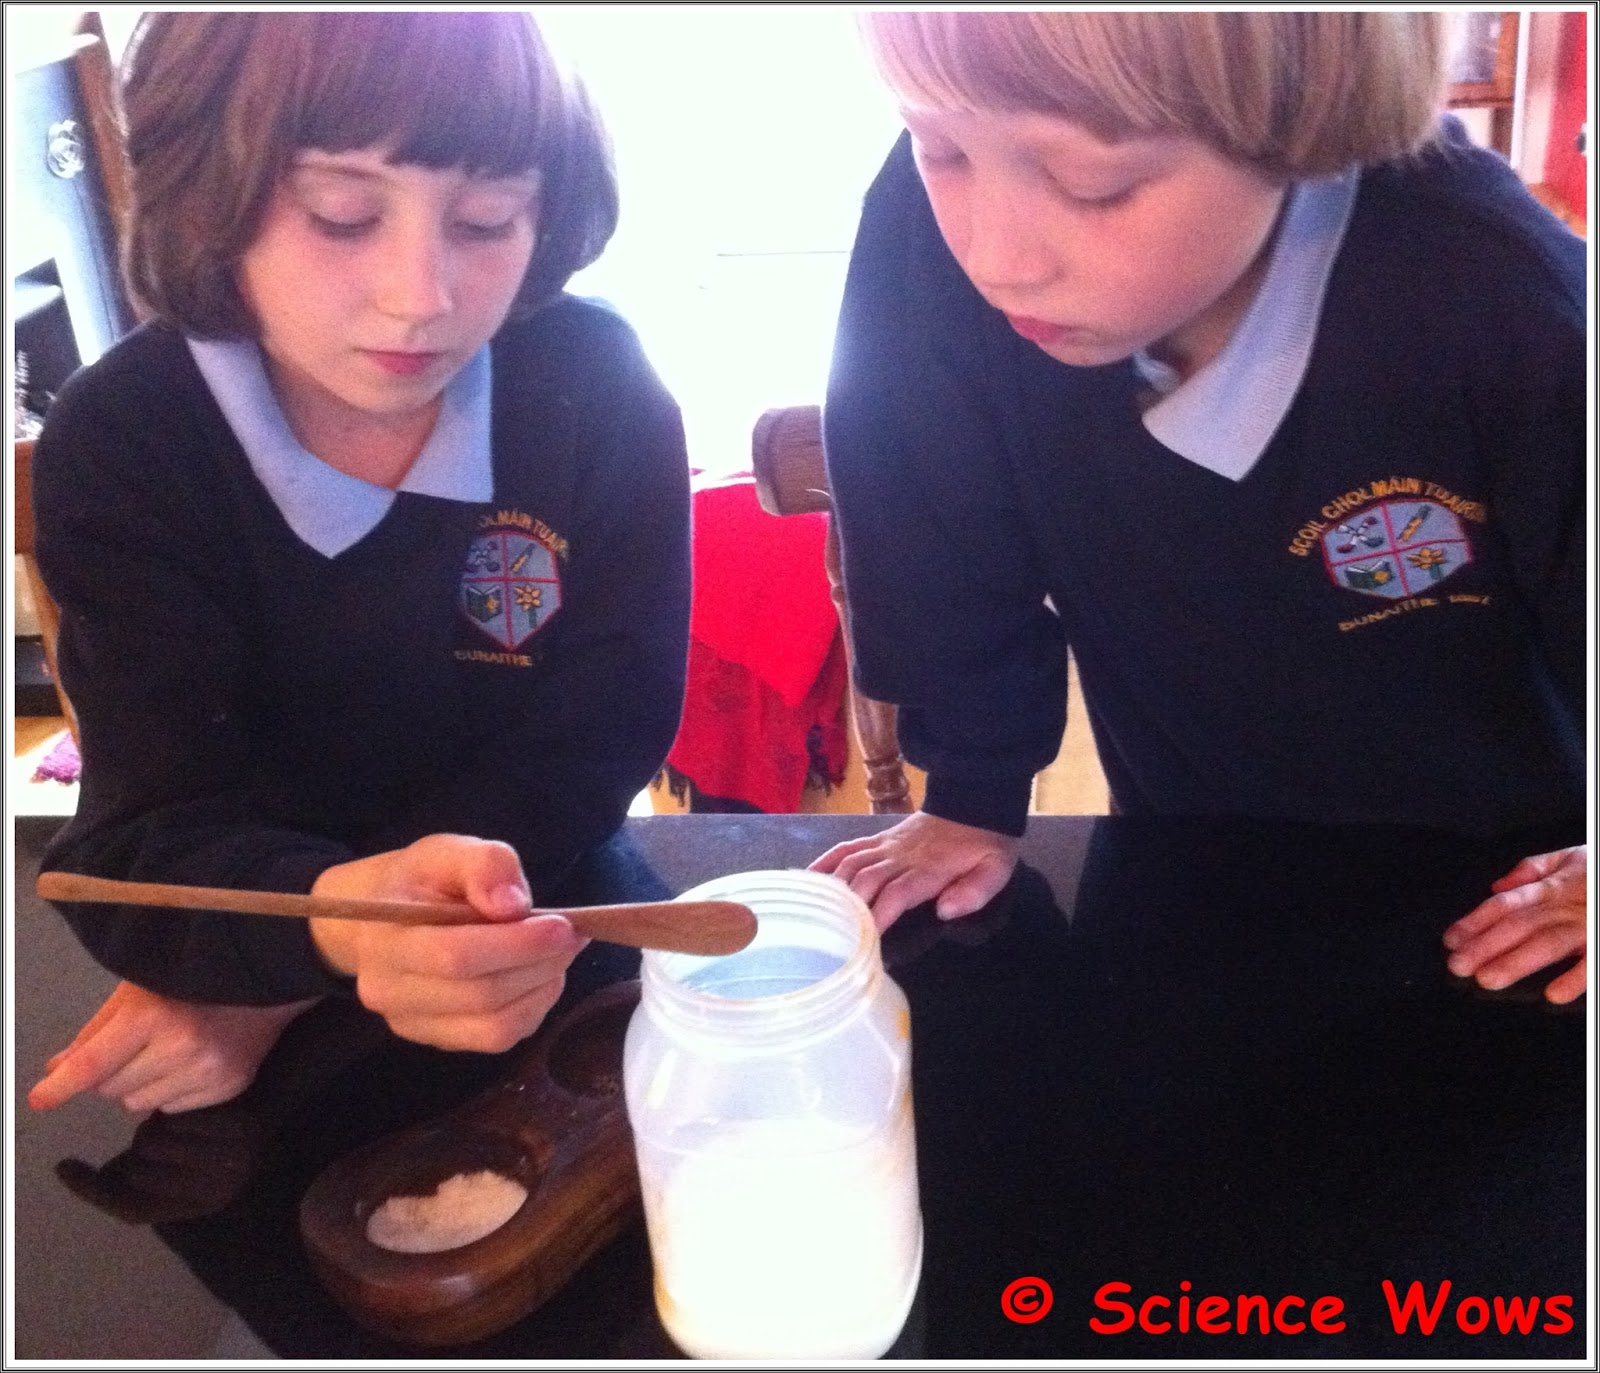
Add salt (if using) … we used about half a teaspoon.
Put the lid on tight and start shaking….
….And shaking….
…And shaking!
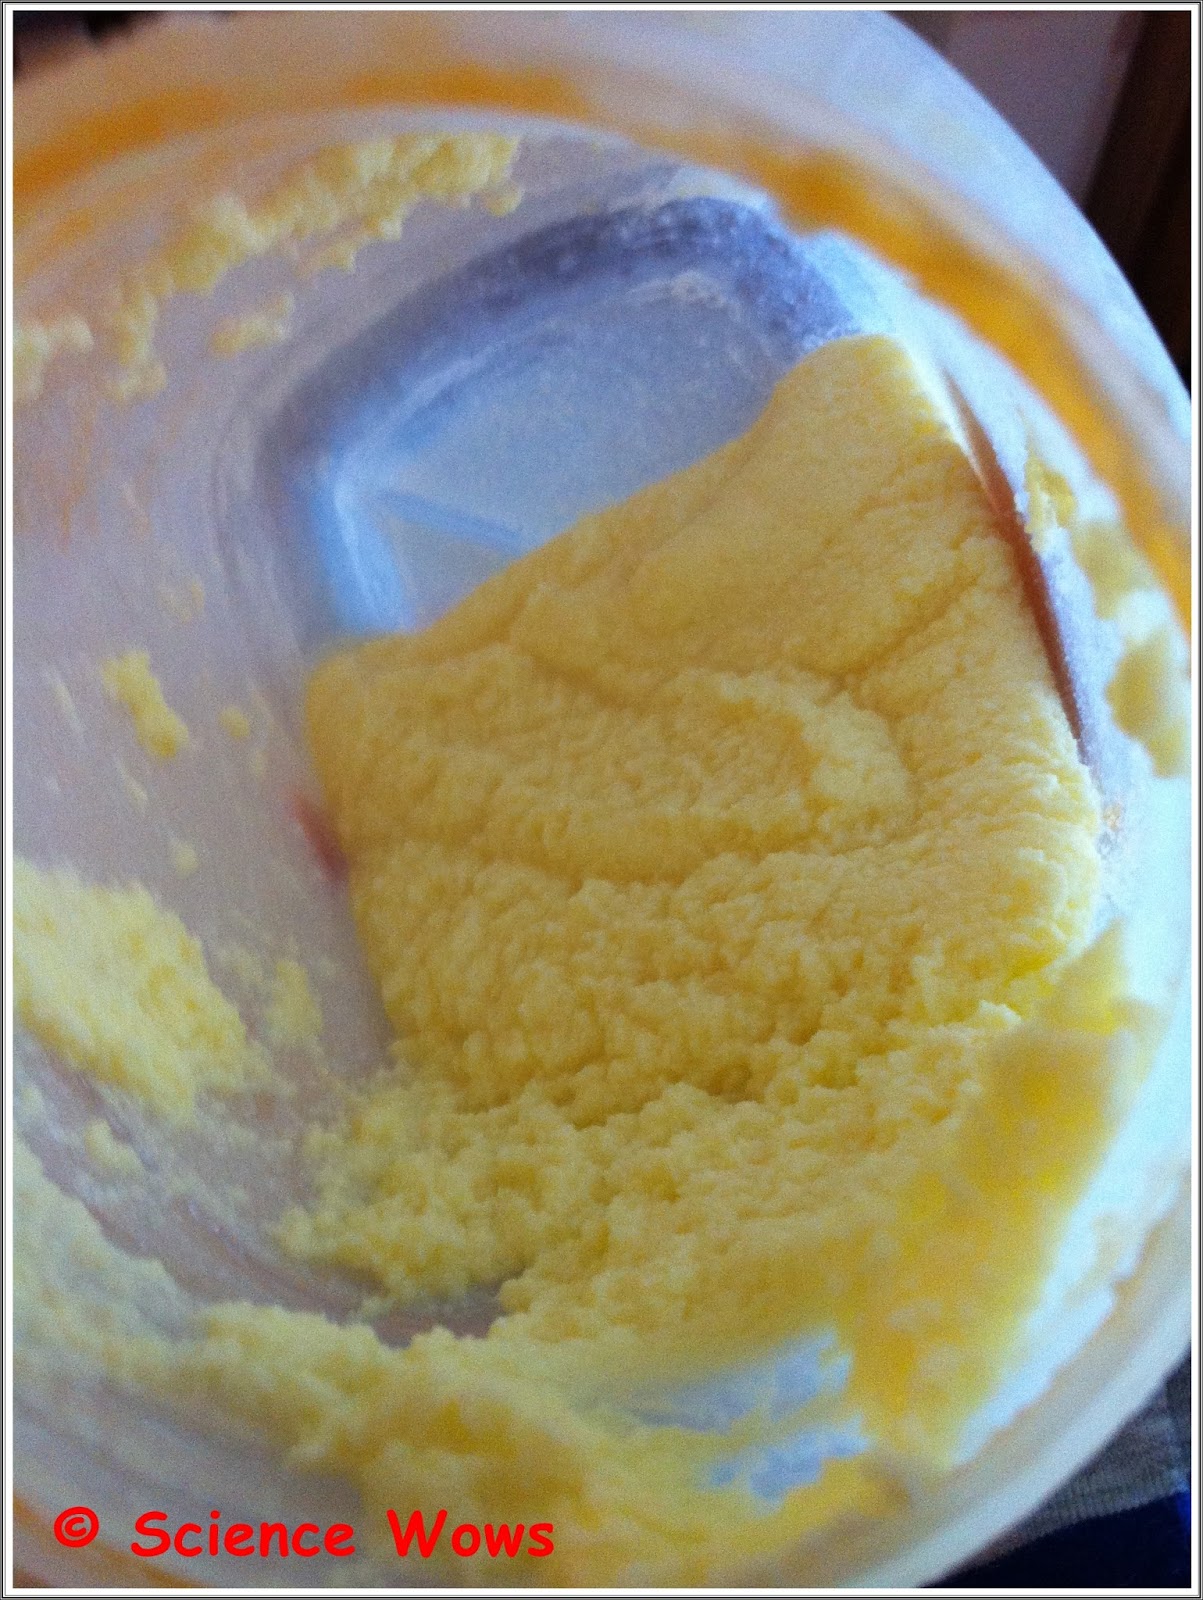
First it turned to whipped cream, then small lumps of butter started to form!
Keep shaking (about 10-15 minutes) until the butter lumps start to get bigger and clump together and you can see the watery bit separate out.
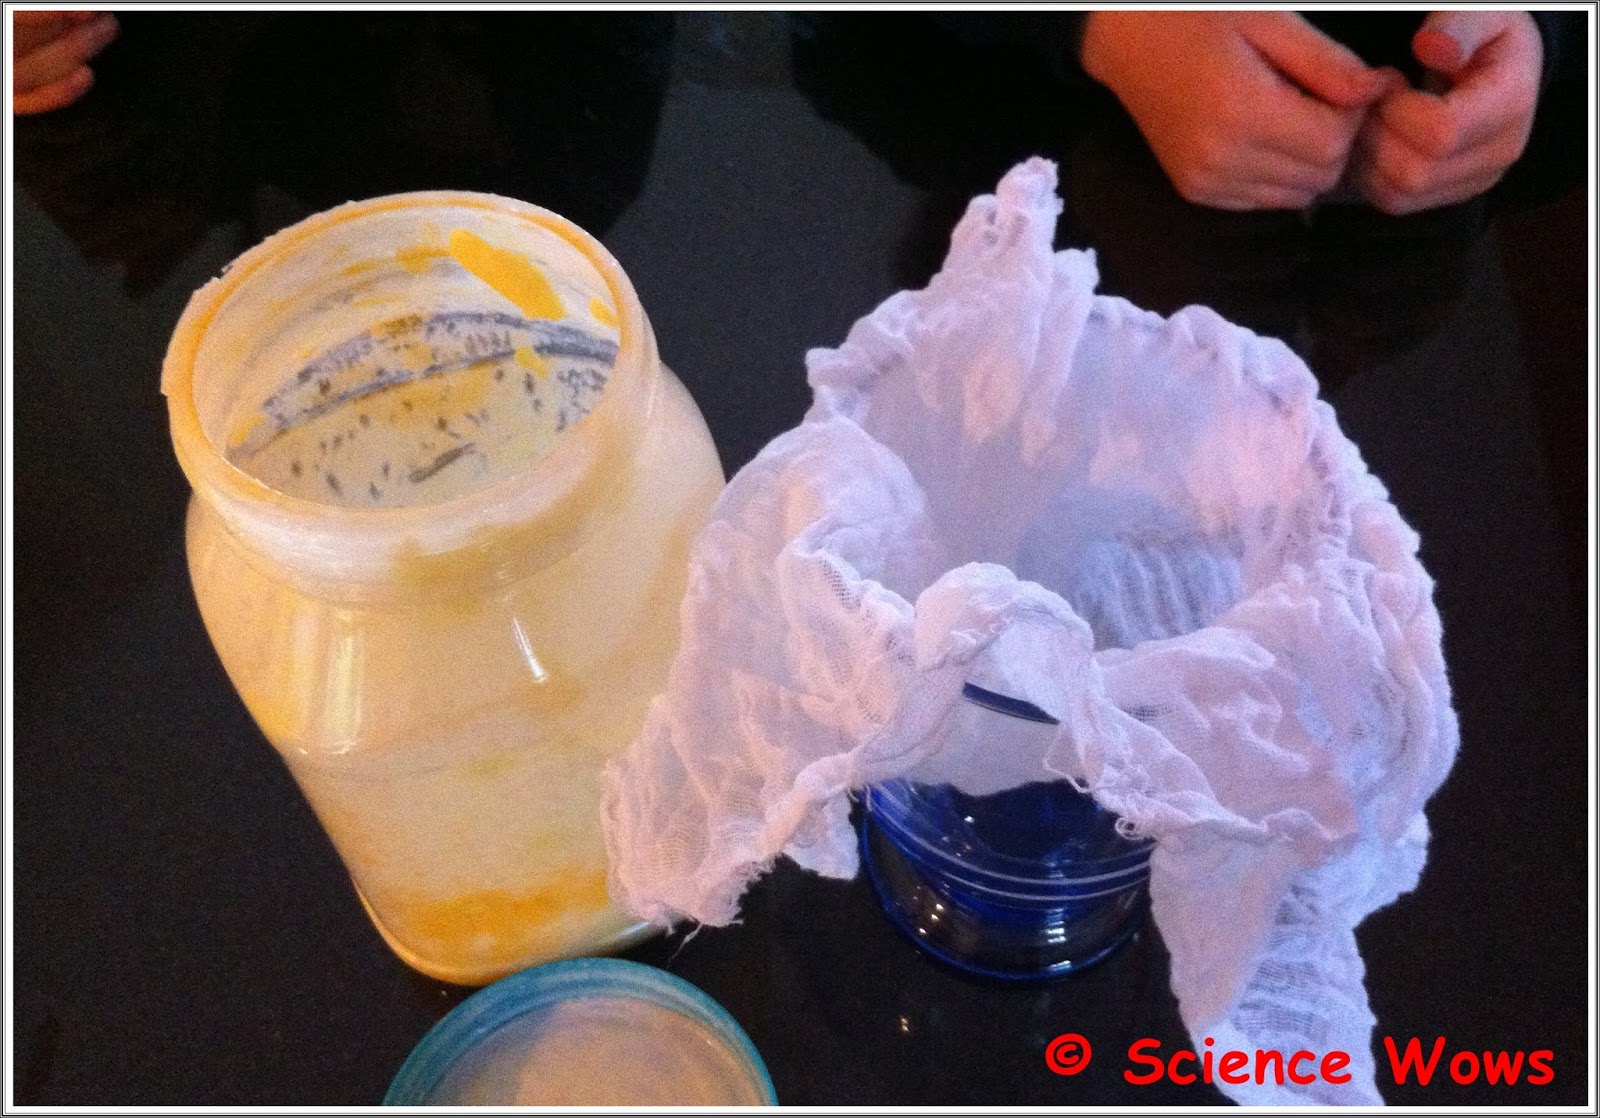
At this stage you can stop shaking (phew!); now you want to separate the butter from the watery bit (which is actually buttermilk!).
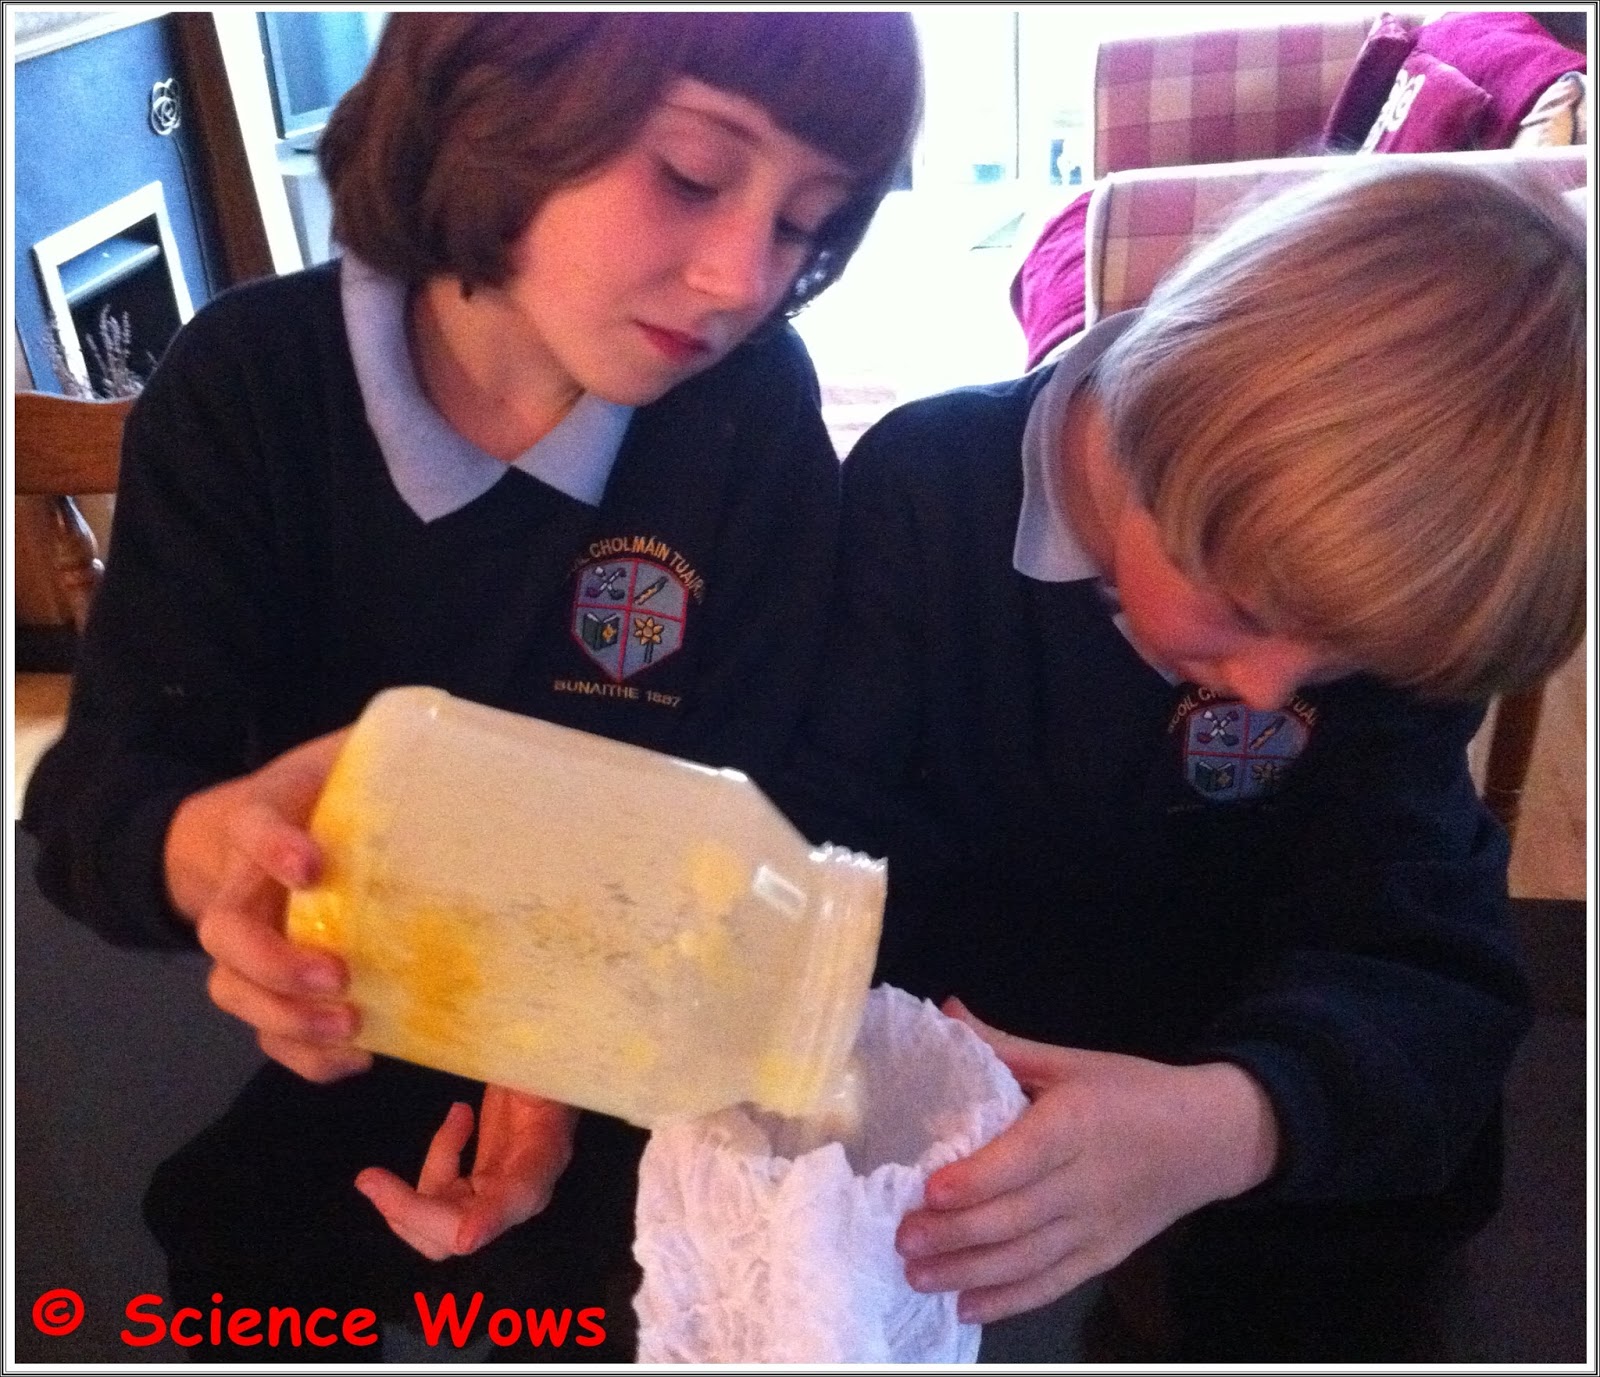
We used clean muslin to separate the butter from the buttermilk, but a few sheets of kitchen roll will work too, or even a clean tea towel.
Squeeze the lump of butter to remove more of the liquid!
Et voila! You end up with a lovely yellowy lump of butter and some buttermilk (we used our buttermilk for making bread!)
You can add salt at this stage instead if you prefer!
We made this!
So what happened (the science bit!)?…
As I mentioned the cream is an emulsion…. a liquid suspension of tiny droplets of one liquid floating in another liquid. In this case tiny droplets of milk fats float in mainly water. When we shake the mixture the tiny droplets of fat collide with each other and the fat sticks together. If we keep mixing most or all of the fat will stick together in one big lump, completely separated from the water. The resulting lump of milk fats is our butter!
This was a really fun and simple experiment that made my kids think about the science behind their food and where it comes from. It has started a number of discussions in our home and no doubt will lead to a few more posts on this blog! Of course once we had made the butter I had to make some yummy bread to put it on and now the kids want me to make the blackberry jam from our stash in the freezer. 🙂
Enjoy your weekend!
If you try out this experiment or have any questions or things to add, do please leave a comment below, we love to hear from you!
My nine year old daughter went a bit crazy on the butterflies and moths this Summer. It was great to see so many of them and herself and her friend spent hours catching them, minding them in the insect observer they have, identifying which type they were and eventually setting them free. To my knowledge none of them were harmed in the process and along with plenty of fresh air she also got to learn a lot about nature!
Caer asked me the other day…. “What is the difference between a butterfly and a moth?”
Moths and butterflies both belong to the order Lepidoptera (which means scaled wings). They both start their lives as caterpillars and then transform into winged insects that eat nectar in the adult phase of their life. There are however many general differences between butterflies and moths, although for each difference there is usually a moth or butterfly that is an exception to the rule!
So here are some differences between butterflies and moths….
Most moths are active at night (nocturnal) while butterflies usually fly during the day (diurnal ).
The antenna on butterflies tend to have a little ball at the end, these are referred to as clubbed, while the antenna of moths are usually plain or feathered.
Clubbed antennae on buckeye butterfly
photo credit: jjjj56cp via photopincc
Feathery antennae on white ermine moth
photo credit: e³°°° via photopincc
Butterflies fold their wings together behind their back when at rest while moths tend to place their wings down their backs.
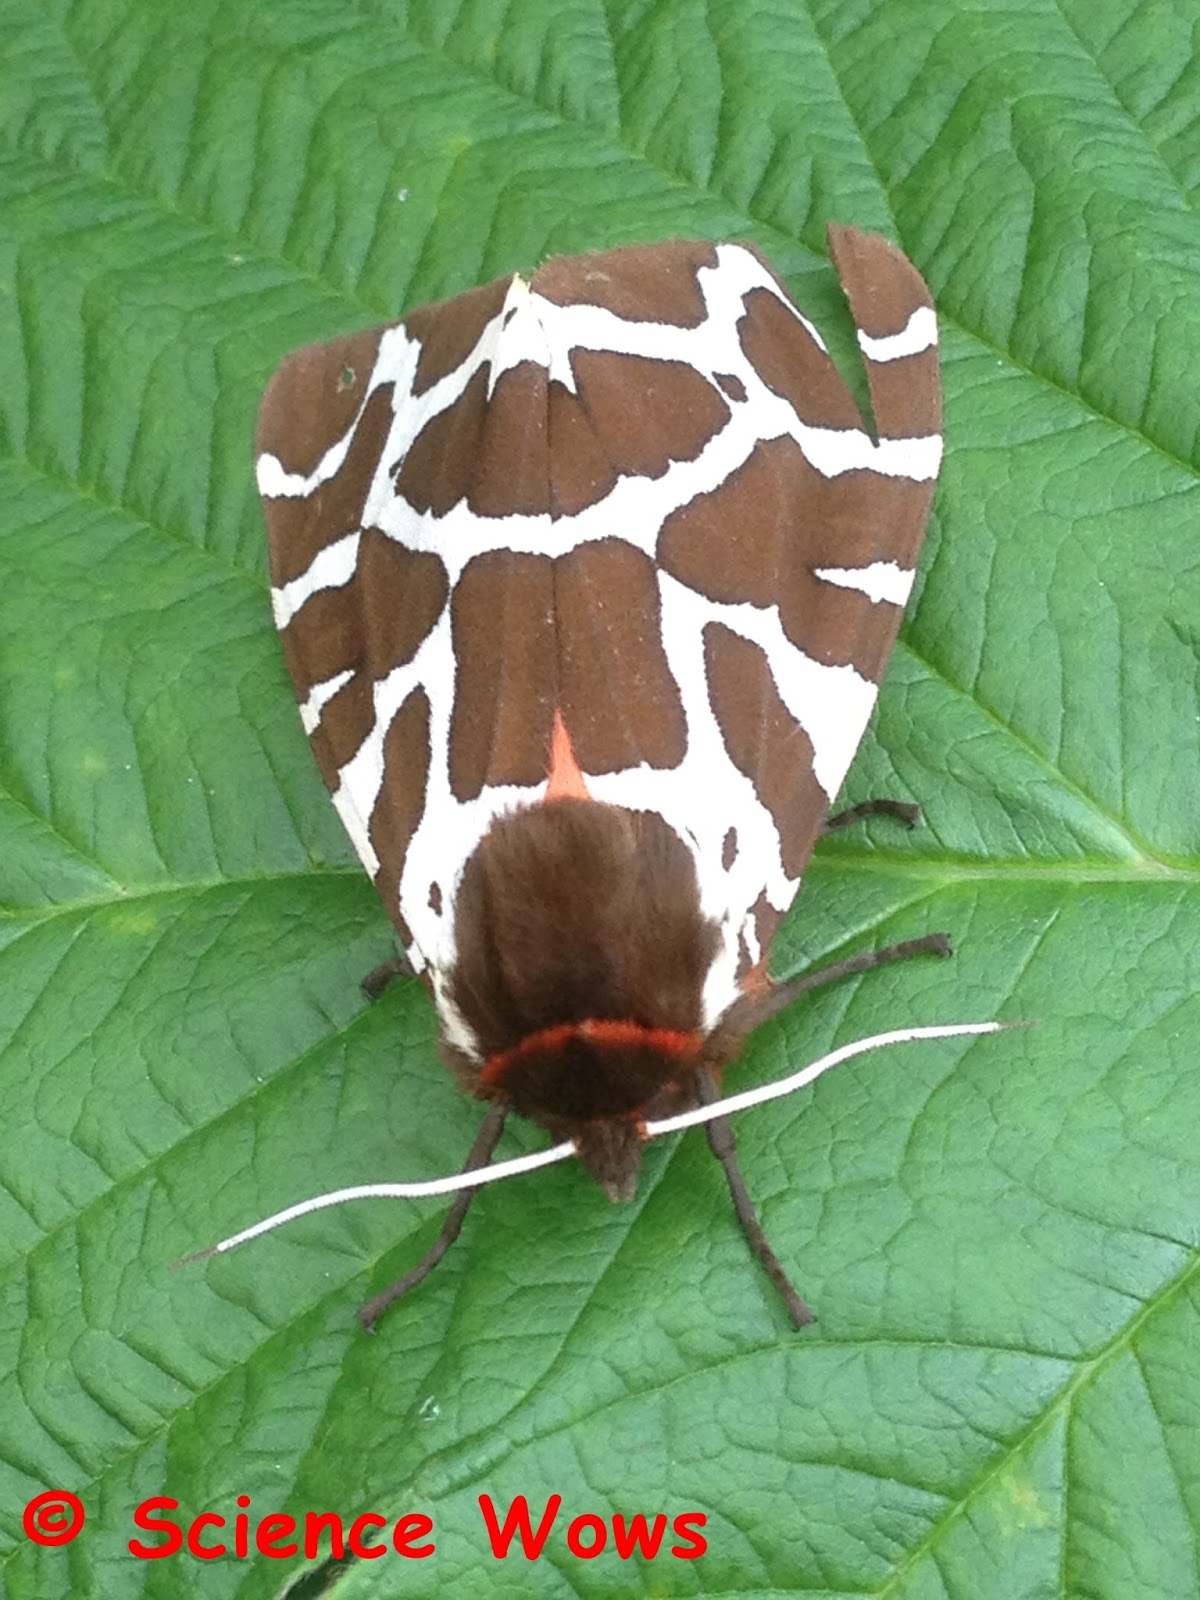
Wings folded back along the body of a tiger moth
Wings folded together on a Queen butterfly
photo credit: jjjj56cp via photopincc
The forewing and hindwing of a moth are attached together by a filament called a frenulum. This allows the wings to move together in flight. Butterflies do not have frenulums.
Both butterflies and moths undergo a complete metamorphosis (homometabolism) from egg to caterpillar, to chrysalis to adult. However the chrysalis of a moth is usually enclosed in a cocoon of silk while that of a butterfly is not.
Butterflies tend to be more colourful than moths, although this is not always the case!
Moths tend to have hairy, plump bodies while most butterflies have more smooth, slim bodies.
An exception to the rule…
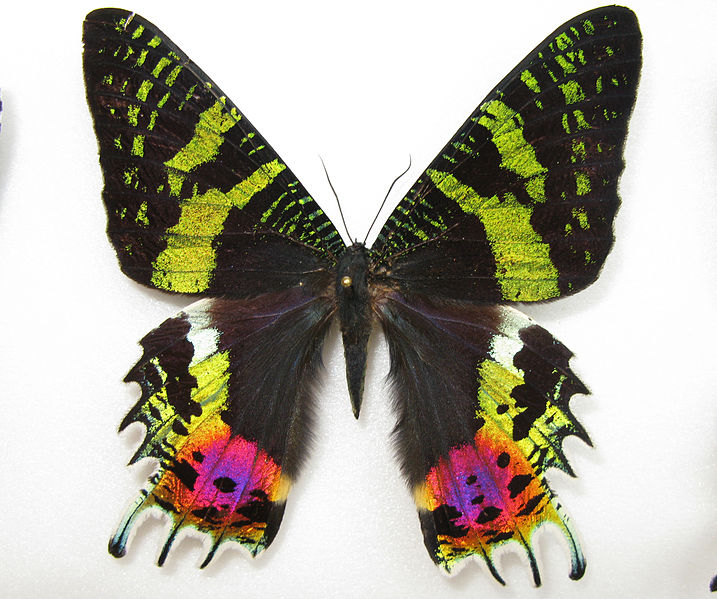
There are, as I mentioned, plenty of exceptions to all these rules…. the Madagascar sunset moth (Chrysiridia rhipheus) is a good example. The bright colours of this day flying moth are more akin to the colours we expect from a butterfly rather than a moth! As always, Mother Nature likes to keep us on our toes!
The Madagascar sunset moth
Image credit: Anaxibia via Wikimedia Commons
If you have spotted any unusual butterflies or moths lately or have anything to add please leave your comment below!
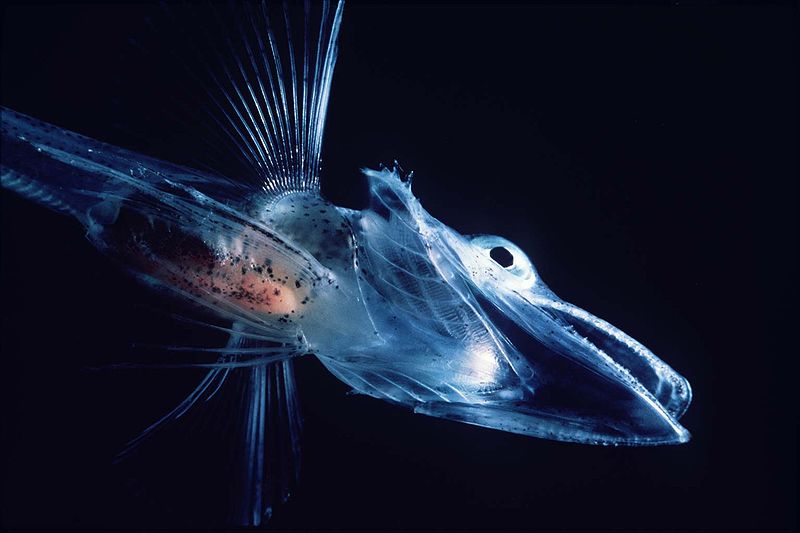
How did you do with last week’s Mystery Creature? It was an Antarctic icefish, did you guess it?
Image source: Wikimedia Commons
There are a number of different types of Antarctic icefish but this one is from the Channichthyidae family. These fish are found in the cold waters off the Antarctic, as their name suggests. They are capable of surviving in waters that often reach temperatures below 0oC in the Winter months. There are some very unusual features to this fish. When first discovered in 1927 they were observed to be scaleless fish with pale, sometimes translucent skin. Further investigation revealed that these fish are unique among vertebrates in that they do not contain any red blood cells. It appears they lack haemoglobin, a protein used by red blood cells to bind and transport oxygen around the body. Haemoglobin also binds iron and is responsible for the red colour of oxygenated blood.
So how and why do these fish survive without this oxygen carrying protein? It would seem that this is an accident of evolution, the haemoglobin gene has mutated resulting in a non functional gene, however the fish has managed to adapt and survive. In order to do this it have developed larger hearts and wider vessels in their circulatory system. The water within which it lives has high levels of oxygen which it absorbs directly through the body (hence the thin, scaleless skin) as well as through the gills. Without haemoglobin it carries only 10% of the normal levels of oxygen within its blood. The cardiac system of the icefish has to work at a much faster rate in order to compensate for this.
Antarctic icefish also produce an antifreeze protein to prevent their ice crystals forming within their bodily fluids under such cold conditions.
Density is the mass of an object per unit volume. A bit of a mouthful but this is how I explained it to my own children today….
…imagine you have a pebble and a marshmallow of the same size and shape… which one do you think is heavier?
My three year old got this straight away… “the pebble of course Mum” (with a “silly question” look that I am use to at this stage).
The Fun Friday Science Team!
So if they are the same size (volume) then why does one weigh so much more than the other? If you remember that everything is made up of molecules… the heavier object simply has more molecules packed more tightly together (a greater mass); the molecules in the lighter object (in this case the marshmallow) are much more loosely packed together (a smaller mass)!
The pebble is said to have a greater density than the marshmallow.
A bit of History:
A Greek scientist called Archimedes (250 BC) is credited with discovering the concept of density. The story goes that Archimedes was given the task of determining if the newly minted King’s gold coins were genuine (or if they had been mixed with silver). Archimedes was pondering this idea while lowering himself into the bath. When he noticed how his body displaced a volume of water he realised he had cracked it! If he compared a coin of pure gold with the newly minted ones he could check if they displaced the same amount of water i.e. that their densities were the same. Turns out they were not and the King was beings duped!
They say that Archimedes was so excited when he realised the solution that he jumped out of the bath and ran all the way home naked shouting “Eureka, Eureka”…. (“I found it, I found it” in Greek).
Here are some experiments on density that you can try at home…
The children and I spent the afternoon trying out these cool experiments that are easy to do at home. Hope you get to try some too!
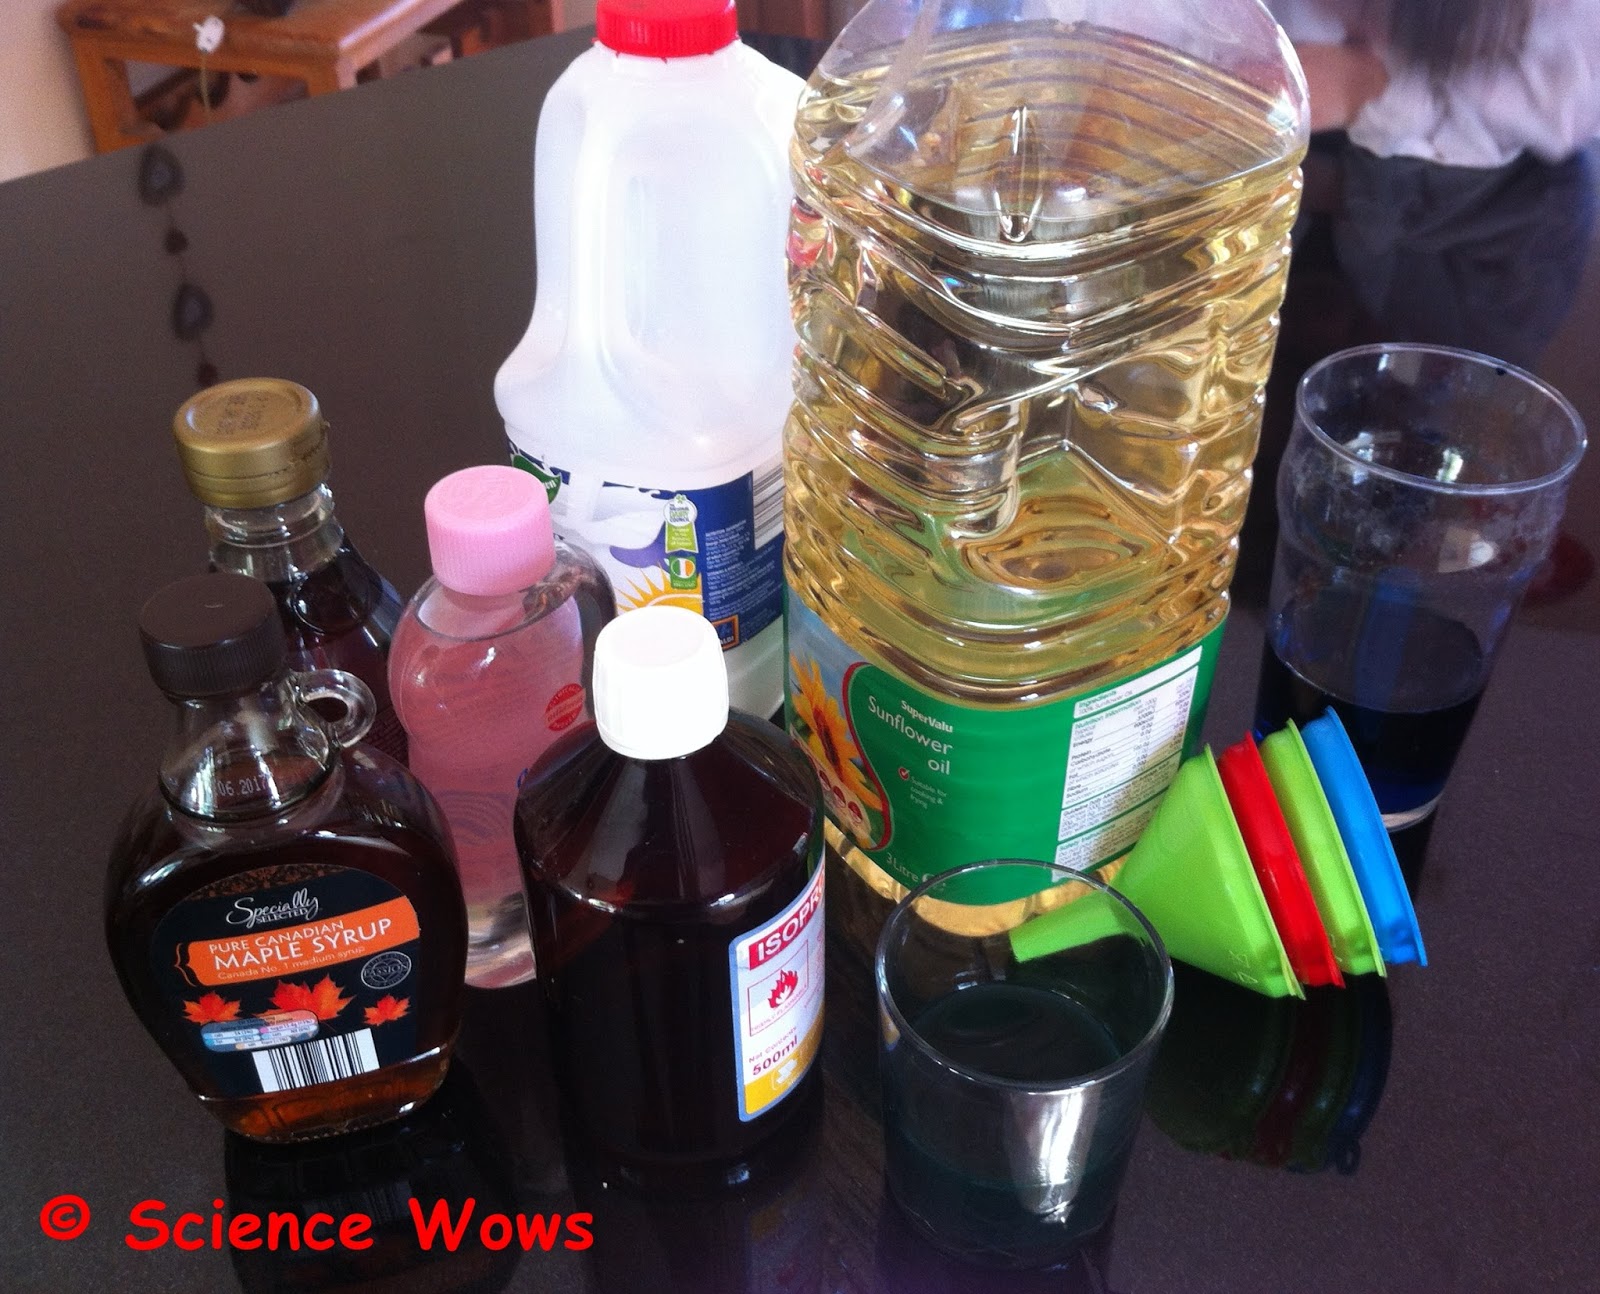
1. Make a density rainbow
You will need: A clear glass, golden syrup or honey, maple syrup, milk, washing up liquid, water, food colouring, cooking oil or baby oil, a clear alcohol (we used isopropanol but you could use methylated spirits or vodka – with adult supervision!), funnels, a dropper or a spoon.
What to do: Place some water in a glass and add a few drops of food colouring and mix. Place some alcohol in another glass and add a few drops of a different food colouring. Mix.
Carefully add each layer in the following order….
golden syrup
maple syrup
milk
washing up liquid
coloured water
baby oil (or cooking oil)
coloured alcohol
Try to add each layer carefully down the side of the glass, using a spoon, a dropper or a funnel (as below). Make sure each liquid makes a complete layer that fully covers the layer underneath. If the layers mix a little, allow to settle before adding the next layer.
Add each layer carefully down the side of the glass
Two junior scientists admiring their work!
We think it looks lovely!
What is happening:
We added the most dense material first (the golden syrup) and then the next dense and so on. So each layer is a little lighter or less dense than the previous one and therefore floats on it.
You can of course add other things are leave some of these layers out!
2. Lava lamp in a glass
You will need: a clear glass, sunflower/vegetable oil, water, food colouring, some effervescent tablets such as AlkaSeltzer.
What to do: Place water in the glass to about one third full. Add a few drops of food colouring to the water and mix. Gently pour the oil down the side of the glass filling the glass to almost the top. If the oil and water mix a little don’t worry, just wait a while until the two layers separate out with the oil sitting on top of the water. Break the tablet into pieces and add one or two pieces to the glass…. I will let Caer explain it to you (with a little prompting from her brother)!
What is happening:
When the AlkaSeltzer tablet reaches the water layer it starts to dissolve and fizz, releasing a gas called carbon dioxide. This gas forms in small bubbles surrounded by water, they start to rise to the top of the glass because the gas is lighter (less dense) than the water and oil. The bubbles pass all the way through the oil layer to the top of the glass where the bubble eventually bursts, releasing the carbon dioxide gas. Once the gas is gone the bubble is just water, which is heavier (more dense) than the oil so it starts to drop down again. The process continues until all the carbon dioxide has escaped to the top. Adding more AlkaSeltzer starts it all off again!
3. Fireworks in a glass
You will need: A glass, water, food colouring and sunflower (or vegetable) oil
What to do: Fill the glass with water to about two thirds full. Carefully pour a layer of oil on top of the water to fill the glass. Add drops of food colouring to the top of the oil layer and watch as they slowly drop down and enter the water layer. They streak through it like some mini fireworks!
Add the drops of food colouring to the top of the oil…
…and wait for the fireworks display to begin!
What is happening:
Food colouring and oil do not mix so the drops will fall until they meet the water layer. Food colouring dissolves in water, the colour diffuses out into the water as the drops fall to the bottom of the glass, giving a lovely fireworks type display!
Hope you enjoyed this week’s Fun Friday as much as we did. If you have any comments, questions or suggestions please leave a comment below, I always love the chat and feedback!
Summer holidays are finally over and my three children were up EXTRA early Monday morning with the excitement of the return! To be honest I had mixed feelings but was encouraged by their enthusiasm. We had a great Summer and I really enjoyed the break from the schedules and routines… but most of all I enjoyed the break from having to prepare the lunchboxes every morning!!!
The break has done me good… I am returning to the challenge with renewed vigour and optimism… for the moment anyway. No doubt within a few weeks I will be reduced to the early morning cold sweat… wondering what I have in the cupboard and WHAT I am going to feed my super fussy son who believes there are only two food groups worth mentioning… Meat and Sugar!
To ease us all into things and to give myself a bit of a head start I did spend some of the Summer modifying a flapjack recipe. The fussy one does love flapjacks and the original recipe was from Rachel Allen’s Food for Living Cookbook. They are heavy on the butter and the sugar and taste sooo good! I decided that if I could make them a little more healthy and fussy one still liked them then I’d have a win-win on this one at least.
Here is the finished recipe and YES the fussy one has been eating them all week…
Ingredients:
5 oz butter
5 oz coconut oil
4 oz light muscovado or soft light brown sugar
2 tbsp maple syrup
1 tsp vanilla extract
3 oz ground almonds
1-2 tbsp chia seeds
2 oz milled seed (I use Aldi milled linseed, sunflower seeds and blueberry seeds)
10 oz oats
Method:
Preheat the oven to 180oC and line a Swiss roll tin or baking tray (approx. 25 x 38cm) with baking parchment.
Place the butter, coconut oil, sugar, maple syrup and vanilla extract into a medium sized pot and place over a medium heat, stirring frequently until the butter and coconut oil have melted and all ingredients are well mixed.
Place ground almonds, chia seeds, milled seeds and oats into a large bowl, mix and then add the melted butter mixture.
Mix well then pour into the prepared tin and spread out evenly.
Bake in the oven for 15 minutes.
Allow to cool then cut into squares.
Enjoy!
Tasty and healthy – a winning combination
Although I have spoken about the positive side to butter in a previous blog, I do hold with everything in moderation! I am happy to replace some of the butter called for in the original recipe with Coconut oil as it is great for brain function, has antibacterial, antiviral and antifungal benefits and can help to reduce skin problems such as eczema. The maple syrup replacing some of the sugar contains maganese and zinc which help boost the immune system. The milled seeds and chia are high in vitamins, minerals and fibre as well as omega 3 fatty acids. Not a bad addition to the lunchbox I think!
Now I have to work out what else to put into the lunchbox… has anyone else this lunchbox dilemma with a fussy child? My little one won’t eat sandwiches, fruit, dairy for snacks. If anyone has any suggestions or comments please let me know!
This cute little creature is the first carnivorous mammal to be discovered in the Western Hemisphere in the last 35 years. However they have not been hiding out on us, they have been on display in museums and some zoos for the decades. The problem is that they were simply mislabeled, thought to be Olingos (a cousin that although similar is larger, with a shorter tail, bigger ears and a longer snout).
Residing in the cloud forests of the Andes this mammal is the smallest member of the racoon family. This arboreal, nocturnal creature is referred to as a carnivore, although fruit makes up most of it’s diet.
The scientific name given to this mammal is “Bassaricyon neblina” where nebulina means cloud and refers to the cloud forests where the olinguito (little Olingo) live.
I had great fun preparing for the third, and final part of this blog series. It is all well and good discussing the merits, scientific and otherwise, of using vegetables in your baking, but as a truly dedicated scientist I realised a little R & D was also required. Time to don the apron and turn on the oven, but which recipes to choose? I am very keen to try Dee’s Beetroot Chocolate Cake from which these blogs were inspired but I wanted to introduce some other vegetables for this blog. When I posed the questioned through social media I was delighted with the number and variety of recipes recommended. I needed to choose my parameters and narrow down my study field.
I started to ask the question… “what vegetable would really convince you?”
photo credit: Tommy Hemmert Olesen via photopin cc
Most people are familiar with the carrot cake and enjoy it as a bone fida cake, so carrots were already out there. This, in my opinion, excluded the parsnip too and many other vegetables that are known to be high in sugar content. Someone mentioned the potato and it seemed like a very good starting point to me… its high starch content makes it an obvious substitute for flour in baking, but in my head it still belonged on my dinner plate along with bacon and cabbage. It was easy to find a recipe using potatoes in cakes and I chose to try some mini chocolate cupcakes.
photo credit: Timothy K Hamilton via photopin cc
My husband said if I managed to bake a tasty cake containing green leafy vegetables it would definitely convince him. I had to admit he made a good point. Green leafy vegetables are not known for their sweetness and definitely not what I would be reaching for when creating a sweet treat. Not one to shy away from the challenge I decided that a spinach cake was next on the list.
photo credit: Theophilos via photopin cc
I liked these choices, but for me there was one vegetable missing. My ultimately convincer would be a tasty cake containing mushrooms! (I know, I know these are not technically speaking vegetables, but if you refer back to the first blog in this series, I did say I would be including it too!) .
I do love the taste of mushrooms but, try as I might, I could not imagine the taste of a sweet mushroom cake. My brain just could not compute that one… or else I felt a bit queasy every time I tried too. So mushroom cake just had to go on the list.
That was my three vegetables picked, so I got down to some baking… with a few little chefs eager to help!
Once the baking was finished I had plenty of taste testers to give their verdict, friends, neighbours… and especially family! Along with the recipes that I share below, I have also included the feedback and opinions I received. At the end of this blog I share some tips and advice suggested by others along with some other vegetable cakes that I didn’t get around to trying yet.
My most enthusiastic Taste Testers….
The taste testers
Potato Chocolate Mini Cupcakes
Here is the original recipe for those who prefer these measurements. Personally, I still like to work in kg/g (or lbs/oz) so I have converted the measurements and share them below…
For the Cupcake:
60g butter (at room temperature)
65g sugar
1 tsp vanilla extract
1 large egg (room temperature)
60g mashed potato (cool and unseasoned)
3 tbsp milk
80g plain flour
3 tbsp cocoa powder
3/4 tsp baking powder
pinch of salt
For the Ganache:
120 ml cream
1 tbsp butter (room temperature)
100g dark chocolate
Method:
Preheat the oven to 190oC and place mini cupcake liners in cupcake tray.
Beat the butter and sugar together until light in colour.
While still mixing add the egg, vanilla and mashed potato and beat until smooth.
Sift the flour, baking powder and salt into a separate bowl and then add to the butter mixture.
Stir until evenly combined.
Spoon batter into miffin cups, filling each about half full.
Bake for 10 – 12 minutes.
Allow cupcakes to cool completely, in the tray, before adding the ganache.
To prepare the ganache, warm the cream and butter over a low heat until just below simmer.
break the chocolate into small pieces in a heat proof bowl.
Pour the heated cream/butter mixture over the chocolate and allow to leave for one minute to allow the chocolate to melt.
Whisk until smooth and pour over the cupcakes.
Add desired sprinkles or toppings of using.
Allow to cool completely before serving.
From this…
…to these…
… with a little help from these!
The potato provides us with Vitamins A, B and C, Potassium, Calcium and IronThe Results and feedback:
These mini cupcakes turned out well. The potato gave them a nice texture but there was no taste of the vegetable at all. No one was able to guess the mystery vegetable ingredient!
Although I liked these cupcakes and they kids did too, giving them a six out of ten, I felt that the ganache was a bit too strong for my liking and some others agreed. If doing this one again I would maybe change the dark chocolate for milk or change the topping entirely. The cupcakes taste good on their own, light and moist too.
Spinach cake
I thought I would find it difficult to source a Spinach cake recipe but it turns out it is a traditional Turkish cake. I based this cake on this original recipe.
Ingredients:
250g Spinach
180 ml Olive Oil (preferably Extra Virgin)
2 tbsp Lemon juice
1 tsp vanilla extract
3 eggs
250g sugar
220g flour
3 tsp baking powder
pinch of salt
Method:
Preheat the oven to 180oC.
Wash the spinach and remove any large stalks.
Add spinach, olive oil, vanilla and lemon juice to bowl or blender and blend until pureed.
In a separate bowl beat the eggs and sugar together until light and creamy.
Add the spinach puree to the beated egg and sugar and mix well.
Sift the flour, baking powder and salt into another bowl, make a well in the centre and add the egg/spinach mix.
Fold together until uniform.
Pour into a greased pyrex dish or into prepared cupcake liners – I made one loaf (5 X 9 inch) and six cupcakes from this mixture.
Bake at 180oC for 30 minutes (20 minutes for cupcakes).
Allow to cool before removing from baking tin.
Tastes good served with whipped cream!
Spinach cake … yep it was GREEN!
The results and feedback:
This one was a BIG hit!!! I called it “Kermit Cake” when offering it to the kids and they could not guess that it was made of Spinach. More importantly, it did not put them off when they found out! My seven year old wouldn’t usually eat spinach if his life depended on it but he could not get enough of this cake. All three kids gave it ten out of ten and it was popular with adults too. One person guessed the mystery vegetable ingredient, which surprised me as I could not detect it at all!
I would definitely bake this cake again!
Spinach is full of vitamins (A, B, C, E and K) as well as Iron
Mushroom Cake
Next up was the mushroom cake, I had my doubts about this one and originally considered adapting a recipe for rhubarb muffins but then Dee pointed me to this recipe she had found.
Ingredients:
125g butter (at room temperature)
150g sugar
1/2 tsp vanilla essence
2 large eggs
240g wholemeal flour
120 ml milk
400g button mushrooms, washed, dried and grated
75g chopped walnuts
2 tbsp honey
Method:
Preheat the oven to 180oC and grease and line 20cm springform cake tin.
Place butter and sugar in a bowl and beat until light and pale.
Add one egg at a time and mix well between additions.
Add the flour and milk, in small amounts, keeping the mixer on a low setting, and ensure each addition is well mixed in before adding the next (i.e. add flour, then mix, then milk, mix, flour again etc).
Add the mushrooms and mix well.
Add the chopped walnuts and honey and mix until all ingredients are thoroughly combined.
Pour batter into prepared tin and tap base to remove any air bubbles.
Pop in the oven and bake for one hour.
Turn off the oven and allow cake to cool gradually with oven door ajar.
Once cake is cool remove from baking tin.
Mushroom Cake… very moist, very heavy and tasted of….mushrooms!
Results and feedback:
This was a very dense, moist cake and despite me leaving it in the oven for extra time, there was no denying the taste of mushrooms! Not a cake I would be reaching for again and the feedback overall was similar. The mushroom taste was too strong and put most people off.
Disappointing! I let this one mull around in my head for a few days but then decided to give it one more try. This time I would go back to my original idea and try to incorporate mushrooms in place of rhubarb in my favourite breakfast muffin recipe.
The original recipe comes from Nigella Lawson’s wonderful book Feasts but I have modified it quite a bit at this stage.
Mushroom Breakfast Muffins
Ingredients:
250g soft brown sugar
80 ml vegetable oil (I usually use sunflower oil)
1 large egg
2 tsp vanilla extract
250 ml buttermilk
150g mushrooms, washed, dried and grated
75g chopped walnuts
200g wholemeal flour
100g plain flour
50g milled seeds (such as linseed/sunflower)
2 tsp baking powder
1 tsp bread soda (bicarbonate of soda)
Topping: mix 2 tbsp on Demerara sugar with 1 tsp on ground cinnamon.
Method:
Preheat the oven to 180oC and place liners in the muffin tray.
In one bowl mix the sugar, oil, egg, vanilla and buttermilk.
Stir in the grated mushroom and chopped walnuts.
Add the wholemeal and plain flour, milled seeds, baking powder and bread soda.
Fold these into the mixture with the minimum amount of mixing.
Spoon into prepared muffin liners and sprinkles with the cinnamon and sugar mixture.
Bake in the middle of the oven for 20 minutes.
Enjoy!
Mushroom Breakfast Muffins…. Yum!
Result and feedback:
This time it was a winner. These muffins were as delicious (or almost) as their rhubarb cousins but with no taste at all of mushroom! The texture and moistness were just right. They were a hit with anyone who tried them and no one guessed the mystery ingredient this time!
Mushrooms contains all five B Vitamins as well as essential minerals and Selenium
Suggestions and tips:
As I mentioned, there were a lot more vegetable cakes I could have tried. I did actually also try a Chocolate and Aubergine Cake (gluten free) that Aedin from FreeFromGuru had previously shared with me and brought the cake to a gluten free barbecue where it proved very popular… again no taste of aubergine. Unfortunately I deleted the photos of the cake but you can check out the recipe here.
I really enjoyed trying out the recipes for this blog …and tasting them. The feedback from all my taste testers was very promising. This experiment has really changed the way I think about vegetables and YES I am converted to the concept of using vegetables in my baking. Now I am reviewing my favourite recipes, wondering how I can incorporate various veggies.
The things that pleased me most about all this are…
my children happily eating a spinach cake!
surprising myself with a cake that contained mushrooms… and tasted GOOD!
the enthusiasm and feedback that everyone gave in response to the idea of vegetables in baking!
I hope you have enjoyed this series on vegetables in baking and would consider giving it a go. If you have any comments or suggestions, or if you have some recipes to share please drop me a line in the comments below… I would love to hear what you think!
Last week was one of those roller coaster type of weeks… plenty of ups and a few downs, in a seven day stretch that felt more like ten. On Monday myself and the children headed to Wicklow for the annual Summer week with Nanny and Grandad. For the children, the excitement of spending a week with beloved Grandparents with the bonus of exploring their lovely old garden, meeting cousins and the joys of a few regular, local walks and activities. For their mum, a chance to catch up with family for a few days before taking a rare couple of days away from the children to rekindle an old pursuit.
All went well on Monday, we arrived in time for lunch and as the Sun shone for the rest of the day we took to the garden and I got to spend the afternoon watching my children do what children do best….. play! Climbing trees, riding bikes, rolling down hills and swinging on the old fashioned rope swing. A day full of fun and fresh air.
Three tired children tucked into bed that night and I was sure they would sleep soundly until the next morning. Unfortunately that was not the case. At three in the morning I had to lift my seven year old from his bed as his asthma kicked in and his breathing rate soared. I had brought him to the doctor before we left to be sure that the heavy cold he had was nothing more. Two days before I was told his lungs were completely clear, now the wheezing and the rapid breathing spoke a different tale. I spent an hour trying to calm him, with one hand on the inhalers and the other on the car keys, ready to bolt for the hospital if required. Eventually I felt he had improved enough to go back to bed and I lay watching him until morning arrived and I could bring him to the doctor. Asthma confirmed and a course of steroids and antibiotics prescribed.
Cousins
Did you know… Ireland has the fourth highest prevalence of asthma in the world?
Tuesday was spent in a tired and worried state, watching my son wanting to run and play with his cousins one minute and then slumping on his mother’s lap the next. My plans to finish my week’s blog quota went out the window and my proposed departure the next day did not look too likely either. The steroids made him hyper and agitated so another restless night for both of us.
Wednesday morning dawned a little brighter. Cautiously I acknowledged that his breathing had improved. He seemed a much more alert, happy kid. My parents urged me to pack my bags and head off, they would look after him and his siblings for two nights and everyone would survive. My son even told me he was well enough for me to go! I was still unsure at lunchtime, until I saw his Nanny open a second tin of beans to stave off his renewed appetite. Leaving my parents a two page list of medical advice and instructions I headed for Limerick to meet up with hubby and join the last day and a half of an Aikido Summer school.
It was with anticipation and fear that I undertook this course. Although I have put in many hours of training in my day and I help my hubby run a kids Aikido club in our local village, it has officially been ten years since I last did any formal training! Rather than choosing to dip my toe in to an evening class I somehow found myself signed up for eight hours of training! Encouraged by a lovely group of people that welcomed me back on to the mat I muddled through and managed to complete most of the remaining course. The sense of achievement was equally balanced with the sense of PAIN!
…I think I ached in every one of them! It was lovely to have crossed the line and be back training again and despite the pain there seemed to be a good level of muscle memory left after the ten year gap. Now that I have done this I am determined to return to training on a more permanent basis.
Smiling through the pain with hubby (left) and Sensei John Rodgers -Shehan (centre), head of IAF
So Friday afternoon I managed to ease myself into the car and make the journey back to Wicklow and a heart warming welcome from our three lovely children. Despite the reassurance from my parents and the regular phone calls it was lovely to see for my own eyes that my son was recovering very well. The rest of the evening’s entertainment was unwittingly provided by my attempts to sit, stand and manage the stairs. My very unsympathetic family were in stitches at my demise!
Saturday morning and our last day before returning West and I was determined (despite the aches) that we finally make a family trip to the National History Museum …. otherwise known as the Dead Zoo! The trip did not disappoint… Caer said it was the best Museum every and the children darted from one animal to the other with unwavering enthusiasm and delight.
Visiting “relatives” at the National History Museum!
This display shows the skeleton of a human, a chimpanzee (common), a baboon, an orangutan and a gorilla. I asked the children which one they thought was most like the human’s and after a bit of consideration they all decided it was the chimpanzee. They were spot on as the chimp is the most closely related species (genetically) to us!
Caer with her favourite animal
Caer was delighted to find her favourite animal.. the tiger. The tiger is the biggest of all the wild cats… very evident when you get to see them up close like this!
Speaking of tigers… the children were thrilled to see a lot of the insects they find around the garden in the insect section. They were quick to spot the Tiger Moth, that we posted in a previous blog, and this time they got to see the beautiful orange back wings.
Culann with his hound
I couldn’t resist this one… with a name like Culann I had to take this photo when we came across the Irish Wolf Hound. The Wolf Hound was bred to hunting wild boar, elk and wolves that would have been native to Ireland at the time. They were also commonly used as guard dogs… as mentioned in the Cu Chulainn legend.
The Golden Eagle
Finally, a photo that leaves us all a bit red faced! This is the last Golden Eagle in Ireland, it was presented to the Museum by Captain Boxer but the story goes that it was my children’s Great, Great, Great Uncle who shot it on Clare Island, Co. Mayo and then gave it to him. At least we can take solace and encouragement in knowing that the project to re introduce these beautiful creatures back into Ireland is doing well.
So that was our week… fun filled, action packed and presenting us with some great memories to add to the wealth already generated this Summer. Now safely back home in the West, my aches are subsiding and I can get back to my blogging. We will no doubt find some local exploits to fill our last and final week of Summer holidays… for when you keep your eyes open to it, there is always an adventure waiting around the next corner!
How did you do with last week’s Mystery Creature? This unusual looking animal is called a red lipped bat fish (Ogcocephalus darwini) from the Galapagos Islands.
Image source: Wikimedia Commons
This striking looking fish has a number of unusual features…
this fish is not a very good swimmer and more often will “walk” along the sea floor using adapted fins
it tends to hunt like the angler fish… luring it’s prey using an organ, called an illicium, that it extends from its head
it has those amazing red lips… possibly to attract a mate although their exact purpose is unclear
Transpiration is the process whereby water is taken into a plant by the roots, transported up through the plant and released from the leaves as water vapour!
Lets learn more!
Transpiration is a bit like perspiration (sweating) in humans – it helps to keep the plant cool! As the water vapour transpires out of tiny holes (called stomata) fresh water is drawn up from below. This means there is always an unbroken tower of water running from the bottom to the top of the plant at all times. Water travels up the plant through tubes called Xylem.
The constant flow of water through the xylem tubes of the plant is called the transpiration stream; this stream keeps the stem firm so that it can support the weight of the plant.
Plants put roots down into the soil to draw water and nutrients up into the plant.
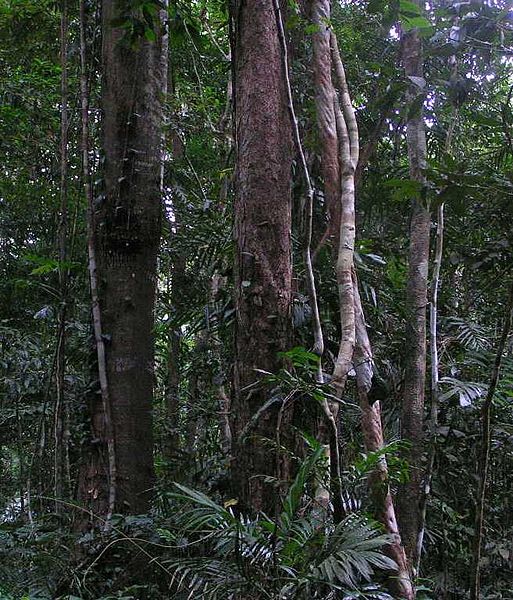
‘Did you know… trees and plants in rain forests help to make rain; if a forest is cut down the area around it may suffer from drought!’
Transpiration accounts for up to 10% of water in the atmosphere! Some trees can loose hundreds of thousands of litres of water in a single day through transpiration! The water vapour trees transpire into the air cools the air!
Transpiration can lift water all the way to the top of the tallest trees!
Stromata
Stomata are tiny holes or pores on leaves, stems and even petals of the plant that allow water out of the plant (transpiration) and gases (like carbon dioxide) into the plant. Most of the stromata of a plant are found on the underside of the leaves.
Stomata can open and close to control the amount of water leaving the plant or the amount of gas coming in.
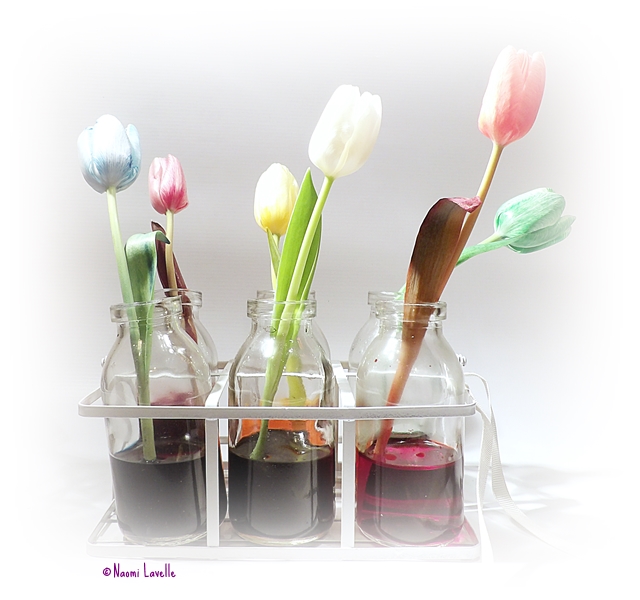
An experiment to try at home: Tracking the flow of water!
You will need…. white flowers, clear cups and food colouring of your choice
Step 1: Fill cups 2/3 full with water
Step 2: Add different food colouring to each one; I used blue, yellow, green, red
(Note: you need a fair amount of food colouring… at least half a bottle per cup)
Step 3: Cut the stem of four flowers to desired length then add one to each cup
Step 4: Leave for a few hours (or overnight) and see what has happened!
So what has happened?…The coloured water travels up the stem and eventually reaches the flower where it changes the flower’s colour.
What could you change or what other things could you try?… What would you change if you repeated this experiment? You could try it using a variety of different types of flowers to see if one type works better than another. You could vary the amount of food colouring you use.