Walking on Ooblecks – add it to your bucket list

Walking on Ooblecks – add it to your bucket list

What do you get when you mix cornflour and water together? Those of you that are regulars to this blog will know by  now that you get a Non-Newtonian fluid… commonly called Ooblecks.

Cad a fhaigheann tú nuair a mheascann tú gránphlúr agus uisce le chéile? Má leanann tú an blog seo go rialta, tuigfidh tú go bhfaigheann tú sreabhán neamh-Niútanach nó ‘Ooblecks’.

What is a Non-Newtonian fluid? Well we know that most matter is either a solid, a liquid or a gas, but a Non-Newtonian fluid breaks the rules a little. Sometimes it acts like a liquid and sometimes it acts like a solid, and that can make for a LOT of fun!

Cad atá i gceist le sreabhán neamh-Niútanach? Bhuel,  tá a fhios againn go bhfuil an chuid is mó d’ábhar ina soladach, leacht nó gás ach briseann sreabhán neamh-Niútanach na rialacha beagán. Uaireannta gníomhaíonn sé mar leacht agus uaireannta eile, mar sholadach. Is féidir an-spraoi a bheith agat leis, dá bharr sin! 

If it is that much fun, why not make a huge vat of it, right? An interesting theory and one that we just had to try! Thankfully everyone over at Meangadh Fibín felt the same way. They are currently filming a fantastic new science series, for children, to be aired in 2016 on Cúla 4, TG4. The series, called Is Eolaí mé (I am a scientist) is all about exploring the curiosity of science; the what ifs? the whys? and the hows? Best of all it is full of great experiments and a real hands-on approach to science.That brings us back to the subject of ooblecks… what can you do with a huge vat of the stuff? A LOT!

Má tá an méid sin spraoi le baint as, nach mbeadh dabhach mór dhe do-chreidte spraoiúil?! Bhí orainn triail a bhaint as agus bhí gach éinne i Meangadh Fibín den tuairim céanna. Tá siad i lár scanánaíocht don sraith teilifíse eolaíochta nua do pháistí, a chraolfar i 2016 ar Cúla4 ar TG4. Is Eolaí Mé is ainm don chlár a fhiosraíonn ceisteanna móra na heolaíochta; cad má? cén fáth? conas? Tá sé lán le trialacha eolaíochta iontacha agus tá cur chuige teagmhálach aige freisin. Tógann sé sin ar ais ag Ooblecks muid… cad is féidir a dhéanamh le dabhach mór de stuif? NEART!

On Friday, in the small hours of the morning, one tonne of cornflour was mixed with a fair amount of water… using a cement mixer and a lot of time and patience.

I lár na hoíche ar an Aoine, meascadh tonna gránphlúr le méid suntasach uisce… ag úsáid meascthóir stroighne, an-chuid ama agus foighne.

Mixer


The result was a trough full of Ooblecks… one metre wide, three and a half metres long and 38 cm deep.

An toradh a bhí ann ná dabhach lán le Ooblecks… méadar leathan, trí go leith méadar ar fhaid agus 38cm domhain.

trough


Two diligent young scientists carried out some quality control testing before the crowd arrived. The crowd in question was a few hundred bemused students at Colaiste Lurgan, Inveran.

Bhí beirt eolaí óga díograiseach ann le rialú caighdeán a chur air roimh a thánaig an slua – cúpla céad macléin mearbhallach ó Choláiste Lurgan, Indreabhán.

testing


Once we got the nod from the young science team it was time to for the fun to begin. Peadar, the shows main presenter, had a test run…

Chomh luath is a raibh an nod ón fhoireann eolaíochta óg, bhí sé in am don spraoi tosnú! Bhí rith tástála ag Peadar, atá mar láithreoir ar an gclár…

Peadar


Then there was ballet, juggling, limbo, hurling and a lot more besides… all on top of the Ooblecks.

Ansin bhí ballet, lámhchleasaíocht, limbo, iománaíocht agus neart eile leis… uilig ar bharr an Ooblecks.

Ballet


It wasn’t long before everyone wanted a go!

Ní fada go raibh gach éinne ag lorg deis triail a bhaint as!

Everyone


As far as we are aware, this is the first time anything like this has been attempted in Ireland; it certainly caught the attention of local media and made the day’s news (Nuacht) on TG4, take a look! (It is at the 10 minute point.)

Chomh fada is atá a fhios againn, ‘sé an chéad uair gur baineadh triail as seo in Eirinn; agus tharraing sé aird na meáin áitiúla freisin – gliogáil ar (Nuacht) TG4 le tuilleadh a fheiceáil. (Ar an marc 10 nóiméad.)

It was a fantastic day with lots of surprises… if you don’t have “walking on ooblecks” on your bucket list then I strongly suggest you add it! I can now tick that box!

Lá iontach a bhí ann le an-chuid iontais… agus muna bhfuil ‘siúil ar ooblecks’ curtha le liosta do mhianta mholfainn duit é a chur leis! Is féidir liomsa tic a chur sa bhosca sin anois!

Me


So what happens if you do sink into that much Ooblecks? You’ll have to watch the programme to find out! Is Eolaí Mé will air in early 2016.

So, cad a tharlaíonn nuair a siúlann tú ar Ooblecks? Beidh ort breathnú ar an gclár le fáil amach. Craolfar Is Eolaí Mé go luath i 2016.

Want the science bit? Ooblecks is what we call a Non Newtonian Fluid… meaning that it does not follow the laws of Newtonian Physics.  When left to rest it looks just like a regular liquid.  However when disturbed by strong hitting, shaking or pulling it acts more like a solid.  It is a phenomenon worth studying and although still a bit of an enigma, scientists think that the material normally acts as a liquid but can produce a sudden, local reaction to rapid impact and stress, reinforcing the area and briefly solidifying the suspension.

Ar mhaith leat an eolaíocht taobh thiar de idir an dá linn? Is  sreabhán neamh-Niútanach é Ooblecks, rud a chialaíonn nach leanann sé rialacha Fisic Niútanach. Nuair a fágtar socar é tá cuma leachtach air. Ach, nuair a suaithtear é tríd é a chraitheadh, a bhuaileadh nó é a tharraingt, gníomhaíonn sé cosúil le soladach. Is feiniméin é gur fiú a staidéar agus cé nach bhfuil tuiscint iomlán air, ceapann eolaíthe go gníomhaíonn an ábhar cosúil le leacht de gnáth – ach gur féidir leis frithghníomhú tobann, logánta a chothú i gcoinne brú agus imbhualadh gasta. Treisíonn sé seo an ceantar agus cothaíonn sé fuaidreán soladach gairid san ábhar.

Ooblecks takes it’s name from the green slime that fell from the skies in the Dr Seuss book “Bartholomew and the Oobleck“.

Tagann an ainm Ooblecks ón sláthach glas a thit ón spéir sa leabhar “Bartholomew and the Oobleck” le Dr. Seuss.


A huge thanks to the lovely Sadhbh over at Where Wishes Come From for translating this blog post for me. There seems to be no end to that lady’s talents! 

The Science of Soil

The Science of Soil

What is Soil?

Soil is the outermost part of the Earth’s surface, where plants grow. Without it we could not survive! Soil is made up of rock material of various sizes (from powdered rock to sand, pebbles and stones). Soil also contains minerals, rotting plants and animals and living organisms. It contains all the nutrients required for plants to grow and survive!

Why is soil so important?

Plants need soil to grow, not just for the nutrients that the soil provides but also as an anchor, a stable place where the plant can place its roots and support its growing structure.

The soil has many other important functions too…

  • Soil acts as a natural water filter, cleaning water as it passes through it
  • The soil provides billions of organisms with a place to live
  • The soil is very important in the cycling of nutrients – especially carbon and nitrogen

How is soil made?

There are a lot of factors that influence how soil is made. The first of these is what type of material the soil is being made from… the type of rock that the soil is made from is called the parent material.

Other factos that influence how soil is made are…

  • the weather,
  • the topography of the land,
  • what living organisms are around and….
  • time!

Did you know… it can take up to 1,000 years for just one inch of soil to form?


Soil is made when the parent material (rock) is broken down by the weather (wind, rain, sun, snow) eventually forming fine powder, sand and small rocks. The decomposition of organic matter and the activity of a variety of organisms help to improve the soils nutritional quality.

The soil is like a big recycling plant

Soil is not just for growing plants. It contains billions of other living organisms too… some can be very small like bacteria, fungi and algae and some can be very large like insects and even mammals.

All of these inhabitants help to break down dead plants and animals so that all the nutrients contained within them are returned to the soil.

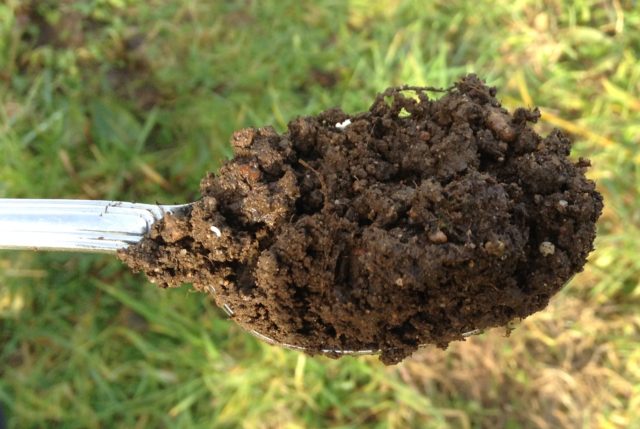
Did you know… that in a tablespoon of good soil there are as many as 50 billion bacteria?

SpoonfulofSoil

The earthworm plays a vital role is maintaining healthy soil and is often called “nature’s plough”.

Did you know… there are approximately 3000 species of earthworm in the world?

worm

Learn more at home… make a wormery

You will need…

A large see-through container, sand, soil, worms, leaves and other vegetation, card or paper.

What to do…

  • Fill a large, see-through container with alternative layers of soil and sand.
  • Put a layer of leaves on the top.
  • Add enough water to keep the soil damp.
  • Collect some earthworms from your garden and add them to the wormery.
  • Cover the outside of your container with a large piece of card or paper to block out the light.
  • Put the wormery in a safe place and check on it every day- remember to keep adding water to keep the soil moist.
  • You should soon notice that the different layers of soil and sand are getting mixed together.

What is happening?

The earthworms mix the layers of sand and soil as they move through the wormery. This helps to distribute nutrients throughout the soil, making it more fertile.

Remember to return the worms safely back into the garden once you have finished.

Or you can watch the “how to” video…


A version of this article originally appeared in Science Spin, Issue 63, March/April 2014

Coloured flower science experiment using tulips

Coloured flower science experiment using tulips

I know I haven’t been blogging much lately, I am trying to work on a little something else that I have wanted to do for a very long time. If I ever get the other project finished I’ll be sharing it right here so watch this space (not literally, it’s taking me a LONG time!).

There is still plenty of science going on in the background though, as is common enough around here. This week we repeated an old favourite, an experiment demonstrating water flow and transpiration in plants… our coloured flower science experiment. I spotted a bunch of pretty white tulips in my local super market and that was all the reason I needed. I had also spotted a set of little bottles while away in Westport last weekend and had to buy them for this experiment, which, I think, elevates my geek status to a whole new level.

I have blogged about this topic before, so if you want more information you can check out this post.

YOU WILL NEED:

  • Some white flowers*
  • Food colouring (I usually use the Goodall’s ones, available in most supermarkets)
  • Water
  • Glasses, cups or other containers, one for each colour you will use

*This will work with all (or almost all) white flowers but it works better with some than others. You can of course use other coloured flowers, daffodils are a popular choice. I have achieved good results with roses, carnations, oxeye daisies and some Chrysanthemums. You can choose the flowers based on what you want to achieve but if working with children (particularly young children) or doing this as a classroom project them I would definitely recommend the tulips. The results are rapid so children will be able to see the colour arriving into the flowers within a fairly short time frame.

WHAT TO DO:

Choose how many different colours you want to use. Place one colour into each glass and add water. I usually use at least 10 mls of food colouring to 20 mls of water (if unsure use a 50:50 ration of food colouring to water).

Choose your flowers, one for each glass, and trim them to the desired length. You will get a more rapid result with a shorter stem.

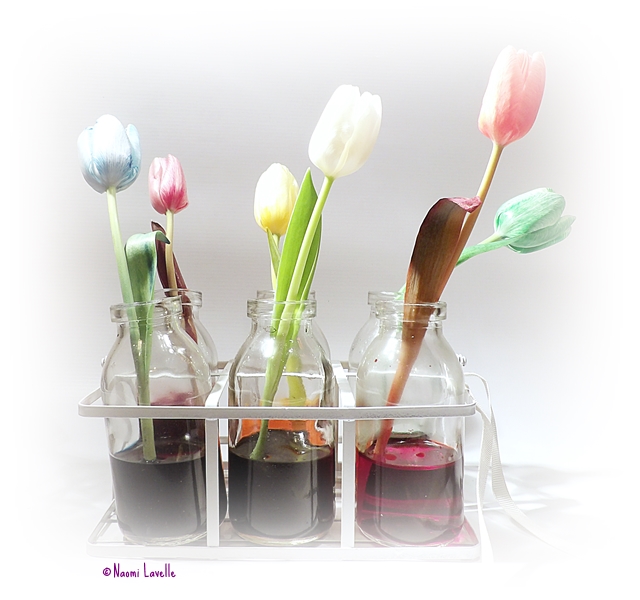
Then simple place a flower in each glass and wait! With these tulips I began to see a result within less than an hour. I set this experiment up overnight and went from this…

tulips1

… to this…


tulips3

WHAT IS HAPPENING:

Water is transported up the stem of the flower through little tubes called xylem. The coloured water will travel through the xylem all the way up the stem to various parts of the plant and right up to the flower. The coloured water stains the plant as it moves through it and this is most apparent when the white flowers change colour. The water ultimately evaporates out of the plant through little pores called stromata. This process is called transpiration and is much like perspiration in humans.

OTHER SUGGESTIONS:

If you want to take this one step further you can try to make a multicoloured flower, like I did with this rose last year. Just click on the image to go to the post with full instructions.

rose


If you try this experiment, or a version of it, I would love to hear how it you get on!


Fun Friday – the Halloween Special – fake blood recipe

Halloween is all about dressing up and sometimes you just need a little fake blood to really set an outfit off. We love making our own and with a little science knowledge you can get just the right consistency and colour that you are after.

You will need...
You will need…

You will need…

  • Smooth Peanut Butter
  • Golden Syrup
  • Washing up liquid
  • Red food colouring
  • Green food colouring


What to do…

This is one of these experiments that does not come with an exact protocol, just add the following ingredients until you are happy with the appearance of it, then apply and freak out all your friends!

When you think you have the fake blood just the way you like it do a little test on a white cloth or tissue and adjust further if necessary.


Fakeblood


If you want to experiment a little more try making your own fake blood choosing your ingredients from the following list:

  • Smooth Peanut Butter
  • Golden Syrup
  • Washing up liquid
  • Red food colouring
  • Green food colouring
  • Blue food colouring
  • Chocolate syrup
  • Cornflour
  • Cocoa powder
  • Ribena
  • Chocolate syrup
  • Tomato ketchup
  • Brown Sauce

So what is happening?…

The trick to making good fake blood is to get the colour and consistency right. The food colouring, washing up liquid, cocoa powder, ribena, peanut butter and ketchup will all influence the colour of the blood. You want to get a dark colour, deep red colour so the chocolate and green food colouring will often give the red a darker effect.

It is not just about the right colour though, the consistency of the blood is important too. The cornflour will thicken the blood and make the colour more transparent, as will the peanut butter, syrup and washing up liquid.

The fun is in mixing and changing until you get your ideal fake blood, then apply and freak out your friends and family, all in the name of Halloween fun.

Enjoy!

Fun Friday – Glowing Monster Slime

Fun Friday – Glowing Monster Slime

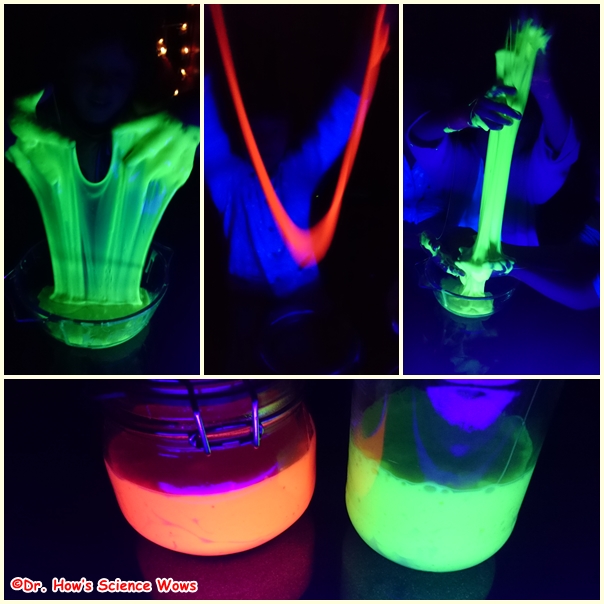
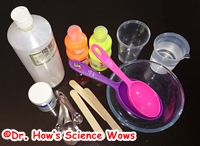
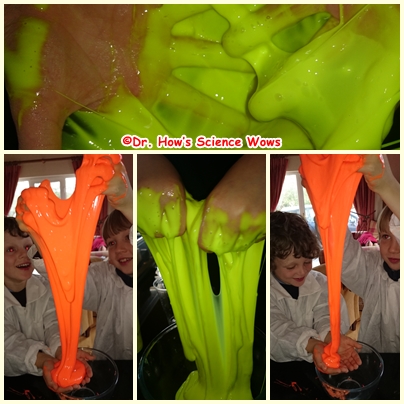
With a name like “Glowing Monster Slime” you just know this experiment is going to be fun! Just look at the photos if you need any convincing!

You will need
You will need

You will need…

  • two small bowls or cups
  • one large bowl
  • PVA glue (white or clear is you can get it)
  • *Borax Powder
  • Fluorescent paint (you can get non-toxic fluorescent paint in most craft shops)
  • something to stir or mix with

*You can pick up the borax powder in your local chemist (See note below)

What you do… 

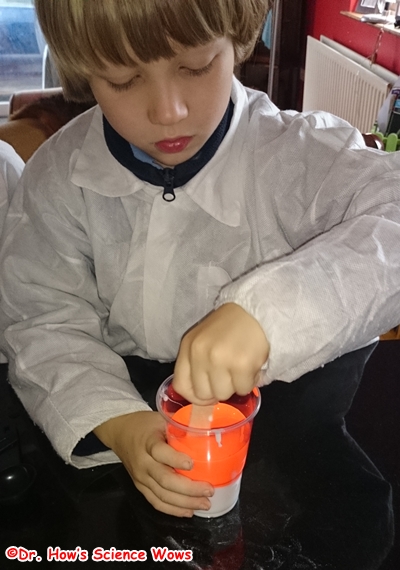
To the first cup add half a cup of fluorescent paint and half a cup of PVA glue and mix well.

Mix the glue with the flourescent paint

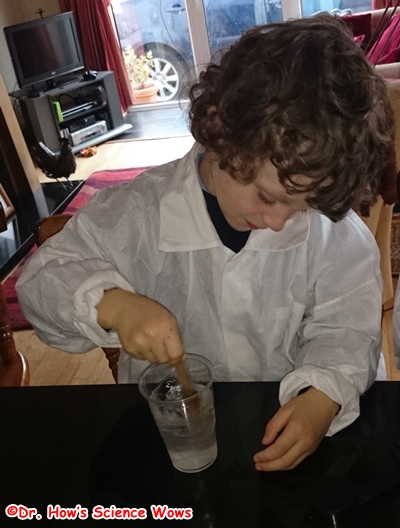
In the other cup add half a teaspoon of borax powder to one cup of water and mix well until all the powder is dissolved!

Dissolve the borax in the water

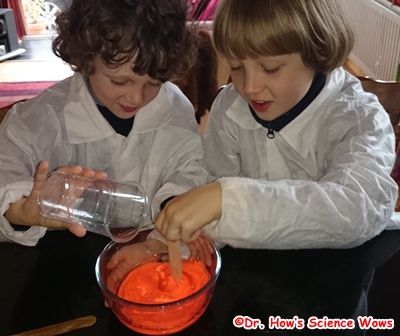
Now for the fun bit… pour the glue mixture into the bowl then add the borax solution, mixing all the time.

Mix together the glue mixture ans the borax solution

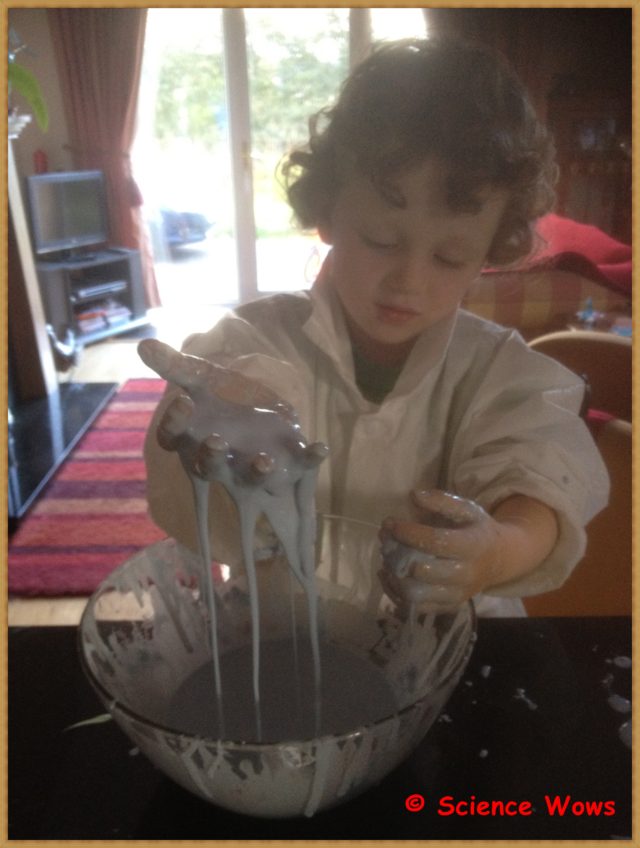
After a while you can use your hands to mix and mould until you have one big lump of slime and there is little, or no liquid left!

The fun bit
The fun bit

You can store your slime in a ziplock bag or clean jar, it lasts a very long time once you do not let it dry out. You may notice a small layer of liquid separating off the top of the stored slime. This can just be poured off and the slime will become a little more rubbery and less sticky.

When you have finally finished playing just store away

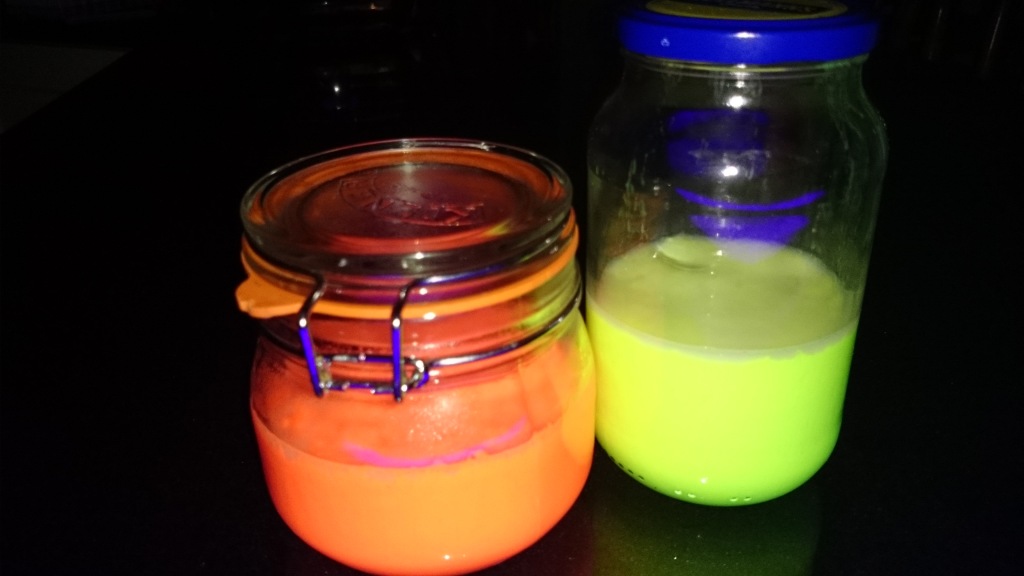
If you have a UV light (black light)** you can make this experiment even more fun by checking out how your slime glows in the dark once the lights go out and the UV light is turned on.

Sooo much fun!
Sooo much fun!

So what is happening?…

Congratulation… you have just experimented with polymers!! In simple terms a polymer is a substance made up of lots of molecules arranged in long chains.  If you imagine that the glue is like cooked spaghetti, it slides and slips around the place quite easily.  When we add the borax to the glue it causes some of the molecules in the glue to stick together making the glue more rubbery and less liquid!  Imagine if you took those strands of spaghetti and tied them together in places, the strands would not be able to slip and slide around nearly as much! The borax and glue mixture is just like your knotted spaghetti!

*Where can I get Borax powder?

In Ireland you need to buy Borax powder in a pharmacy.  The production is a little erratic and the larger volumes are no longer available!  You should be able to get a 100g tub in any pharmacy and it costs between €2 and €3.

**Where can I get a UV light?

This experiment is lots of fun without the UV light but the glow in the dark bit really does take it to a different level. My youngest nearly burst waiting for the night to fall so we could do that part of the experiment. If you are considering buying a UV light you should be able to get one fairly cheaply. I got mine from Maplin. I will be sharing lots more glow in the dark experiments, so if you do get one remember to check back here for some more ideas.

I hope you enjoy this as much as we did and please let us know if you do try it out!

UPDATE 2017: Borax powder is no longer as readily available in Ireland.  here is one alternative, using very simple ingredients… check out this post on how to make silly putty.

Or check out our Ultimate Slime Guide for lots of fantastic slime recipes using contact lens solution or laundry detergent.


Fun Friday – the teabag rocket

We have come over a little healthy of late in the Science Wows household, the adults anyway! #Freefrom this and #freefrom that and of course caffeine is out. Which means herbal teas are in; and the best thing about herbal teas is that you can do this with the teabag…


Seriously, if you were only ever to do one experiment from this blog,  make it this one!!!


Three of our favourite Science Experiments – the messy play edition

Three of our favourite Science Experiments – the messy play edition

There is a lovely linky running over on the Mama Courage blog. It invites bloggers to get over any hang ups they may have and let the kids get… well messy. Messy play is great for children as a fun, tactile, interactive activity. We are all for it in this house. I thought the linky would be a great wayto share some of our favourite messy experiments with you all.

I hope that these entice you to roll up your sleeves and get stuck in to some messy play science, just don’t look at me when it comes time to clean up!

Here are three of our favourite “messy” science experiments…

1. Making Slime


Of course this is top of the list… messy and slime are interchangeable really, aren’t they?

This is one of our popular slime recipes…

You will need… two bowls (or cups), borax powder (you can buy this in pharmacists throughout Ireland), water, PVA glue, some stirrers and food colouring of your choice (optional)


What to do…

Add one cup of water to the first bowl and mix in a teaspoon of borax powder until it is all dissolved.

Add a cup of PVA clue to the second bowl; add a cup of water and mix well.

If you would like to colour the slime add a few drops of your chosen food colouring to the glue mixture and mix thoroughly.

Add the borax solution to the glue mixture and start to stir immediately… you will notice that the glue turned to slime almost straight away.

The slime can be stored in an airtight container and will last for years once it is not allowed to dry out.


Time for slime
Time for slime

What is happening?…

Congratulation… you have just made a polymer!! In simple terms a polymer is a substance made up of lots of molecules arranged in long chains.  If you imagine that the glue is like cooked spaghetti, it slides and slips around the place quite easily.  When we add the borax to the glue it causes some of the molecules in the glue to stick together making the glue more rubbery and less liquid!  Imagine if you took those strands of spaghetti and tied them together in places, the strands would not be able to slip and slide around nearly as much! The borax and glue mixture is just like your knotted spaghetti!


2. Making goo (otherwise called Ooblecks)


Messy but fun
Messy but fun

This stuff is very messy but oh so much fun. Not just for the kids either, once adults get their hands on this goo their is no stopping them. It makes a great stress reliever… honestly, have a go!


You will need… A large bowl, cornflour, water, a large spoon to mix and food colouring (optional)


What to do…

Mix the cornflour and water together in the bowl (approximately one cup of cornflour to two cups of water). Add a few drops of food colouring if you wish. Once it is well mixed it’s time to get stuck in. First place your hands into the goo and slowly lift them, watching how it runs through your fingers. Now try punching the surface of the ooblecks with your fist, you may be surprised with the result.


Here is an demo from an enthusiastic member of the Science Wows team:


I left him play while I was making dinner but had to take one more video to show how much fun he was having (you’ve got to watch this one)…


What is happening?… 

Ooblecks is what we call a Non Newtonian Fluid… meaning that it does not follow the laws of Netonian Physics.  When left to rest it looks just like a regular liquid.  However when disturbed by strong hitting, shaking or pulling it acts more like a solid.  It is a phenomenon worth studying and although still a bit of an enigma, scientists think that the material normally acts as a liquid but can produce a sudden, local reaction to rapid impact and stress, reinforcing the area and briefly solidifying the suspension.
Ooblecks takes it’s name from the green slime that fell from the skies in the Dr Seuss booh “Bartholomew and the Oobleck“.


3. Our version of the ‘Coke and Mentos’ experiment


You have probably all seen the coke and mentos experiment, maybe you have even tried it yourself. The basic idea is that you want to get as many mentos as possible into a bottle of coke as quickly as you can.

Last year I found myself minding two boys who were off “sick” from school. As the day went on it was obvious that they were getting a little less sick and a little more bored. So I decided to give them a challenge (you can read the original post here);

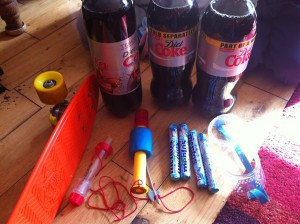
I gave them these …

The props
The props

… and told them to devise their own version of the coke and mentos experiment.

This is what they came up with…. (notice the poor teddies that were strapped onto the front of the skateboard!)

So what is happening?...

Firstly, this is not thought to be a chemical reaction between the coke and the mentos.  It is most likely a physical reaction known as nucleation;  The coke is full of carbon dioxide gas, to give it its fizz;  the mentos are full of tiny little craters on the surface of the sweet, the carbon dioxide gas is able to form bubbles in these “craters” producings thousands of tiny bubbles all at once; these bubbles of gas are under a lot of pressure within the bottle of coke and so come shooting out the mouth of the bottle.  If anyone knows anything about Newton and his laws they will know that every reaction has an equal and opposite reaction (Newton’s third law of motion)… so the coke comes shooting out of the bottle in one direction and the force of this propels the skate board forward in the opposite direction.  PRETTY COOL!

 These are just some of our favourite messy play experiments. Check out what others are getting up to in Mama Courage’s Messy Play Project linky.


Fun Friday – Five Fantastic Facts about DNA and how to extract DNA from a banana

Fun Friday – Five Fantastic Facts about DNA and how to extract DNA from a banana

Dr. Simple was explaining a little about DNA in the last post, so I thought I would share one of the first experiments my children ever asked me to do with them…. they wanted to see DNA, so we extracted it from a banana.

Did you know that we share approximately 50% of our DNA with bananas?


You will need

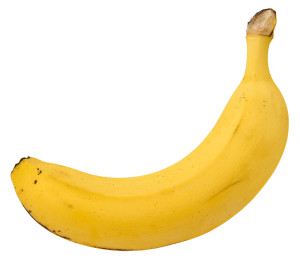
… a banana, a fork, a bowl, washing up liquid, ice cold surgical spirits (or isopropanol – both available from a pharmacy), salt, a sieve, a glass jar.


What to do…

Remove the banana skin and mash the banana in the bowl, using the fork. Add two teaspoons of washing up liquid and stir slowly.

Add a teaspoon of salt and one to two tablespoons of water and stir carefully.

You want to avoid making bubbles.

Leave for five minutes then strain carefully through the sieve into the jar.

Tilt the glass jar and carefully pour the surgical spirits down the side of the jar, at least as thick as the banana layer.  This will form a separate layer on top of the banana mixture.

Do not mix.

After five to ten minutes you will see a long, stringy substance appear in the top layer. This is the banana’s DNA.

You can use a tooth pick to lift and examine the DNA.


So what is happening?

The salt and washing up liquid break open the banana cells, releasing the DNA.

The DNA will not dissolve in the surgical spirits (or any alcohol) so it floats in this layer.


Here are a five fantastic facts about DNA…

5 Facts about DNA
5 Facts about DNA

The experiment described above is just a quick and simple method that I have used before but if you want something more scientific and a lot more fun… check out Cell Explorers! They do amazing school visits, for junior infants right up to secondary level students,  which I am sure would be of interest to teacher or parents making suggestions in their own schools. Run by Dr. Muriel Grenon and her wonderful team of students and graduates these activities are really top class!  Contact them by email at cellexplorers@nuigalway.ie


Fun Friday – 2 of our favourite sea experiments for kids

Fun Friday – 2 of our favourite sea experiments for kids

These two experiments are inspired by Dr. Simples latest post about “Why the sea is salty“.

First up to show the effect of adding salt to water…

1. THE FLOATING EGG EXPERIMENT


Take the floating egg experiment one step further!


Take this one step further….

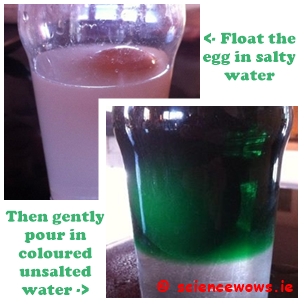
We mentioned in the video that you can take this experiment a step further.

Float the egg in the salty water as before.

Add a few drops of food colouring to a jug of unsalted water.

Carefully pour this coloured water down the side of the glass so that it sits on top of the salty water.

The egg will sit between the two layers… can you see it in this picture?

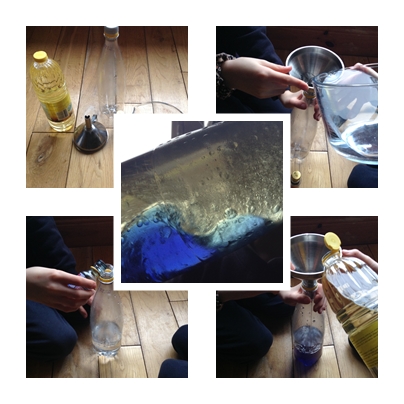
2. OCEAN IN A BOTTLE EXPERIMENT


This is a really simple experiment but always keeps both young and old entertained!

All you need for this experiment is…

  • an empty clear plastic bottle (a 1 or 2L soft drink bottle will work fine)
  • water
  • cooking oil (any kind)
  • Blue food colouring
  • A funnel


What you do…

  1. Using the funnel fill the plastic bottle about one third full with water
  2. Add a few drops of food colouring to colour the water blue
  3. Using the funnel again fill the bottle with the oil (you will notice that the water and oil will quickly settle into two separate layers)
  4. Close the lid tightly on the bottle and turn the bottle on its side
  5. The water layer will be on the bottom of the bottle
  6. If you rock the bottle from side to side you can create a wave like motion of the water, looking just like a little ocean in a bottle; see what kind of waves you can make!


Ocean in a bottle
Ocean in a bottle


How does it work…

This is a good experiment to explain density. The oil is less dense than the water so it will sit on top of the water, creating two separate layers. The layer of oil keeps the water contained within the bottom half of the water and makes the movement of the water look like waves where the two liquids meet.

I have discussed density in more detail in this previous post as well as sharing lots more density experiments.

If you get bored of your ocean in a bottle, why not stand it upright again and add some Alka Seltzer tablets to instantly turn it into a lava lamp!


Enjoy!


Fun Friday – 4 fantastic light experiments for kids

Fun Friday – 4 fantastic light experiments for kids

Yesterday Dr. Simple answered the question… Why is the sky blue?

Sometimes it is nice to get the “proof behind the science” so I thought I would share our four favourite light experiments so your children can find out how it works for themselves!

4LightExp

First up, an experiment to demonstrate what Dr. Simple was talking about yesterday…

Make a blue sky in a jar

Make a blue sky in a jar

You will need…

A clean glass jar, water, milk, a spoon, a torch and a dark room.

What to do…

Fill the jar two-thirds full with water and add half a tea spoon of milk.

Mix well.

Turn on the torch, make sure the room is dark, then shine the torch at the jar of liquid, holding the torch to one side of the jar and look at the colour of the liquid from the front.

The milky liquid will appear light blue in colour (move the torch closer to, or farther from the jar if necessary).

What is happening?…

Tiny particles in the milk act just like the tiny particles in the atmosphere, they scatter light shining upon them. When the light comes from the side of the jar the light of shorter wavelength, like blue light, is scattered the most so this is the colour we observe.


Now with a little alteration you can make…

Sunset in a jar
Sunset in a jar

A sunset in a jar

What to do…

This is the same experiment as the previous one, only this time shine the torch at the back of the jar while you observe the colour from the front. Now the milky water should appear red.

What is happening?…

When we shine the torch from the back of the jar the light is scattered differently. This time most of the blue light has been scattered away from our line of sight so the dominant colour to reach our eye is red light, hence the solution appears red.


Remember how Dr. Simple said that even though sunlight might appear white it is actually made up of all the colours of the rainbow? Here is an experiment to prove that…

Make a rainbow
Make a rainbow

Make your own Rainbow

You will need…

A plastic container, a piece of white card, a mirror and a sunny day!

What to do…

Fill the plastic container about two- thirds full with water and place it on the ground outside, in direct sunlight.

Place a mirror into the water and prop it up at an angle so the sun shines on it.

Hold the white card away from the mirror and move it from side to side or back and forth until you capture the rainbow on the card!

So what is happening?…

Water bends (refracts) light that passes through it.  Each colour bends a slightly different amount so the colours separate. The separated colours are bounced off the mirror and the image is caught on the piece of white card.

If you want a simpler version of this experiment take an old CD out into the sunshine and tilt the side without the label to the Sun. You will see a rainbow of colour appear on the CD at the point where the Sun shines.


Bend light
Bend light

Make a fountain of light

You will need…

An empty plastic bottle (one or two litre), a pin or needle, a torch, a sink or basin and a dark room.

What to do…

Place the empty bottle beside the sink and, using the pin, make a small hole in the side of the bottle, about half way up.

Place your finger over the hole and fill the bottle with water.

Turn on the torch and shine the torch on the bottle, behind the hole. Make sure the side with the hole is positioned towards the sink.

Remove your finger and let the water pour into the sink. See how the stream of water lights up.

So what is happening?…

Light bends when in water so when we shine the light from behind the stream of water the light is reflected off the side and bends with it… effective the light is trapped within it.