We woke this morning to find the science equipment had been raided…. by a group of dinosaurs! They were caught red handed… reading the science books (and checking out interesting facts about their relatives), rummaging through the equipment and hoisting themselves up to shelves for better access. The children thought it was great but I am a little worried. What are these dinosaurs planning?
It looks like dinovember might have arrived at the Science Wows house! Let’s hope they don’t get up to too much mischief!
We found this pair reading up on some dinosaur facts…
Did you know that the tail of the Apatosaurus may have acted like a bullwhip, breaking the sound barrier as it did so? These enormous dinosaurs lived more than 150 million years ago and may have used their super sonic tail action for defence, communication or courtship.
These guys were helping from below;
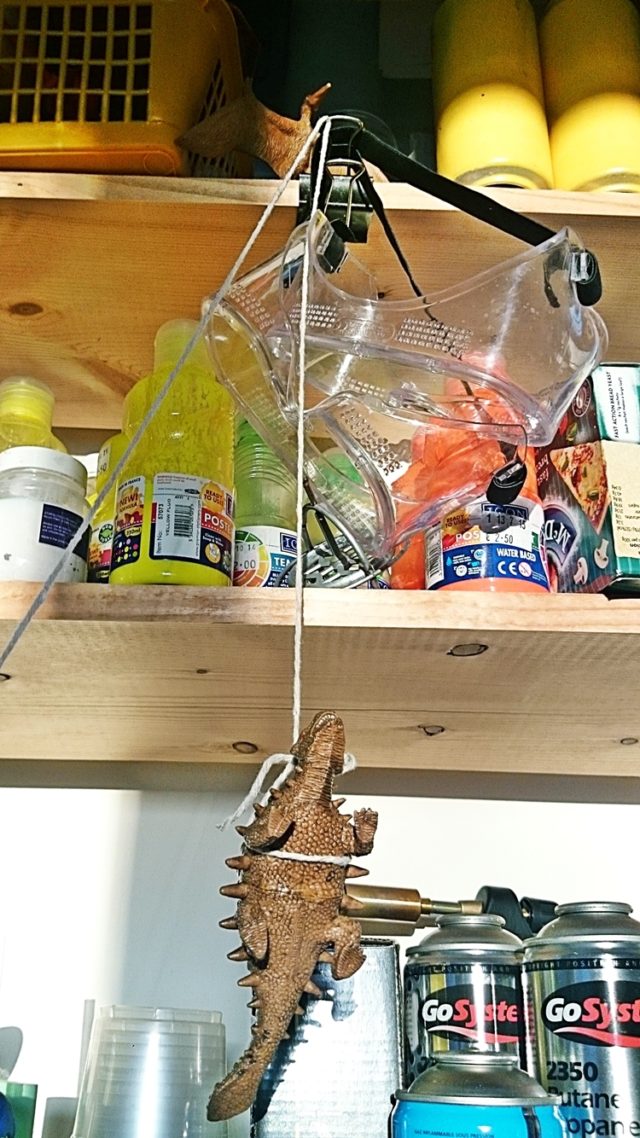
While the pterosaur flew up to prepare the rope….
…and hoist up some back up!
Did you know that, although pterosaurs lived along side dinosaurs (from the late Jurrasic period) they are in fact winged reptiles?
I really hope they don’t plan on opening any of these paint bottles!
This one seems very interested in electric currents!
Giving a homo sapien a helping hand!
I think it is going to be a long month with this crew running loose. If you want to keep up to date with their antics follow science wows on facebook, twitter and instagram.
And remember to keep an eye on your household dinosaurs… have you noticed anything unusual?
The Hallowe’en break has finally arrived! If you are looking for activities to keep your family entertained here is something sure to please …. Hallowe’en and science combined into one, fun quiz!
Use it to challenge, entertain or inspire your junior scientists, or get all the family involved and see if the children can beat Mum and Dad!
There is even a certificate to print off at the end of the quiz.
Remember to follow the screens right to the end, to find out an interesting fact on each question.
Good luck and have fun!
I hope you have a great Hallowe’en, and remember, there are lots of science experiments you can try too… check out the oozing pumpkin, the spooky cups, or the glowing monster slime; or how about making your own fake blood? All in the name of spooky science fun.
Some days … I struggle with the realisation that we are going to be late.
My pleas, requests and cajoles to get dressed, find shoes, brush teeth, comb hair go unanswered; I say it once, I say it twice… by the time I get to the sixth request I am feeling my blood pressure rise.
Ultimately we do get into the car, in some form of readiness but inevitably behind schedule. As I slam the car door and start the ignition the tirade begins. The words tumble out, one on top of the other, heating the air and creating a car full of friction. The more I rant the more obvious their silence… I am cross, I am frustrated and I am on a roll. I look in the rear view mirror and thenI see their faces and I realise that dressed and on time are irrelevant when there is a game to play.
Some days… I remember that there is a talent to getting lost in play.
Some days… I’m cleaning the house with a steady grumble. They are old enough to clean up after themselves. ‘The floor is not a wardrobe’ I hear myself mutter, ‘I didn’t sleep in this bed so I shouldn’t have to make it’. The words just slip out of my mouth with a life all of their own. Eventually it is the sticks and stones that break the camel’s back, literally! What could two small boys possibly need with so many of them (sticks not camels… obviously)… and why inside the house? That’s it, I’m throwing them all out… and then Isee their faces and I understand that these sticks and stones are magical elements in the mind of a child.
Some days… I remember that unmade beds make amazing forts and clothes on the floor make great stepping stones across treacherous croc filled waters. And a house full of sticks and stones could be just the talisman needed to keep our home a sanctuary.
Some days… are long days. Bed time has come and gone, and gone some more. There is a path worn from sitting room to their respective beds. This is ridiculous! Can’t a parent get any down time? They have had all day to go to the toilet/ drink water/ finish that story, so why, oh why, do they save it all up for those bewitching hours? Limits are reached, more noises are heard, steps are stomping down darkened corridors one time too many. But actually they are all asleep… and thenI see their faces and I forget all bedtime mischief.
Some days… I remember that we need to be well fed and watered before embarking on a night full of dream filled adventures.
Soil is the outermost part of the Earth’s surface, where plants grow. Without it we could not survive! Soil is made up of rock material of various sizes (from powdered rock to sand, pebbles and stones). Soil also contains minerals, rotting plants and animals and living organisms. It contains all the nutrients required for plants to grow and survive!
Why is soil so important?
Plants need soil to grow, not just for the nutrients that the soil provides but also as an anchor, a stable place where the plant can place its roots and support its growing structure.
The soil has many other important functions too…
Soil acts as a natural water filter, cleaning water as it passes through it
The soil provides billions of organisms with a place to live
The soil is very important in the cycling of nutrients – especially carbon and nitrogen
How is soil made?
There are a lot of factors that influence how soil is made. The first of these is what type of material the soil is being made from… the type of rock that the soil is made from is called the parent material.
Other factos that influence how soil is made are…
the weather,
the topography of the land,
what living organisms are around and….
time!
Did you know… it can take up to 1,000 years for just one inch of soil to form?
Soil is made when the parent material (rock) is broken down by the weather (wind, rain, sun, snow) eventually forming fine powder, sand and small rocks. The decomposition of organic matter and the activity of a variety of organisms help to improve the soils nutritional quality.
The soil is like a big recycling plant
Soil is not just for growing plants. It contains billions of other living organisms too… some can be very small like bacteria, fungi and algae and some can be very large like insects and even mammals.
All of these inhabitants help to break down dead plants and animals so that all the nutrients contained within them are returned to the soil.
Did you know… that in a tablespoon of good soil there are as many as 50 billion bacteria?
The earthworm plays a vital role is maintaining healthy soil and is often called “nature’s plough”.
Did you know… there are approximately 3000 species of earthworm in the world?
Learn more at home… make a wormery
You will need…
A large see-through container, sand, soil, worms, leaves and other vegetation, card or paper.
What to do…
Fill a large, see-through container with alternative layers of soil and sand.
Put a layer of leaves on the top.
Add enough water to keep the soil damp.
Collect some earthworms from your garden and add them to the wormery.
Cover the outside of your container with a large piece of card or paper to block out the light.
Put the wormery in a safe place and check on it every day- remember to keep adding water to keep the soil moist.
You should soon notice that the different layers of soil and sand are getting mixed together.
What is happening?
The earthworms mix the layers of sand and soil as they move through the wormery. This helps to distribute nutrients throughout the soil, making it more fertile.
Remember to return the worms safely back into the garden once you have finished.
Or you can watch the “how to” video…
A version of this article originally appeared in Science Spin, Issue 63, March/April 2014
I am just back from a week in Malta. I was attending the annual Science Expo and I was really impressed with how well it was organised and the level of enthusiasm and knowledge among the children. From primary school level, right up to third level, students came up with some great ideas, prepared, tested, recorded and then presented their projects with confidence.
The ideas presented varied widely from what conditions help us on memory tasks to investigating the use of apples to combat dust mite allergies (a subject close to my own heart). The place was abuzz with invention, innovation and imagination.
This project investigated the best herb or spice to combat a sore throat.
One project looked at the effects of smoking on a number of levels. The team involved went as far as to set up a Facebook page to emphasis their research, a really great idea, you’ll find it here.
WORKSHOPS
There were also a number of workshops running for the week. I ran an interactive one on acids and bases, a workshop created to show children how easy it can be to do science experiments with things you may have in your own kitchen… because science is an anywhere kind of thing.
I was lucky to have my daughter with me for the week, she was a great help and even got to demonstrate the first experiment to the class.
(video credit: Iris Nijman)
This Inflating balloon experiment is a really simple one but I love the squeals of excitement when the balloon starts to grow, even when the children have anticipated what is to come.
The children enjoying their first experiment (Photo credit: Irish Nijman)
One class to visit my workshop was from the International School in Malta. I was charmed when at the end of the workshop, each child thanked me in their own language. There was 16 kids in total, and I received a thank you in 14 languages!
There were many other great workshops throughout the week, I was just disappointed that I could not sneak in and have a look at them all.
On a national level there was the forensics division of the Maltese police force, explaining to children some of the techniques they use as well as allowing children try some forensic experiments themselves. There was also a very informative shark exhibition run by the shark research centre on the island. My daughter attended their workshop and came back with lots of great facts to share with me.
There was also plenty of international outreach programs represented at the Expo.
Iris Nijman of Universe Aware ran a workshop informing children about the conditions on the planets in our solar system, then the children got to create their own alien that was adapted to life on one of the planets they had learned about. This was a great way to make the workshop interactive for the children and a unique way to make the information much more memorable.
In João Retrê’s workshop children got to make their own planets from the solar system and then place them in their correct location on a scaled model. A great way to get a grasp of the perspective of each planet and its size and distance from its neighbouring planet. This workshop was part of the Portuguese Institute of Astrophysics and Space Sciences outreach program.
Mel Evans, from Cheltenham University, posed some very interesting questions as part of her PhD studies… how accurately is science portrayed in films and what is our interpretation of it? Does the film industry have a moral obligation to depict science with accuracy or is it acceptable to go well beyond the realms of possibility? Do we think that what we see in a film is possible in reality? Mel posed all these questions as she shared and discusses a number of popular film clips and received some very interesting responses from the children and their teachers.
Simon Guilliams from Belgium presented his self-built tri-copter at the Expo. Simon was a winner at the Belgian Science Expo with the tri copter he built in his back yard, starting at the age of 14 and building and improving it over the last four years. His prize was a trip to the Maltese Expo and a chance for him to share his creation.
SOME OF THE SITES OF MALTA
Of course our week in Malta was not all about science, we also got to see some of the island. We were a mere 15 minute bus drive from the beautiful capital, Valetta. We viewed this first by night, on a very informative walking tour of the city (organised by the NSTF). It was lovely to return again and see the same sites by day, soaking up the atmosphere as well as the Sun’s rays. There were many other activities organised for us by the NSTF, including a country walk at the North end of the island and harbour boat trip.
I know I haven’t been blogging much lately, I am trying to work on a little something else that I have wanted to do for a very long time. If I ever get the other project finished I’ll be sharing it right here so watch this space (not literally, it’s taking me a LONG time!).
There is still plenty of science going on in the background though, as is common enough around here. This week we repeated an old favourite, an experiment demonstrating water flow and transpiration in plants… our coloured flower science experiment. I spotted a bunch of pretty white tulips in my local super market and that was all the reason I needed. I had also spotted a set of little bottles while away in Westport last weekend and had to buy them for this experiment, which, I think, elevates my geek status to a whole new level.
I have blogged about this topic before, so if you want more information you can check out this post.
YOU WILL NEED:
Some white flowers*
Food colouring (I usually use the Goodall’s ones, available in most supermarkets)
Water
Glasses, cups or other containers, one for each colour you will use
*This will work with all (or almost all) white flowers but it works better with some than others. You can of course use other coloured flowers, daffodils are a popular choice. I have achieved good results with roses, carnations, oxeye daisies and some Chrysanthemums. You can choose the flowers based on what you want to achieve but if working with children (particularly young children) or doing this as a classroom project them I would definitely recommend the tulips. The results are rapid so children will be able to see the colour arriving into the flowers within a fairly short time frame.
WHAT TO DO:
Choose how many different colours you want to use. Place one colour into each glass and add water. I usually use at least 10 mls of food colouring to 20 mls of water (if unsure use a 50:50 ration of food colouring to water).
Choose your flowers, one for each glass, and trim them to the desired length. You will get a more rapid result with a shorter stem.
Then simple place a flower in each glass and wait! With these tulips I began to see a result within less than an hour. I set this experiment up overnight and went from this…
… to this…
WHAT IS HAPPENING:
Water is transported up the stem of the flower through little tubes called xylem. The coloured water will travel through the xylem all the way up the stem to various parts of the plant and right up to the flower. The coloured water stains the plant as it moves through it and this is most apparent when the white flowers change colour. The water ultimately evaporates out of the plant through little pores called stromata. This process is called transpiration and is much like perspiration in humans.
OTHER SUGGESTIONS:
If you want to take this one step further you can try to make a multicoloured flower, like I did with this rose last year. Just click on the image to go to the post with full instructions.
If you try this experiment, or a version of it, I would love to hear how it you get on!
Halloween is all about dressing up and sometimes you just need a little fake blood to really set an outfit off. We love making our own and with a little science knowledge you can get just the right consistency and colour that you are after.
You will need…
You will need…
Smooth Peanut Butter
Golden Syrup
Washing up liquid
Red food colouring
Green food colouring
What to do…
This is one of these experiments that does not come with an exact protocol, just add the following ingredients until you are happy with the appearance of it, then apply and freak out all your friends!
When you think you have the fake blood just the way you like it do a little test on a white cloth or tissue and adjust further if necessary.
If you want to experiment a little more try making your own fake blood choosing your ingredients from the following list:
Smooth Peanut Butter
Golden Syrup
Washing up liquid
Red food colouring
Green food colouring
Blue food colouring
Chocolate syrup
Cornflour
Cocoa powder
Ribena
Chocolate syrup
Tomato ketchup
Brown Sauce
So what is happening?…
The trick to making good fake blood is to get the colour and consistency right. The food colouring, washing up liquid, cocoa powder, ribena, peanut butter and ketchup will all influence the colour of the blood. You want to get a dark colour, deep red colour so the chocolate and green food colouring will often give the red a darker effect.
It is not just about the right colour though, the consistency of the blood is important too. The cornflour will thicken the blood and make the colour more transparent, as will the peanut butter, syrup and washing up liquid.
The fun is in mixing and changing until you get your ideal fake blood, then apply and freak out your friends and family, all in the name of Halloween fun.
With a name like “Glowing Monster Slime” you just know this experiment is going to be fun! Just look at the photos if you need any convincing!
You will need
You will need…
two small bowls or cups
one large bowl
PVA glue (white or clear is you can get it)
*Borax Powder
Fluorescent paint (you can get non-toxic fluorescent paint in most craft shops)
something to stir or mix with
*You can pick up the borax powder in your local chemist (See note below)
What you do…
To the first cup add half a cup of fluorescent paint and half a cup of PVA glue and mix well.
Mix the glue with the flourescent paint
In the other cup add half a teaspoon of borax powder to one cup of water and mix well until all the powder is dissolved!
Dissolve the borax in the water
Now for the fun bit… pour the glue mixture into the bowl then add the borax solution, mixing all the time.
Mix together the glue mixture ans the borax solution
After a while you can use your hands to mix and mould until you have one big lump of slime and there is little, or no liquid left!
The fun bit
You can store your slime in a ziplock bag or clean jar, it lasts a very long time once you do not let it dry out. You may notice a small layer of liquid separating off the top of the stored slime. This can just be poured off and the slime will become a little more rubbery and less sticky.
When you have finally finished playing just store away
If you have a UV light (black light)** you can make this experiment even more fun by checking out how your slime glows in the dark once the lights go out and the UV light is turned on.
Sooo much fun!
So what is happening?…
Congratulation… you have just experimented with polymers!! In simple terms a polymer is a substance made up of lots of molecules arranged in long chains. If you imagine that the glue is like cooked spaghetti, it slides and slips around the place quite easily. When we add the borax to the glue it causes some of the molecules in the glue to stick together making the glue more rubbery and less liquid! Imagine if you took those strands of spaghetti and tied them together in places, the strands would not be able to slip and slide around nearly as much! The borax and glue mixture is just like your knotted spaghetti!
*Where can I get Borax powder?
In Ireland you need to buy Borax powder in a pharmacy. The production is a little erratic and the larger volumes are no longer available! You should be able to get a 100g tub in any pharmacy and it costs between €2 and €3.
**Where can I get a UV light?
This experiment is lots of fun without the UV light but the glow in the dark bit really does take it to a different level. My youngest nearly burst waiting for the night to fall so we could do that part of the experiment. If you are considering buying a UV light you should be able to get one fairly cheaply. I got mine from Maplin. I will be sharing lots more glow in the dark experiments, so if you do get one remember to check back here for some more ideas.
I hope you enjoy this as much as we did and please let us know if you do try it out!
UPDATE 2017: Borax powder is no longer as readily available in Ireland. here is one alternative, using very simple ingredients… check out this post on how to make silly putty.
Or check out our Ultimate Slime Guide for lots of fantastic slime recipes using contact lens solution or laundry detergent.
This week’s question for Dr. Simple came in from a little boy who has just turned five and sometimes goes by the name of Spidey (you might find him here); He wants to know…
Why is the sea salty?
This is a great question and Dr. Simple was delighted to “dive right in” and answer it!
Before Dr. Simple gets stuck in it might be a good idea to look at the definition of a sea and an ocean. Dr. Simple will use the word sea to mean both, which is commonly done, but there is actually a difference between the two words…