A Simple Slice of Science – What makes the wind?

A Simple Slice of Science – What makes the wind?

This week Dr. Simple answers a question that comes in from a lovely little girl who can sometimes be found here; she would like to know…

What makes the wind?


wind


Did you like Dr. Simple’s explanation or did you find it “a load of hot air“?

Personally I preferred the little girl’s own explanation… she reckons the wind is made by the trees flapping their leaves! A much more simple, and beautiful, explanation, don’t you think?

Remember to keep your questions coming, just leave them in the comments below and Dr, Simple will be happy to answer!

Fun Friday – Magnets Part 1… a favourite magnet game

Fun Friday – Magnets Part 1… a favourite magnet game

We love magnets in this house. Some rainy days my children like to take out my box of magnets and are happy to play away with them for hours. Recently I brought my magnet collection along to local Beavers Club for the children to explore and learn… and play some great magnet games. This game was a favourite so I thought I would share it with you!

Before you start this game you might want to let the children explore how magnets work, how they attract or repel each other and how all magnets have two sides, a North and a South. Explain the invisible magnetic forces at play. Check out this post on magnets before you get started!


“Herding sheep” magnet game


You will need...
You will need…


For this game you will need some magnets* (two per player), a table, some cotton balls and some duct tape or masking tape.

*We used torpedo magnets for this but any magnets will do once they can attract each other through the table… so the choice of table is important. Wood is good, or plastic, but thin and without many/any crossbeams or bars underneath. We used a light chipboard wallpapering table.


The Set Up...
The Set Up…


 Set Up:


Using the tape mark a starting line at one end of the table and a box with a small opening at the other end; this is the “sheep’s pen”.

Place one magnet from each pair on top of the table and the other under the table… the magnet under the table should be held in place by it’s attraction to the magnet above. Each child is designated a pair of magnets, these represent the sheep dogs.

Place the cotton balls (these are the sheep) behind the starting line.


The aim of the game:


The aim of the game is that the children must “herd” the sheep along the table and into the “pen” at the other end. They can only move the “sheep dog” by moving the magnet under the table! The children keep going until all the sheep are transferred to the pen.

You can use a timer for this game if you wish. Time how long each team takes or get a group of children to try again and see if they can beat their previous time.


Ready-Steady-Go!


Ready-Steady-Go… let the fun begin! I have yet to meet a child (or adult) who does not get totally engrossed in this game!

Here is a game in action in our house…


Let the fun begin!
Let the fun begin!


 What do they learn?


This game is great for children’s fine motor skills and coordination, it also teaches children to work as a team. Children learn about the attractive forces between magnets. You can follow on this game by asking the children if they think the magnets would still be attracted through other materials… paper, plastic, glass?


Make it your own:


Once the children get the idea of the game they will probably come up with their own modifications. What else could you try? Adding obstacles along the route? trying magnets of different shapes and strengths? Changing the number of sheep? What about replacing the top magnet with something metal?

The only limit to this game is the child’s imagination… which is usually limitless! I hope you enjoy!

What would you alter? If you come up with a different way to play this game please do let me know!


Eh... which way is North?
Eh… which way is North?


Next week we will share another favourite game and learn a little about compasses too, so see you next Friday for Part 2!

Our five favourite Easter experiments (or should that be eggsperiments)

Our five favourite Easter experiments (or should that be eggsperiments)

Are your children just starting their mid term break? Looking for some exciting activities to entertain them over the next two weeks? How about some Eggsellent Eggsperiments to keep everyone happy?

Here are five of our favourite experiments for Easter… or any other time of the year.

Easter Experiments

1. THE FLOATING EGG EXPERIMENT


Take the floating egg experiment one step further!


Take this one step further….

We mentioned in the video that you can take this experiment a step further.

Float the egg in the salty water as before.

Add a few drops of food colouring to a jug of unsalted water.

Carefully pour this coloured water down the side of the glass so that it sits on top of the salty water.

The egg will sit between the two layers… can you see it in this picture?


2. BALANCING EGG EXPERIMENT

Amaze your friends with this egg balancing trick


The junior science team were a little enthusiastic

with their salt levels in this video

but you can get this to work with A LOT less salt.


3. HOW CAN YOU TELL IF AN EGG IS RAW OR COOKED?


4. IMPRESS YOUR FRIENDS WITH THIS EGG IN A BOTTLE TRICK


5. MAKE A BOUNCY EGG

Not only did we make a bouncy egg, but we also made a fluorescent one…. check out these experiments here.


There will be plenty of great Easter blog posts by fellow Irish Parenting Bloggers over the next week or two…. here are a few already posted and if you check back I will keep this list updated as new posts are available.

You may also like…

Easter gift tag printables over at My Country Girl Ramblings

Check out these great dairy free treat ideas over at Dairy Free Kids

Easter Hama bead activity and Things I love (and hate) about school holidays over at Learner Mama

Easy Easter bonnets at Where wishes come from

Office Mum wonders “Is the Easter Bunny a thing?”

There is an Easter trip involving “Hot cross buns and Vikings in the Park” over at The Busy Mama

Tyler Lee’s Easter basket over at Dolly Dowsie

or check out what Bumbles of Rice has planned for Easter with this lovely Easter Ideas post


Happy Easter!


Fun Friday- Make a simple kaleidoscope

Fun Friday- Make a simple kaleidoscope

The weekend already…Yay! Hope you are doing something fun…. if you are looking for an activity to entertain your children why not try this?… My junior scientists had great fun making these simple kaleidoscopes and learning about light and reflection!

Fun Friday - Make a Simple Kaleidoscope
Fun Friday – Make a Simple Kaleidoscope


Here is what you will need:

  • a sheet of mirrored card* (we found a packed of A4 mirrored card in our local craft shop)
  • a ruler
  • a scissors
  • some felt pens
  • tracing paper/transparent paper
  • a sheet of clear plastic (optional)


What to do…

1. Cut a 6cm strip off the long end of our A4 mirrored card leaving the card 24 cm in length

2. Fold the card in half (mirror side in) so that the short ends meet

3. Open back out the card and next fold the short ends in so that they meet in the middle

4. You should now have a card with three folds and four sections, 6 cm wide

Kaleidoscope1


5. Next fold the card into a triangle (mirrored side in), with one of the strips overlapping

6. Tape this overlapping strip along the edge so the triangle is now secure – this will be the tube of your kaleidoscope

The tube of the kaleidoscope - mirrored surface on the inside
The tube of the kaleidoscope – mirrored surface on the inside


7. Now it is time to prepare the designs for your kaleidoscope… we used the coloured pens to draw designs on a square piece of clear plastic, at least 6 X 6 cm in size.

The design team at work


Some of the finished designs

8. Once finished tape the coloured squares on to a piece of transparent paper (or you can just draw your design directly onto transparent paper if you wish)

9. Now it is time to use your Kaleidoscope… hold the transparent paper with the design up to a window or a light source, look at it through the kaleidoscope… rotate the paper and see how the patterns change

Using the kaleidoscope


We love the results
We love the results

What is happening?

Light travels through the transparent paper into the kaleidoscope where is bounces off each of the three sides before reaching our eyes. As each side is mirrored it reflects the light that bounces off it and also the light bouncing off the other mirrored sides of the kaleidoscope. All this reflecting makes multiple images of different parts of the pattern and create a very interesting effect.

Do have a go it is great fun! 

*Note: if you cannot get mirrored card you can use cardboard covered in aluminium foil. This will work better if you also add a layer of clear plastic on top of the foil… creating a better mirror! 


Fun Friday – Carve a Heart of Hope Pumpkins

Fun Friday – Carve a Heart of Hope Pumpkins

Continuing on with the Halloween theme we are talking PUMPKINS today; Of course in this house we don’t just carve them… Oooh Noooh… we like to see what else we can do with them… exploding, glowing, oozing… all in the name of SCIENCE!

But first…

But before we all don the lab coats and goggles I wanted to draw your attention to the Carve a Heart of Hope for Halloween Campaign, run by World Vision Ireland.

World Vision Heart of HopeWorld Vision Ireland is a small part of the global World Vision organization, providing long term support to children in six African countries; Mauritania, Kenya, Swaziland, Tanzania, Uganda and Sierra Leone.  They also provide emergency support where needed and are actively supporting the Syrian crisis at the moment.

This Halloween World Vision Ireland are running a campaign to raise awareness of the work that they do.  They are asking people all over Ireland to carve a heart of hope into a pumpkin and place it in their window as a sign of support of their Survive to 5 campaign.

(Click on the links above if you want to find out more about this campaign).

Back to Pumpkins…

So what did we do with our pumpkins? Well first we carved them…
Then we added a bit of glow in the dark paint… because we are just loving anything that glows at the moment!


Then we turned our attention to the oozy, exploding bit…

If you want to try this at home you will need…

What you need:
A carved pumpkin (use a small one)
250 mls 6% Hydrogen Peroxide
2 teaspoons (or 2 sachets) dried yeast
2 Tablespoons warm water
Washing up liquid
Food colouring (optional)

What to do:
Place a small plastic container inside your pumpkin (large enough to contain 300 mls but small enough to leave plenty of room between the container and pumpkin lid). Carefully pour in the 250 mls hydrogen peroxide.  Add a BIG squirt on washing up liquid. A about 5 drops of food colouring if using.

In a separate bowl mix the 2 teaspoons of dried yeast into the warm water. Carfeully add this to the hydrogen peroxide mixture inside the pumpkin, replace the lid and then stand back and enjoy!

What is happening:
This is an example of a catalytic reaction which really just means that something is added to the reaction to make it happen a lot faster, but that it is not chemically changed by the reaction. The something added is called a catalyst.  The yeast is the catalyst it this reaction… it splits the hydrogen peroxide into water and oxygen without getting chemically changed itself.  The oxygen produced then combines with the washing up liquid to produce a LOT of foam!

What to do with the bits you don’t use for Science?… Eat them!

Don’t forget about the lovely fleshy parts of the pumpkin, you did keep them before you started experimenting, right?  Here are some links to some great recipes, from some of my favourite bloggers, to put that pumpkin to good use…

  • Pumpkin Bread… a yummy alternative to Banana Bread; this one is by fellow Irish Parenting Blogger, Christine, more often found blogging at Awfully Chipper.
  • Or you could just download the lovely Pumpkin Pack as part of the Carve a Heart of Hope Campaign for a great Pumpkin soup recipe from Donal Skehan.

Happy Halloween… and stay tuned for more Halloween fun… lots of glowing, bubbling, exploding experiments coming up in the next few days!

Fun Friday – making slime!

Here is a fun science experiment that all kids love….. and no matter how many times a child may have done this one, they are always happy to do it again!

HOW TO MAKE SLIME

You will need….

  • two small bowls or cups
  • PVA glue (white or clear is fine)
  • water
  • food colouring (optional)
  • Borax* powder.

*You can pick up the borax powder in your local chemist (See note below)

What you do… 

  • To the first bowl add half a cup of water and half a cup of PVA glue and mix well.
  • If you want to make coloured slime add a few drops of food colouring and mix this in well.
  • In the other bowl add one teaspoon of borax powder to one cup of water and mix well until all the powder is dissolved!
  • Now for the fun bit… pour the borax solution into the PVA/water mix and mix, mix, mix!!! YOU HAVE JUST MADE SLIME!


This experiment is as fun as it looks!

If you want to keep your slime just pop it into a Zip-lock bag and seal it and it will be ready for you next time you want some slimey fun!

So what is happening?…

Congratulation… you have just made a polymer!! In simple terms a polymer is a substance made up of lots of molecules arranged in long chains.  If you imagine that the glue is like cooked spaghetti, it slides and slips around the place quite easily.  When we add the borax to the glue it causes some of the molecules in the glue to stick together making the glue more rubbery and less liquid!  Imagine if you took those strands of spaghetti and tied them together in places, the strands would not be able to slip and slide around nearly as much! The borax and glue mixture is just like your knotted spaghetti!


*Where can I get Borax powder?

In Ireland you need to buy Borax powder in a pharmacy.  The production is a little erratic and the larger volumes are no longer available!  You should be able to get this 100g tub in any pharmacy and it costs about €2.25.

UPDATE 2017: Borax powder is no longer as readily available in Ireland.  here is one alternative, using very simple ingredients… check out this post on how to make silly putty.

Or check out our Ultimate Slime Guide for lots of fantastic slime recipes using contact lens solution or laundry detergent.


Check out next week’s Fun Friday post for more slime recipes to try at home!

Fun Friday – Exploring Density

What is Density?

Density is the mass of an object per unit volume.  A bit of a mouthful but this is how I explained it to my own children today….

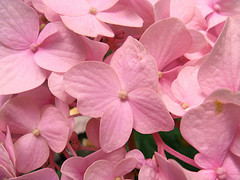
…imagine you have a pebble and a marshmallow of the same size and shape… which one do you think is heavier?

My three year old got this straight away… “the pebble of course Mum” (with a “silly question” look that I am use to at this stage).

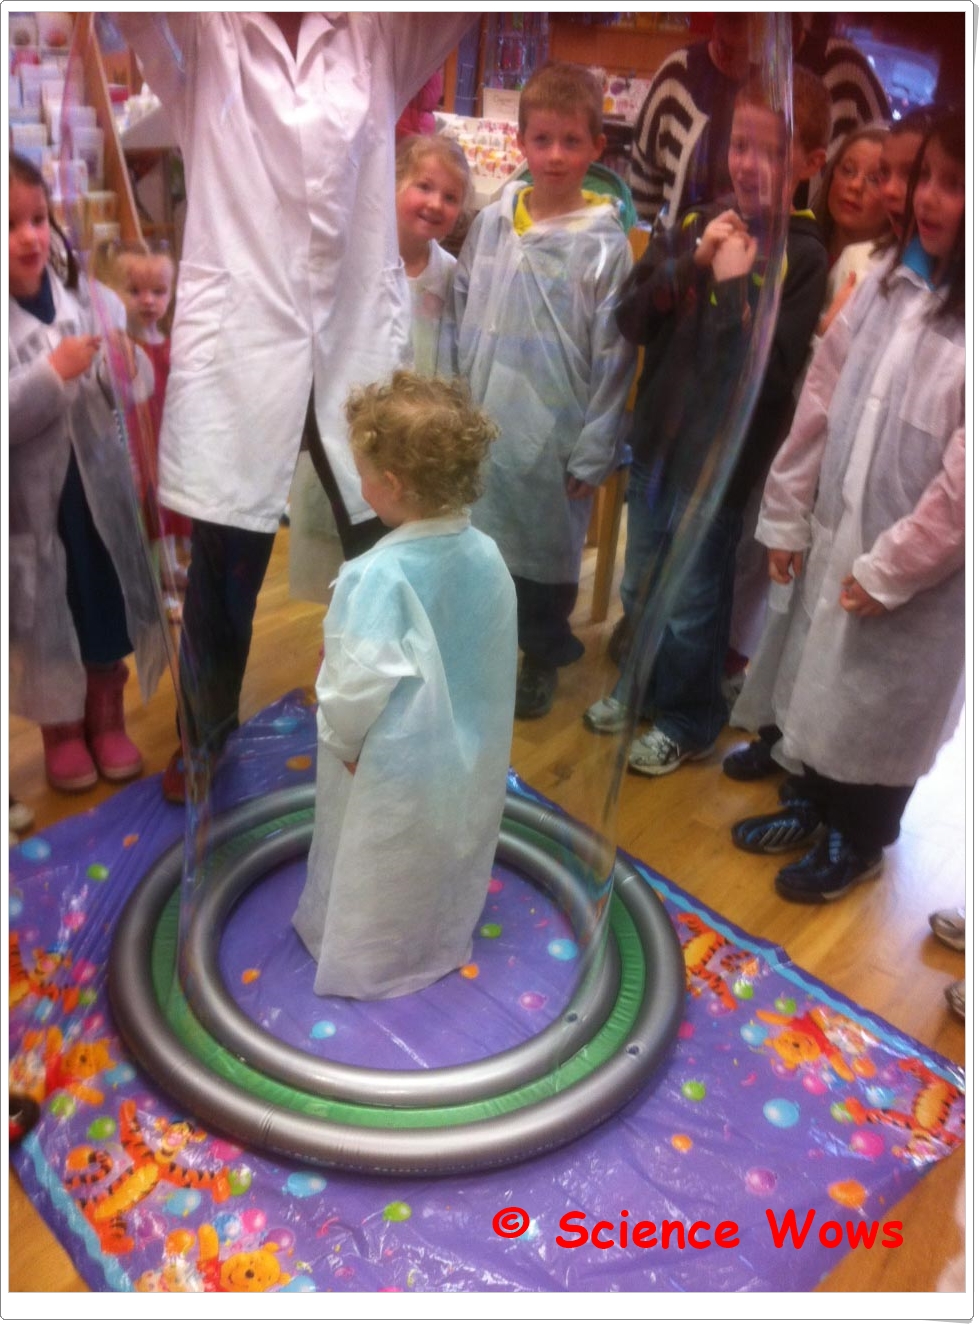
The Fun Friday Science Team!

So if they are the same size (volume) then why does one weigh so much more than the other?  If you remember that everything is made up of molecules… the heavier object simply has more molecules packed more tightly together (a greater mass); the molecules in the lighter object (in this case the marshmallow) are much more loosely packed together (a smaller mass)!

The pebble is said to have a greater density than the marshmallow.

A bit of History:

A Greek scientist called Archimedes (250 BC) is credited with discovering the concept of density.  The story goes that Archimedes was given the task of determining if the newly minted King’s gold coins were genuine (or if they had been mixed with silver).  Archimedes was pondering this idea while lowering himself into the bath.  When he noticed how his body displaced a volume of water he realised he had cracked it!  If he compared a coin of pure gold with the newly minted ones he could check if they displaced the same amount of water i.e. that their densities were the same.  Turns out they were not and the King was beings duped!

They say that Archimedes was so excited when he realised the solution that he jumped out of the bath and ran all the way home naked shouting “Eureka, Eureka”…. (“I found it, I found it” in Greek).

Here are some experiments on density that you can try at home…

The children and I spent the afternoon trying out these cool experiments that are easy to do at home.  Hope you get to try some too!

1. Make a density rainbow
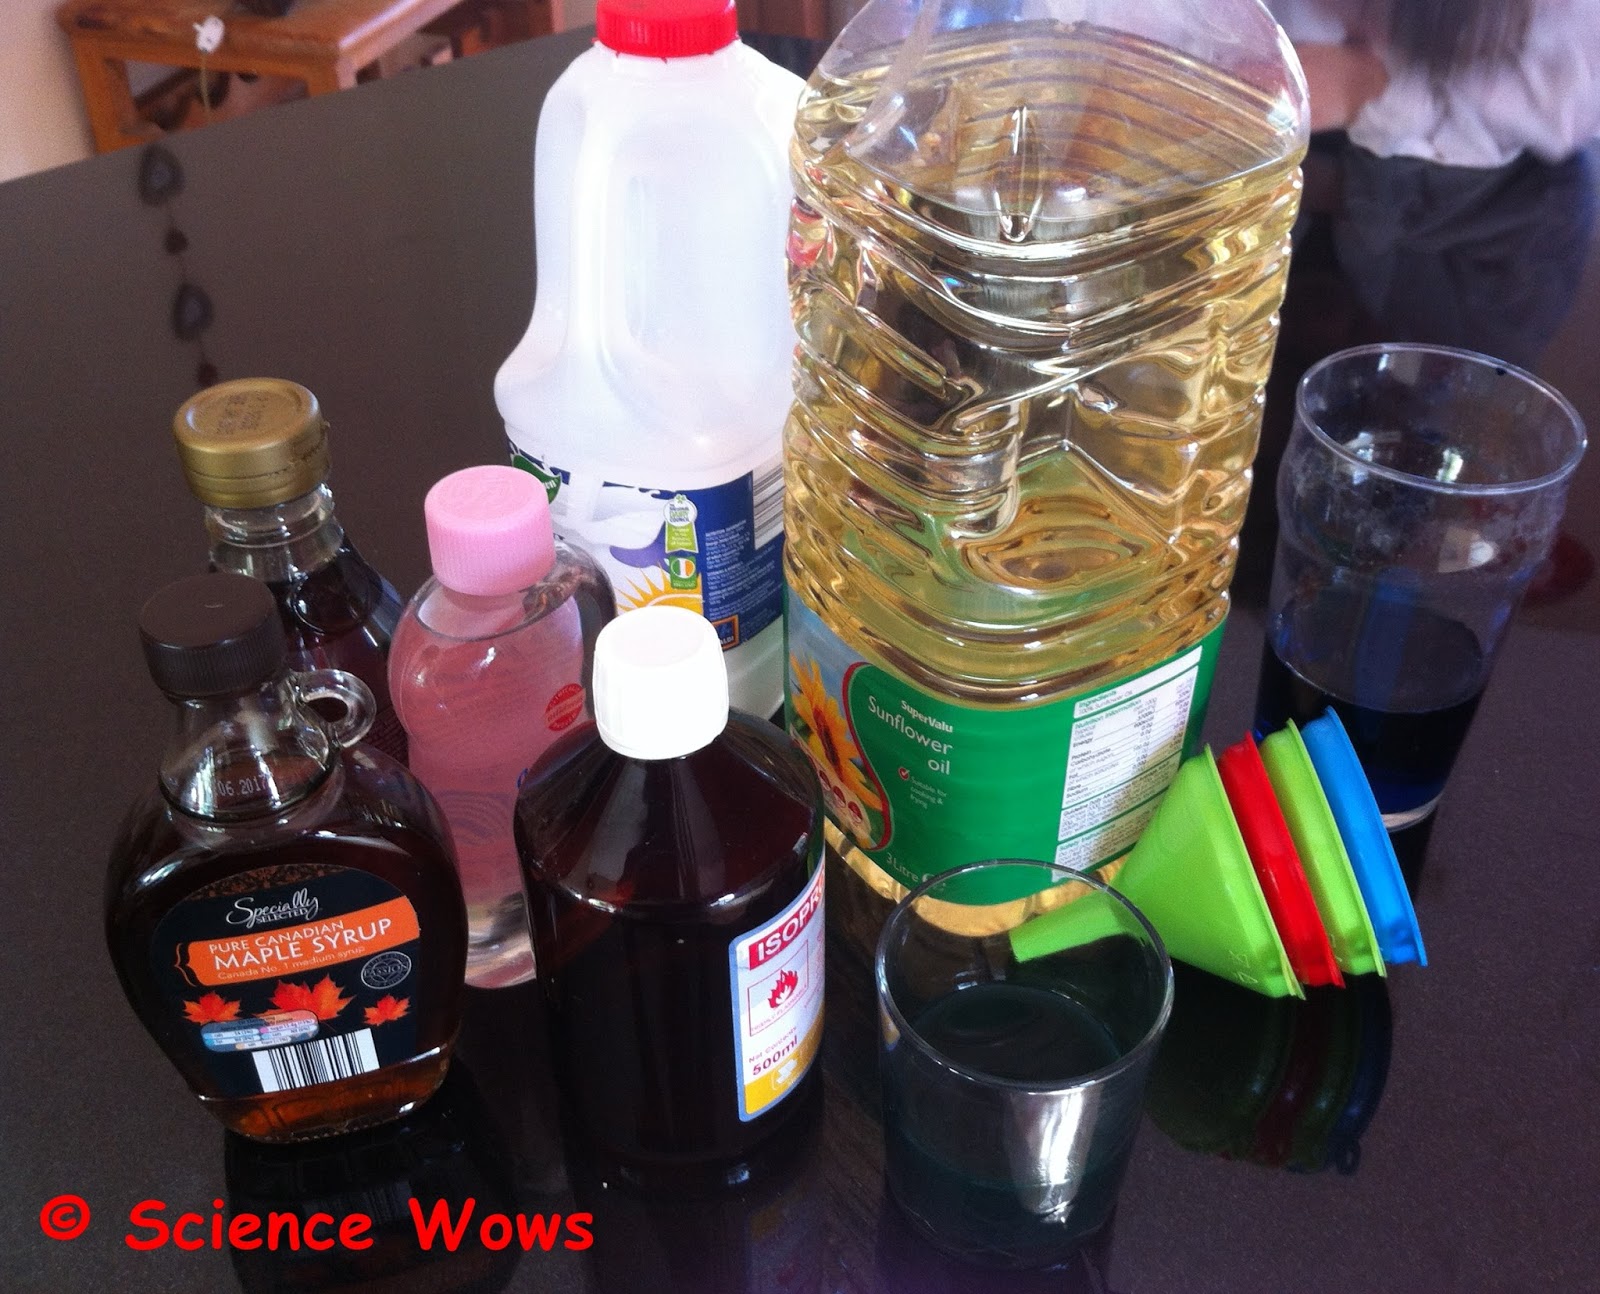
You will need:

A clear glass, golden syrup or honey, maple syrup, milk, washing up liquid, water, food colouring, cooking oil or baby oil, a clear alcohol (we used isopropanol but you could use methylated spirits or vodka – with adult supervision!), funnels, a dropper or a spoon.

What to do:

Place some water in a glass and add a few drops of food colouring and mix. Place some alcohol in another glass and add a few drops of a different food colouring. Mix.

Carefully add each layer in the following order….

  1. golden syrup
  2. maple syrup
  3. milk
  4. washing up liquid
  5. coloured water
  6. baby oil (or cooking oil)
  7. coloured alcohol
Try to add each layer carefully down the side of the glass, using a spoon, a dropper or a funnel (as below).  Make sure each liquid makes a complete layer that fully covers the layer underneath.  If the layers mix a little, allow to settle before adding the next layer.
Add each layer carefully down the side of the glass
Two junior scientists admiring their work!
We think it looks lovely!


What is happening:

We added the most dense material first (the golden syrup) and then the next dense and so on.  So each layer is a little lighter or less dense than the previous one and therefore floats on it.

You can of course add other things are leave some of these layers out!

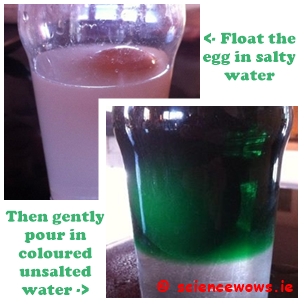
2. Lava lamp in a glass

You will need: a clear glass, sunflower/vegetable oil, water, food colouring, some effervescent tablets such as AlkaSeltzer.

What to do: Place water in the glass to about one third full.  Add a few drops of food colouring to the water and mix. Gently pour the oil down the side of the glass filling the glass to almost the top.  If the oil and water mix a little don’t worry, just wait a while until the two layers separate out with the oil sitting on top of the water. Break the tablet into pieces and add one or two pieces to the glass…. I will let Caer explain it to you (with a little prompting from her brother)!

What is happening:

When the AlkaSeltzer tablet reaches the water layer it starts to dissolve and fizz, releasing a gas called carbon dioxide.  This gas forms in small bubbles surrounded by water, they start to rise to the top of the glass because the gas is lighter (less dense) than the water and oil.  The bubbles pass all the way through the oil layer to the top of the glass where the bubble eventually bursts, releasing the carbon dioxide gas.  Once the gas is gone the bubble is just water, which is heavier (more dense) than the oil so it starts to drop down again.  The process continues until all the carbon dioxide has escaped to the top.  Adding more AlkaSeltzer starts it all off again!

3. Fireworks in a glass

You will need: A glass, water, food colouring and sunflower (or vegetable) oil

What to do: Fill the glass with water to about two thirds full.  Carefully pour a layer of oil on top of the water to fill the glass.  Add drops of food colouring to the top of the oil layer and watch as they slowly drop down and enter the water layer.  They streak through it like some mini fireworks!

Add the drops of food colouring to the top of the oil…
…and wait for the fireworks display to begin!

What is happening:

Food colouring and oil do not mix so the drops will fall until they meet the water layer.  Food colouring dissolves in water, the colour diffuses out into the water as the drops fall to the bottom of the glass, giving a lovely fireworks type display!

Hope you enjoyed this week’s Fun Friday as much as we did.  If you have any comments, questions or suggestions please leave a comment below, I always love the chat and feedback!  

Have a great weekend!

Fun Friday – Exploring Bubbles!

Fun Friday – Exploring Bubbles!

WHAT IS A BUBBLE?

A bubble is a thin film of liquid filled with air or another gas. Most bubble are made up of soapy water and air.

LET’S LEARN MORE…

No matter what shape a bubble starts off as, it will always try to form a round shape (called a sphere). A sphere is the shape that allows the least amount of surface area – and therefore the least amount of energy is needed to maintain this shape.

If one or more bubbles touch they will loose their sphere shape – the walls of the touching bubbles will merge. If both bubbles are the same size the shared wall will be flat!

The walls of joined-up bubbles always meet at an angle of 120 degrees

photo credit: kaibara87 via photopin cc
photo credit: Jeff Kubina via photopin cc


WHAT COLOUR IS A BUBBLE?

Bubbles reflect colours from their surroundings so at first they may appear rainbow coloured.

As time goes on the colour of the bubble changes until finally the bubble appears colourless – and then it bursts


HOW DOES IT WORK?

The sphere of a bubble is made up of two layers – an inner wall and an outer wall. As light waves hit the bubble they are reflect off both walls. The walls of the bubble gradually weaken and the distance between the two walls reduces until the reflected light waves cancel each other out and the colour disappears.

 Did you know… The skin of a bubble is less than one thousandth of a millimetre thick!


EXPERIMENTS TO TRY AT HOME

Make your own bubble solution!

 Commercial bubble solutions are great but they can be expensive, so why not make your own? There are lots of good recipes that work really well but this is the one I usually use! 
You will need… a clean, dry empty plastic bottle (1 litre), 4 tblsp (60ml) washing-up liquid, 2 cups (480mls) clean water, 2 tblsp (30ml) glycerine
What to do: Before you start make sure the bottle, your hands and any measuring utensils are clean and dry. Carefully measure out each ingredient and add, one by one to the bottle, trying not to make the mixture get too bubbly. Once everything has been added stir slowly and carefully. Cap the bottle and leave it in a safe place overnight. The bubble solution is ready to use the next day.
Some tips: When making your bubble solution make sure you use “original” washing-up liquid and not any of the scented varieties! If possible, use bottled or filtered water rather than tap water.


So now what?… Now start making bubbles!! If you don‛t have any bubble wands you can make your own using some pipe cleaners. Try shaping the pipe cleaners into different shapes and see how the bubble will still always end up as a sphere shape.

 Did you know… The biggest free- floating soap bubble ever blown was 105.4 cubic feet. It could have held 788 gallons of water!


If you really want to scale it up make extra bubble solution and us a small paddling pool and a hoola hoop to make some mega bubbles!


This is a photo of my son in a big bubble made using a commercial bubble ring


Did you know… The world record for the most people inside a bubble was set in 2006 by Sam Heath; His bubble contained 19 girls and boys over five feet tall!!


BUBBLE ART:

You will need.. bubble solution, food colouring, plastic cup, a straw, paper.


What to do: Pour bubble solution into the plastic cup until the cup is about one third full. Add two tablespoons of food colouring to the bubble solution and mix it well. Place the straw into the bubble solution and keep blowing until the bubbles are coming out of the pot.

Lower the piece of paper onto the bubbles to make an imprint (do not let the paper touch the plastic cup).  Lift off the paper and allow your bubble art to dry.

You can repeat the process using different colours of food colouring!


ENJOY!

Fun Friday – exploring Acids and Bases

Fun Friday – exploring Acids and Bases

I know, I know, I shouldn’t call in Fun Friday when I am posting it on a Saturday, but ignoring the fact that I am a day late with this regular blog post, I hope you enjoy!

Exploring Acids and Bases

What are Acids and Bases?

Acids and Bases are chemicals that occur naturally in lots of different substances.
Acids can be found in things like lemons and vinegar; Bases (also called Alkali) are found in toothpaste or many cleaning products. Bread soda is a base.

Lets learn more!

The Bronsted-Lowry Definition of an acid and a base is…
  • Acids are substances that gives up hydrogen ions (H+).
  • Bases are substances that accept hydrogen ions (H+).
  • These hydrogen (H+) ions can change things in many ways, including taste and colour!

Did you know… that the word acid comes from the Latin word acidus meaning sour!

Lemons contain an acid called
citric acid that gives them that
sour taste!

The pH Scale

The pH scale is a scale that measures how acidic or basic a substance is.
The pH scale goes from 0 to 14. The scale for acids goes from 0 to 7. A very strong acid has a pH of 0. The scale for bases goes from 7 to 14. A very strong base has a pH of 14.
Something with a pH of 7 is said to be neutral (neither an acid or a base). Pure water has a pH of 7.
photo credit: ViaMoi via photopin cc


“Did you know… that bee sting venom contains an acid called formic acid!”

Acids and bases in plants!

An indicator is something that can determine whether a substance is an acid or a base. Many indicators are natural chemicals.
A group of chemicals called anthocyanins are naturally present in a number of different plants such as apples, grapes, the leaves of many trees and flowers such as roses and poppies.
photo credit: Jason A. Samfield via photopin cc

The colour of anthocyanin changes depending upon the acid levels (pH) of the plant. The bright red and pink colours of Autumn are due to anthocyanin and acid levels in leaves (for more on this see my previous
post “Carrots, Cabbages and Cups of Tea“).

Anthocyanin changes colour from red to pink, to purple, to blue, to green as the pH changes from 0 to 14.
photo credit: Parvin via photopin cc

“Did you know… Hydrangea flowers can change colour depending on the pH of the soil. In acidic soils chemical reactions occur to make aluminium available to the plant, turning the flowers blue, in alkaline (basic) soil these chemical reactions cannot occur so the flowers remain pink.”


Experiments to try at home:

Make your own sherbet

You will need… icing sugar, citric acid, bread soda, flavoured jelly crystals, a teaspoon, a tablespoon and a mixing bowl.
What to do… add one teaspoon of citric acid and one teaspoon of bread soda to the bowl. Add three tablespoons of icing sugar and two tablespoons of flavoured jelly crystals. Mix all together then place a small amount on your tongue! The sherbet should bubble a little and you should feel a tingle on your tongue!
So what is happening?… you have just created an  acid-base reaction in your mouth! When the citric acid, bread soda and saliva in your mouth combine they react together to give off a gas, called carbon dioxide, that forms tiny bubbles that you feel fizzing on your tongue!

Cabbage juice experiment

You will need… a red (purple) cabbage, a knife, a saucepan, a sieve, an ice tray, clear vinegar, water and bread soda
What to do… cut up half the red cabbage and add it to a pan.  Ask and adult to cover with water and bring it to the boil then leave to cool.  Once cool pour the cabbage juice through a sieve, collecting the juice in a bowl.  Pour the juice into an ice tray and freeze until it hardens into ice-cubes.
Half fill three glasses, one with water, one with clear vinegar and one with water mixed with half a teaspoon of bread soda. Now drop a cabbage juice ice-cube into each glass and see what happens.
Cabbage Juice ice cube experiment


So what is happening?… red cabbage contains anthocyanin. When the cabbage juice mixes with the acid (vinegar) it turns a red/pink colour; when it mixes with the bread soda solution (base) it turns a blue/green colour.  The water is neutral (pH 7) so it does not alter the purple colour of the cabbage juice.
#FunFriday – exploring Magnets

#FunFriday – exploring Magnets

What is a Magnet?


A magnet is an object that can produce a magnetic force around it called a “magnetic field”.  Magnets attract certain types of metals such as iron, nickel and cobalt.


Let’s learn more!


A magnetic field is not visible to the human eye, however iron filings can be used to show the pattern of a magnetic field. The magnetic field around all magnets is strongest at it‛s ends – these ends are called the Poles. One end is called the North Pole and the other is called the South Pole, just like the Earth.

If you put the poles of two magnets together they will either pull together (attract) or push apart (repel); Different poles attract (North and South), similar poles repel!

photo credit: daynoir via photopin cc


Did you know… small iron rocks on the Earth‛s surface are often natural magnets and these are called Lodestones.

The Earth as a magnet


The Earth is one big magnet – it‛s magnetic field is created by the iron that is in the core of the Earth. The Earth‛s magnetic field is strongest at the North Pole and the South Pole.

photo credit: *~Dawn~* via photopin cc
Did you know… many objects is space are magnetic including the Sun!

photo credit: Najwa Marafie - Free Photographer via photopin cc
photo credit: Najwa Marafie – Free Photographer via photopin cc


Did you know… the Earth‛s magnetic field deflects charged particles that come from the sun (Solar Wind) and this creates the wonderful lights called AURORA that can sometimes be seen in the sky.

Magnetic compasses use the Earth‛s magnetic field to determine North, South East and West.


Electromagnets


An electromagnet is a magnet that is produced when an electric current is passed around a piece of iron.  Unlike true magnets, electromagnets are only magnetic while the electric current is switched on!

Did you know… the first person to notice that electric currents produce magnetism was a Danish scientist called Hans Christian Oersted, in 1820.
Some countries have started to use high speed trains called “MagLev” trains that are operated by powerful electromagnets.
photo credit: Erwyn van der Meer via photopin cc


These wheel less trains float on magnetic tracks and can reach speeds of more than 500 km/h.

Two experiments to try at home:

Make a compass:

You will need… a circle of paper, a needle, a magnet and a bowl of water.
What to do… thread the needle through the circle of paper so that nearly all the needle lies on one side of the paper (see below). Stroke the needle 30 times in one direction with one end of a strong magnet.  Lift the magnet between strokes. Float the circle of paper on top of the water in the bowl (needle side up).  The paper should spin around slowly for a few moments and then stop.  The needle should now be pointing North-South.  You can confirm this with a compass if you wish!
So what is happening? The needle contains little particles of iron that are all jumbled up.  When the needle is stroked with the magnet it makes all the iron particles align in the same direction (North-South); the needle is temporarily magnetised!

Make an electromagnet:

You will need.. 1 metre of thin insulated wire, a large iron nail, blue tac, a 1.5 volt battery, paper clips;
What to do… wind the insulated wire tightly around the nail at least 30 times then ask an adult to strip back the insulation from both ends of the wire, exposing about 2 cm of the wire beneath.  Using the blue tac stick one end of the wire to the + side of the battery and the other end to the – end.  Now see if your electromagnet can pick up some paperclips.  If you disconnect the batter the paperclips should fall!!
photo credit: Steve Wilhelm via photopin cc


So what is happening? When the wire is attached to the battery it creates an electric current that runs through the wire, temporarily magnetising the iron particles in the nail. When the battery is disconnected the nail no longer acts as a magnet!


Hope you have fun with these this weekend!  If you have a question or something to add please drop me a note in the comments below!