4 Valentine experiments 4 your loved ones

4 Valentine experiments 4 your loved ones

I must admit that I am not a big fan of the commercial side of Valentine’s day but I have no problem with the idea of telling someone you love just how much they mean to you. When I get to couple the sentiment with some science experimenting then my heart really does skip a beat. Check out these cool valentine science experiments that would make some pretty unique (and educational) gifts for the someone special in your life.

  1. Say it with flowers

Who doesn’t love flowers on Valentine’s Day? With a little bit of science you can add an extra twist to this staple gift. Try these CHROMATOGRAPHY flowers…

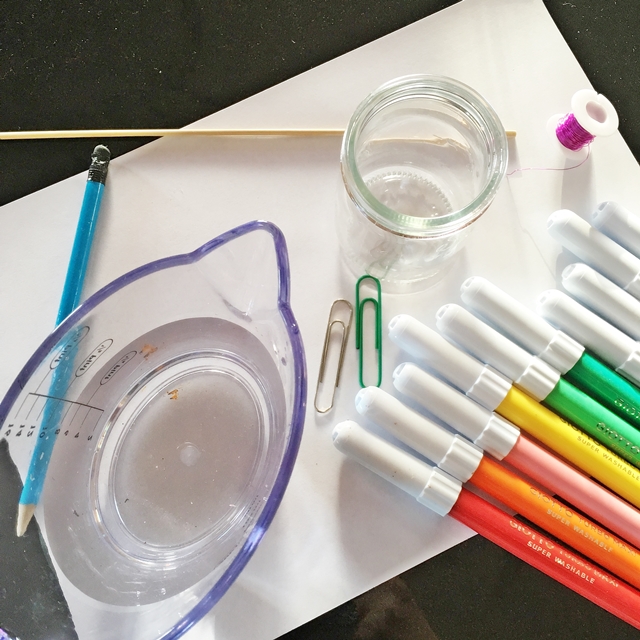
Here’s what you’ll need:

  • Some paper (we used regular white A4 paper here)
  • A selection of water soluble coloured markers
  • A pencil
  • A ruler
  • A paperclip
  • A glass or beaker
  • A jug of water
  • Some wire or pipe cleaners

Chromatography flower 1

What to do:

Fold your paper in half down the long side and then open it out again.

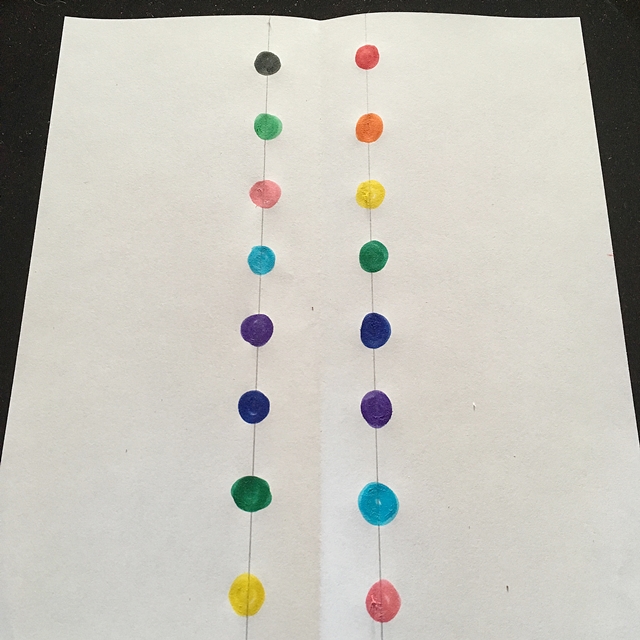
Using your ruler and a pencil, draw a line either side of the crease, the line should be about 2 cm from the crease on each side.

Choose the colours you would like to use and place large dots of each colour along these lines, leaving about 1 – 2 cm between each dot. Alternate the colours in whatever way you wish.
Chromatography flower 2

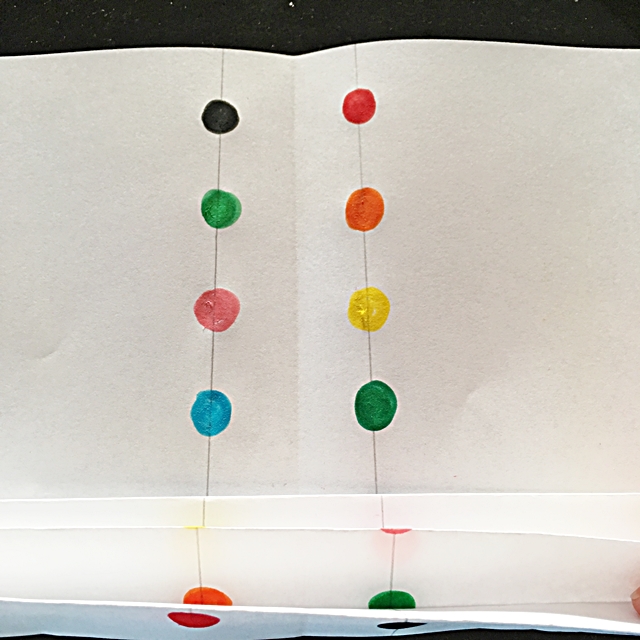
Once you have that done it is time to fold your paper. You need to fold along the shorter side, start at one end and fold the edge of the paper in about 2 cm. Turn over the paper and fold back another 2 cm. Turn over the paper and keep going like this until you reach the other side of the paper.
Chromatography flower 3

Keeping the paper folded, fold it in half and secure with a paperclip.

Trim the tops of the folded paper on each side. I used a serrated scissors but you could just cut into a pointy shape or round off the ends, whatever you prefer.

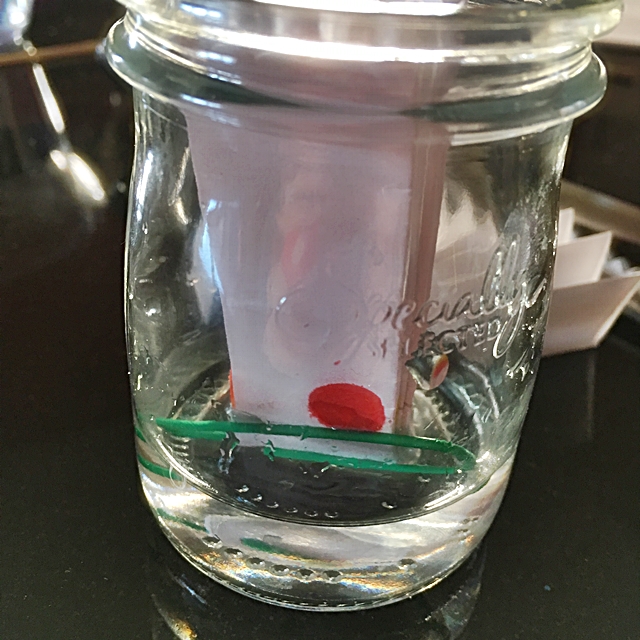
Pour about 1 cm of water into your glass (or beaker) and place the folded paper into the glass, as in the photo below. You want the end of the paper to sit into the water below the dots of markers, you don’t want the water level to reach the dots though.
Chromatography flower 5

Now you just need to wait a while. You should see the water creeping up the paper, spreading out the marker ink as it moves upwards. Once the water reaches the top of the paper you can remove it from the beaker and place it somewhere warm to dry.

Replace the paper clip with a strip of wire or a pipe cleaner, and twist it to close. This will be the stem of the flower.

Once dry it is time to open out the paper, into a flower shape, and see what a colourful CHROMATOGRAPHY flower you have made. You can try different types of paper, blotting paper works really well.

Chromatography flower 6

The science bit:

This experiment used a scientific technique called CHROMATOGRAPHY to separating different chemicals; in this case the chemicals are the inks in coloured markers. As the water creeps up the paper (by a process called CAPILLARY ACTION) it dissolves the different inks that make up the colour. These inks separate out as the water moves upwards and you get lovely streaks of colours through the paper.

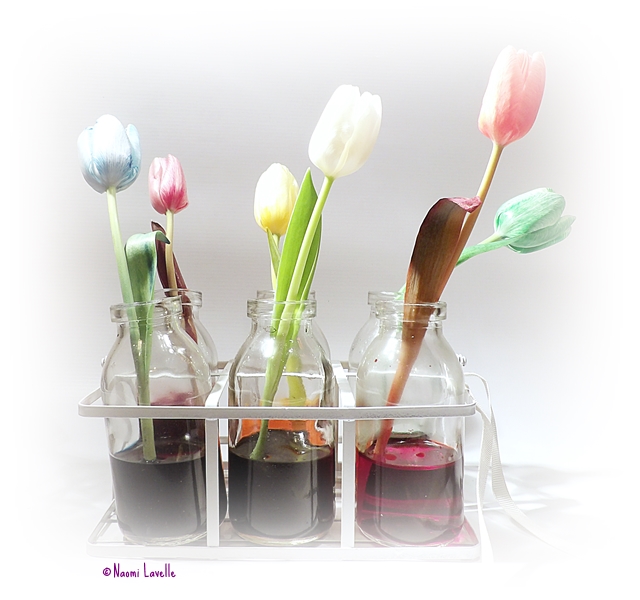
If you prefer real flowers to artificial ones you can still use a bit of science to add some extra colour; Here are two of our favourites (click the images below to find out how to make these beautiful coloured flowers while learning all about TRANSPIRATION!).

rose

Make a multicoloured Rose (click the image to find out more).

tulips3

Or try making a rainbow bunch of flowers, click the image above to go to the blog post.

2. You make my heart spin

I’ll admit these do take an extra bit of time and effort but they are really worth it and give a nice WOW factor. Your Valentine will be amazed with a gift like this… left wondering just how you did it. This experiment requires ADULT SUPERVISION!

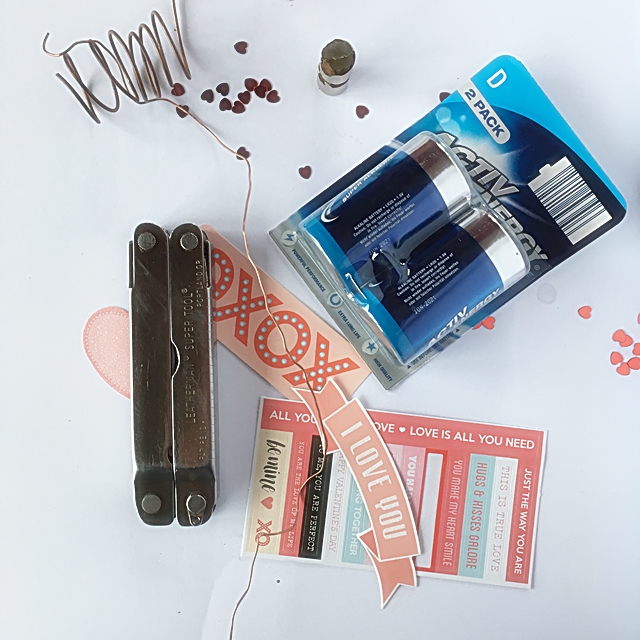
Here is what you’ll need:

  • Some copper wire
  • a pliers
  • a strong scissors or wire cutter
  • A battery (AA work just fine), I used a D battery here
  • A neodymium magnet (these are strong, rare earth magnets, often found in electrical appliances but can be purchased in many specialised shops)
  • Some items to decorate (optional)

Spinning heart

And this is what you do:

You can start by decorating your battery with love hearts or similar stationary if you wish.

Place the neodymium magnet on the base (minus side) of the battery, it will ‘stick’ to the metal.

Now for the tricky bit, you need to make a connection from the positive end of the battery, to the other side (the magnets in this case) to complete an electrical circuit. You can see from the photo and video below that I shaped one end of the copper wire into a heart shape with a little ‘stalk’ to sit on the top of the battery. I then wrapped the remaining wire around the battery and finally, I wrapped the end of the wire around the neodymium magnet (in this case I used two small neodymium magnets, one on top of the other). You will know if the circuit is complete as the battery and copper wire will heat slightly. However in order to get the wire to start to move you need to ensure that the wire is balanced correctly and is not wrapped too tightly around the battery or magnet. It will take a bit of patience and ‘tweaking’ to get this right, but, hopefully you will be rewarded by a lovely spinning heart 🙂

Want to know how it works?

Congratulations, you have just created a HOMOPOLAR MOTOR and, by combining an elctrical current and a magnetic field, working in specific directions, you have generated a force called LORENTZ force, that makes the copper wire move.

To put it as simply as possible, the copper wire connect to the positive and negative ends of the battery, completing a circuit and creating an electrical current that runs through the wire. The neodymium magnet generated a permanent magnetic field. In this set up the electrical current is perpendicular to the magnetic field and this generated teh Lorentz Force which acts on the copper wire, making it move!

NOTE: This experiment requires adult supervision! An electrical current can generate heat and you need to be careful that nothing gets too hot.

3. Gooey with love

Slime may not be the first thing that comes to mind when thinking of a Valentine’s day gift but this one is the prettiest slime I’ve ever made, and it has love hearts and sparkles in it, so what’s not to love. Plus… a few minutes playing with this stuff is time well spent, it is actually a great stress busting exercise, try it and see!

What you will need:

  • A bottle of clear glue
  • A jug of water
  • Bowl and something to stir with
  • A cup or small plastic cup or a second bowl
  • Borax powder
  • glitter and mini hearts (or any decoration of your choice)
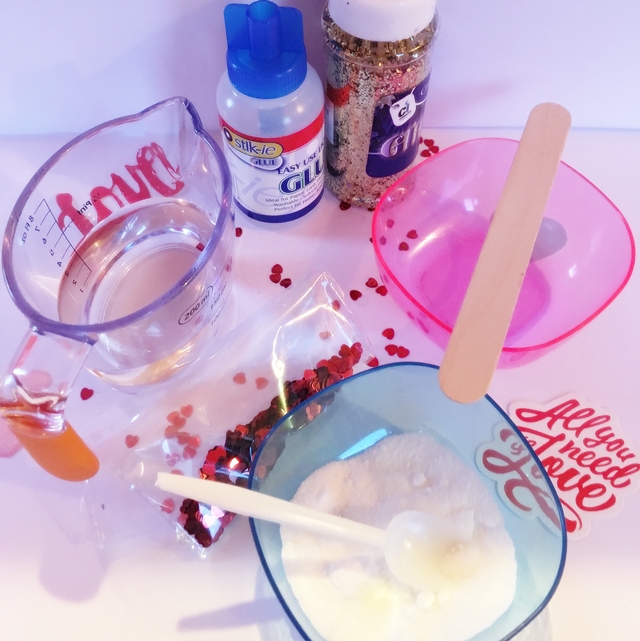
Valentine's slime 1

Here is what you do:

Pour a small amount of clear glue into your bowl (we used a 10 ml at a guess). Add the little of the love hearts and glitter, just a small sprinkle of each is fine.

Give all that a good mix and then leave to the side while you make up the borax solution

In the cup (or jug) make up your borax solution; you want to dissolve 1/2 teaspoon of borax powder in a cup measure of warm water (about 240 ml); Stir until fully dissolved.

Still the glue constantly and add a very small amount of borax solution. Keep stirring all the time. As soon as the glue is no longer sticky you can pick it up in your hands and start kneading and molding it, for a few minutes.

I will admit that I had a lot of trouble coming up with a good recipe here. I am used to working with white glue (PVA) which makes great slime. The clear glue can get very rubbery slime which breaks easily. So the trick is to use small amounts and add as little borax solution as possible. Also, once the slime forms at all, take it into your hands and knead it.

You can even roll it into a ball and see how bouncy it is…


I know that borax is not easy to buy in Ireland at the moment so I will test out some alternatives and hopefully have a post next week with some borax-powder-free slime recipes!

The science bit:

Congratulation… you have just made a polymer!! In simple terms a polymer is a substance made up of lots of molecules arranged in long chains.  If you imagine that the glue is like cooked spaghetti, it slides and slips around the place quite easily.  When we add the borax to the glue it causes some of the molecules in the glue to stick together making the glue more rubbery and less liquid!  Imagine if you took those strands of spaghetti and tied them together in places, the strands would not be able to slip and slide around nearly as much! The borax and glue mixture is just like your knotted spaghetti!

4. I Lava you

This is like two science experiments in one. It is an adaptation of this Ocean in a bottle experiment.

Here is what you will need:

  • A clear bottle (plastic is safest) with lid
  • A funnel
  • A bottle of cooking oil (we used vegetable oil)
  • A jug of water
  • Red (or pink) food colouring
  • Glitter and plastic miniature hearts
  • (Antacid tablets, such as Alkaseltzer – and adult supervision!)

What you do:

First add a few drop of red food colouring to the water until you are happy with the colour.

Add about half a teaspoon of glitter and half a teaspoon of miniature hearts to the water and mix well.

Using the funnel, pour the coloured water into the bottle, filling it to about a third full.

Fill the rest of the bottle with oil (using the funnel again) and replace the lid. You will notice that the oil and water remain as two separate layers.

Hold the bottle on its side and tilt it slowly back and forwards, you will see the water moves like a coloured wave, it gives a lovely effect.

If you want to turn this into a Valentine’s lava lamp just stand the bottle back up again, open the lid and pop in half an antacid tablet (like Alkaseltzer) NOTE: these tablets are not for eating and this part must be supervised by an adult.

Pop the lid back on (don’t seal it fully though as gas will build up in the bottle) and watch your lovely lava lamp.

When it stops you can pop in another piece of Alkaseltzer and watch all over again.

The science bit:

This is a good experiment to explain density. The oil is less dense than the water so it will sit on top of the water, creating two separate layers. The layer of oil keeps the water contained within the bottom half of the water and makes the movement of the water look like waves where the two liquids meet.

When we add the Alkaseltzer tablets to the bottle we get a chemical reaction. The tablets contain an acid and a base (or alkali) in powder form. When the tablet sinks down to the water layer the tablet dissolves and the acid and base get to mix together, forming carbon dioxide gas. The gas forms bubbles, and is lighter than the water and oil so the bubbles float to the top of the bottle where they burst, leaving just a drop of water, which is more dense than the oil so it falls back down. This cycle gives a lovely lava lamp effect of bubbles and blobs rising and falling through the oil layer. We are loving this one in our house at the moment. The glitter and love hearts add a really lovely touch to the whole thing.

So there you have it… five of our favourite Valentine experiments, I’m sure you’ll agree, as well as being educational, these would make great gifts for someone you love! We hope you get as much fun out of making these as we did and remember to let us know how you get on!

HAPPY VALENTINE’S DAY!!!

*****

If you’d like to know a little about the Science of Love, check out this post


New Kids’ Science TV show – Is Eolaí Mé

New Kids’ Science TV show – Is Eolaí Mé

I am delighted to tell you that Is Eolaí Mé is starting next Tuesday 20th September, on Cúla 4, TG4, at 17.25pm. It has been almost a year since filming of the show wrapped, you can take a look at my behind the scenes account here. As consultant and script writer on the show, I am extremely excited to be able to finally watch it on TV.

Here is a little preview…

What to expect

Each show will be jam packed with lots of amazing Science. The presenters, Una and Peadar will explore a different theme each week… and explore is definitely the right word to use; they will be out and about finding fun ways that science is used in real life. From rocket launching to surviving an indoor storm and so much more in between. I

Is Eolaí Mé is presented by Peadar Ó Goill & Úna Ní Fhlatharta and produced by Fíbín.

Each week Una will be joined by a group of children, keen to help her roaming reporting on the science topic of the day.

iemuna2cnamharlach

When Peadar is not out testing his endurance skills in the name of science, he will be in his amazing loft lab, testing theories, trying out the latest experiments and even sharing ones to do at home.

iempeadar1

Peadar will be joined in his loft by some amazing young scientists who are always up for the adrenaline-pumped science challenge of the day.

Then there are the antics of An t-Ollamh Ullamh and his reluctant side-kick, Aodh, that will definitely add an hilarious comic angle to each programme.

And all that is only the tip of the iceburg, you will be amazed at just how much science is packed into the half-hour programme. So set your alarm clocks, tell your parents and teachers and get ready for kick off next Tuesday! The show will air twice a week, for double the fun; Tuesdays and Thursday at 17.25, and, of course, also available on TG4/Cúla 4 player.

I’ll leave you with this little video… showing Peadar running across a bath of white liquid! How does he do it? You’ll have to tune in to find out!

Check it out… Is Eolaí Mé, every Tuesday and Thursday, 17.25 on Culá 4, TG4. Starting 20th September, 2016.


What do Forrest Gump, horses and music have in common?

What do Forrest Gump, horses and music have in common?

What kind of music do animals like? Can cows tell the difference between classical and rap? Which animals are partial to a bit of REM and what do Forrest Gump, horses and music have in common? Science has the answers!

Before my first child could even speak we had noted her reaction to music. Just having the radio on in the background we often observed a change in her posture or mood depending on what was playing; in fact, we frequently had to turn off the radio when a slow or sad tune would reduce her to tears.

This has fascinated me ever since, from the effect of music on our mood, our health, and our brain development. I never gave much thought though to the effect, if any, of music on animals. That is, until today. A good friend called round for a chat and fascinated me with something she had heard on the radio about the effect of  the theme tune to Forrest Gump on the emotional state of horses. My interest was piqued. With a little research, it seems many animals respond in different ways to different types of music, just as we do. And for the animals that have no interest in ‘human’ music at all… there is now species-specific music created just for them!

Music with a Meow in mind

It would appear that cats are not terribly impressed with any of the music composed for our human ears. They show little or no reaction to it. However, this prompted a small team of scientists (Snowdon and Savage) and a composer, David Teie, to look at just what might appeal to our feline friends. With much study and research, they created music with cats in mind, composed of tones, pitches and frequencies that would most appeal to cats, and mimic what is in their natural environment. They have reported that the cats they studies showed an increased interest and preference in the species-specific music (with greater positive responses in younger and older cats when compared to middle-aged cats).

REM keeps these cows ‘udderly’ content

Many farmers know that playing music to their cows keeps them calm and happy during milking. In 2001 a study run by a group of Psychologists from the University of  Leicester, UK,  played music of different tempos to herds of more than 1,000 Friesian cattle. The results were impressive: they played a variety of music, from slow, classical, techno and rap to the animals for 12 hours a day, over nine weeks. While they found no increase in milk yield when playing fast tracks to the cows, they reported a 3% increase in each animal when slow music was played; that is about 3/4 of a litre or one and 1/2 pints of milk extra per cow, per day.

What tunes did the cows seem to enjoy the most? “Everybody hurt” by REM and “Bridge over troubled water” by Simon and Garfunkel were apparently popular for increasing milk yield and keeping the ladies calm!

Based on this knowledge, the British Columbia Dairy Association decided to jazz things up a little by inviting people to compose some mellow cow tunes and enter them into their “Music makes More Milk” contest. Finalists had to impress the jury of five Holstein cows. The winning tune (if you really need to know) was titled “A Moo down Milk Lane”.

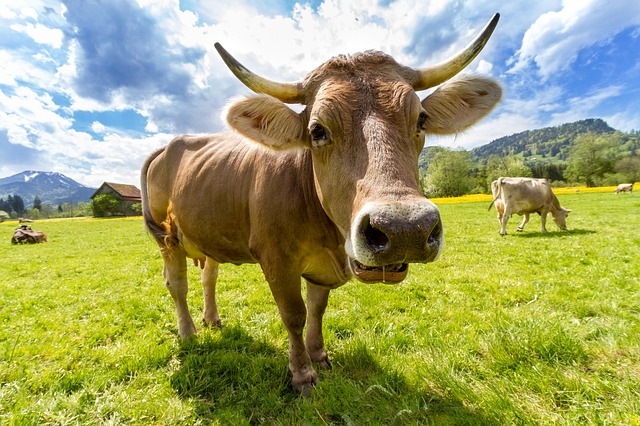
cow

Image source:pixabay.com

Moving on from bovine Moosic we finally come to the horse part of this story! What do our equine friends think of our human music?

Music keeps them ‘stable’

A 2015 study on purebred Arabian race horses looked at the emotional and performance levels of the horses when exposed to classical music in the stable area. The initial results of the study suggested that the horses exposed to classical music exhibited reduced stress levels (determined by measuring cardiac activity variables) and an increase in performance (as measured by their overall wins). These observations peaked at the two to three-month phase of the study and then dropped back to normal levels over time (suggesting that the horses became accustomed to the music and it had less effect).

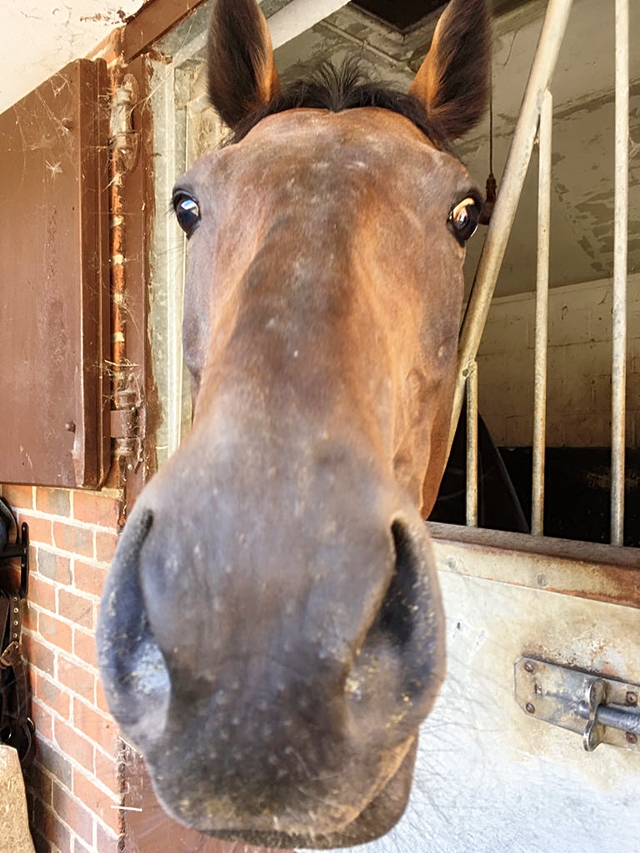
Horse at stable door

photo credit: What you looking at? via photopin (license)

The music used in the study was specifically composed with horses in mind. What about human music?

That’s a ‘neigh’ for jazz

A 2013 study tested horses’ emotional responses to classical, country, rock and jazz. The results from this small study suggested that classical and country music had the most calming effect on the animals tested and the fast tempos and minor keys of the jazz music put the animals more on edge.

Then someone decided to try a little Forrest Gump theme music! (Finally!!)

Trot Forrest Trot!

From specific genre to a specific piece of music… the Forrest Gump theme tune. This classical piece, by Alan Silvestri, was chosen for its ‘repeatability’. The study was carried out using horse from the French National Stud. 48 horses were fitted with newly designed horse headphones; half of the horses were played the Forrest Gump theme tune while travelling in horseboxes; the other half were played the music while being shod by a farrier. Both these events will typically increase stress indicators in the animals.

And the results? The horses that were played music during transport showed the greatest reduction in stress indicators. This could be very good news for trainers and owners of horses that often have to travel internationally for events. The effect in the animals that were being shod was less effective, although both groups showed a quicker heart rate recovery afterwards.

Personally, I find these results fascinating. I grew up around horses and found them very sensitive creatures, in tune with everything in their surroundings. I love the idea of reducing their stress in any way possible. And I listened to the Forrest Gump theme tune while I wrote this piece, it certainly brought me to my calm place!

Have a listen.

What do you think? Have you ever noticed a pet respond to a particular type of music? What kind of music was it? Or what favourite piece would you like to see used in these experiments? Have you any favourite animal music stories of your own? Let us know in the comments below!

Ten science experiments you can do with a plastic bottle – Part 2

Ten science experiments you can do with a plastic bottle – Part 2

We are back with more bottle science experiments! How did you get on with the first five we shared last week? We have had plenty of feedback from people who tried them out and really enjoyed them so here are five more bottle science experiments to try!

You can find experiments 1 to 5 in this post!

REMEMBER: YOU NEED ADULT SUPERVISION FOR ALL THESE EXPERIMENTS 

6. Using Friction to defy gravity


7. The Hovercraft Experiment


8. The Cloud in a Bottle Experiment


9. Bottle Rocket Experiment No. 1

This video doesn’t include the science of how it happens, so here it is! As you know from previous experiments… when we mix the vinegar and the bread soda the react rapidly making a salt, water and Carbon Dioxide gas. Gases usually take up more space than liquids or solids so the sudden production of Carbon Dioxide gas causes a rapid increase in pressure inside the bottle. The gas wants to break out of the confined space within the bottle but the cork is in the way. With enough pressure the cork is forced off and the gas escapes.

Newton’s Thirds Law of motion states that…

Every action has an equal and opposite reaction!

This law is what makes the rocket shoot into the air. The first ‘action’ is the cork shooting off the bottom of the bottle; this produces the ‘equal and opposite’ reaction of the bottle rocket shooting off in the opposite direction! It all follows the laws of physics!

10. Bottle Rocket Experiment No. 2

This rockets follows the exact same law as the previous experiment, except this time the pressure is built up by the air we pump into the bottle. This pressure eventually builds up forcing the cork, and the water, out of the bottle and the rocket is then propelled off in the opposite direction, shooting up into the sky.

And there you have it! Ten fantastic experiments to do with a plastic bottle. If you missed the first five you can find them here! Please let us know what you thought of this series and how you got on. If you like these video experiments and would like some more just let us know in the comments below and we will get working on a new series straight away!

ENJOY!


Ten science experiments you can do with a plastic bottle – Part 1

Ten science experiments you can do with a plastic bottle – Part 1

Do you love science and want to try out some experiments yourself? Do you worry that you’ll need special equipment and expensive kits? FEAR NOT! There are so many science experiments you can do with things you have around your home RIGHT NOW! Just remember to always ask an adult’s permission. Finish drinking your water and save that bottle because we are going to share TEN amazing experiments with you… you’ll never look at a plastic bottle in the same way again!

A few months ago I promised to share ten experiments you can do with a simple plastic bottle. If you have been following me on Face Book you will have noticed that I have shared one every week and we reached ten no problem; I’ve compiled all the instruction videos here so that you can pick and choose which ones you want to do (or, even better, try all ten).

The reason I started this was because I was sick of seeing science experiment kits full of rubbish (I am not saying all science kits are rubbish, but I have seen my fair share lately). I wanted to show you that you can do plenty of science experiments from things you have around your own home. And what better example to use than a simple, humble, plastic bottle. A great example of reusing and recycling.

PLEASE NOTE: ALL THESE EXPERIMENTS REQUIRE ADULT SUPERVISION!

Without further ado… here are first five Science Experiments you can do with a plastic bottle:

  1. make a fire extinguisher


2. Inflate a balloon


3. The Sneezing Alien Experiment


4. and 5. Ocean in a bottle experiment and Lava Lamp experiment


Those are the first five experiments. Have lots of fun with them, check back next week for the next five experiments. Remember to keep those bottles!

As always, we love to get comments and feedback so do let us know if you try some of these experiments; we’d love to know how you get on, did you make some of your own modifications and improvements to the experiments? Would you like us to share more video experiments?


STEM questions and answers with Dr. How’s Science Wows

STEM questions and answers with Dr. How’s Science Wows

We love questions here at the Science Wows HQ; We generate a lot on a daily basis, and we answer many too. I was delighted to try out the new Facebook live tool for a Q & A session and got to answer lots of question sent in on all the STEM topics (Science, Technology, Engineering and Maths). Many of these questions were sent in by children, and, from the quality of the questions, and the inquisitive minds behind them, I am sure these are the STEM experts of the future.

If you sent in your question – thanks so much! If you want to send one in for another time then leave your question in the comments below or drop me a line.

Here is the video, if you missed it, or want to rewatch, I hope you enjoy and maybe pick up some new facts.

Here are all the questions asked; If you want to find the specific answer to that question in the video I have included how many minutes into the video it was answered. Under each question below is an additional fact, not included in the video… for some extra WOW!

Oran and Oscar wanted to know…

“Why is it blurry when you look underwater with goggles?” (1 min 20 secs)

Did you know that… if you get a really good pair of goggles or a scuba mask, then that extra air between the glass and your eyes will correct for the blurry vision problem and the light entering your eye will be bent correctly, allowing for a nice clear image?  In fact, you may even see things clearer and larger – the mask can make things appear up to 33% larger and 25% closer

and

“Why do crickets make that noise and where do they go during the day?” (5 mins)

Did you know that… crickets need warm weather to chirp, as they are cold blooded creatures. If the weather gets too cold they will not be able to generate enough energy for their normal chirps and their sounds will actually slow down or stop!

Elissa, Nia and Matthew asked …

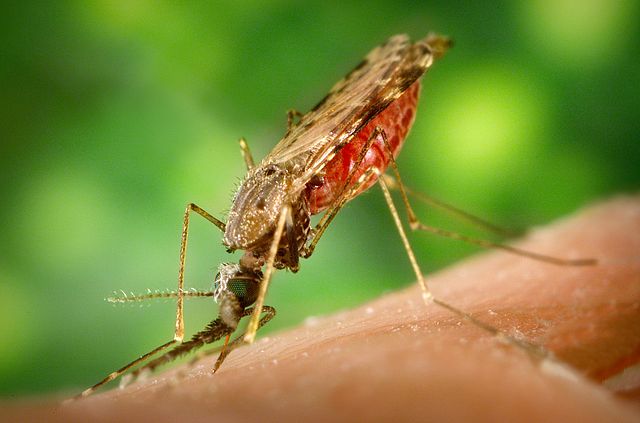
“What are mosquitos for?” (12 mins)

Did you know that … the annoying buzzing sound we hear when a mosquito is near is the sound of their wings flapping at an amazing speed of 300 to 600 beats a second? That still doesn’t make the sound any more pleasant though, does it? 

mosquito

Photo credit: James Gathany (CDC)

Dermot is obviously an environmental thinker as he wanted to know …

“How do you convert wind power into electricity?” (11 mins)

Did you know that… humans have been harnessing the power of the wind for a very long time? The first windmills date back to 200B.C.

Ruairí had lots of questions, like …

“Why does your skin go brown after the Sun?” (17 mins 40 secs)

“Did you know that… the more sun exposure we get, the more the melanin producing cells move closer to the surface of the skin. We look like we are getting a darker tan but, more importantly, the melanin absorbed the harmful UV rays from the Sun, protecting our skin from damage.” 

“What’s in the centre of the Earth?” (23 mins 30 secs)

Did you know that… scientists estimate that the temerpature of the Earth’s core is 6,000 Celcius? That is about the same temperature as the surface of the Sun.

“What’s inside a leaf?” (27 mins 30 secs)

Did you know that the colour changes we see in leaves in Autumn are due to different pigments inside the leaves? The colour we see depends on which pigments are present. Some pigments are more dominant than other so if they are present in the leaf they dictate what colour the leaf is. Some pigments we find in leaves are choropyl (green), Carotene (orange/yellow), tannin (brown) and anthocyanin (red/purple). 

“What is inside a bird that helps it to fly?” (20 mins 30 secs)

Did you know that… some birds, such as ostriches, penguins and Emus are too heavy to fly? These birds (called ratites) are thought to have started out as flighted birds but have evolved flatter breastbones, shorter wings, weaker pectoral muscles and heavier bodies.

and…

“Why is fruit good for us?” (7 mins 30 secs)

Did you know that… tomatoes are actually considered fruit and that raspberries and strawberries are not true berries, but bananas are? 

Emily asked…

“Why does your skin go wrinkly in the bath?” (4 mins)

Did you know… it takes five minutes of constant exposure to fresh water for the wrinkles to appear on our fingers, palms, toes and soles of our feet? It takes even longer when in sea water.

Amanda, from Spider Working, is a real lover of cats and she wanted to know…

“Why do cats have whiskers?” (24 mins)

Did you know that… cats are longsighted so their super sensitive whiskers allow them work out everything in their close environment with greater detail? This is particularly important when deciding when to pounce on their prey.

Cats whiskers
photo credit: Let's Play via photopin (license)

With a child in this house with an allergy to dust mites, I had particular interest in a question sent in from Jack, asking…

“Where does dust come from?” (9 mins)

Did you know that… the Sahara desert is the largest source of dust in the world? It can produce more than 60,000 kg of dust per year.

Harry would fit in well in this house, with all his questions, such as…

“How do aeroplanes fly in the sky?” (19 mins 30 secs)

Did you know that… the first powered aerplane was made in 1903 by the Right brothers? 

“Why do people have hearts?” (21 mins 50 secs)

Did you know that the heart pumps more than five litres of blood around the body in one minute?

and…

“Why is there no dinosaurs?” (15 mins 40 secs)

Did you know that… birds are considered to be modern day descendants of dinosaurs? 

I loved this question in from Meabh…

“Why do monkeys like bananas?” (26 mins 25 secs)

Did you know that… although monkeys like the sweet taste of bananas, they do not actually eat many in each day? Monkeys kept in captivity usually get no more than one banana a day, their diet is balanced with lots of other fruit, vegetables, seeds and nuts.

Cathal sent in a question while on holidays; he wanted to know…

“Why do you always feel cold when you get out of the pool, even though it is hot out?” (30 mins 10 secs)

Did you know that… the water that stays on our skin after the pool, or a shower, eventually evapourates into gas? To do this it need some heat energy, and some of this heat energy is taken from out bodies, making us feel extra chilly. 

And finally, A question in from four brothers… Brendan, Liam, Iarla and Conor; these boys rescued a dying bumble bee by feeding it a sugar solution. They wanted to know…

“If the sugar thing really worked and why was the bee so shaky afterwards?” (28 mins 35 secs)

Did you know… to make a sugar solution to revive a tired bee, mix about two tablespoons of white, granulated sugar, with one tablespoon of water.

A big thank you to The Busy Mama’s, Awfully Chipper, Office Mum, Wonderful Wagon, Dairy Free Kids, Bumbles of Rice, Learner Mama, Simply Homemade Blog and Get Crafty for sending in some of these questions!

I really hope you enjoyed this, I’d love to do it again so please do share your questions for the next round and let me know what you think! Just pop your questions or feedback in the comments below.

Where do tears come from and why do we cry?

Where do tears come from and why do we cry?

This question comes in from the very lovely, and very curious, Kayla, aged six, who can sometimes be found over at My little babóg blog. Kayla would like to know…

Where do tears come from?

tears


Where do tears come from?

Tears are made by little glands above our eyes, called tear glands, or lacrimal glands. There is one gland above each eye; each produce tears that travel to the eye through tiny pipes, called ducts. There are a number of these tear (lacrimal) ducts behind our upper eye lids.

Our tear ducts are constantly producing tears, to keep our eyes clean and moist, but we don’t usually even notice. When we blink we wipe the tear fluid over our eyes, keeping them moist. This fluid is then drained off from the eyes through more ducts. It is only when we start producing a lot more tears that we start to notice them. The ducts that drain the fluid away cannot cope with all the extra tears and they start to run down our cheeks.

What are tears made of?

Tears are basically made of slightly salty water. They also contain enzymes that kill bacteria and vitamins and minerals. Some tears contain proteins, called hormones, that can change how we feel.

Why do we cry?

Scientists are still working this one out. We do know that we cry different kinds of tears in response to different things. Science defines crying as the process of producing tears in response to an emotion – be it sadness, fear, anger or happiness. When we produce tears to clear something out of our eye or to moisten the eye… Then we call this lacrimation.

So how does it all work? Well, the emotional crying seems to be triggered as a response to activity in a part of the brain called the hypothalamus. This part of the brain responds to our different emotions and can produce chemicals, called neurotransmitter, that will travel to specific parts of the body and induce a response. In the case of crying, the neurotransmitter produced is called acetylcholine and it triggers tear production in the lacrimal gland.

The reason why our brain responds in this way to emotions can vary. Babies, for example, cry to communicate with us… Telling us the are tired, hungry or in pain. This makes sense as they do not have many other forms of communication available to them. But why do we still cry here we are all grown up? It may be that crying creates other responses in our bodies, our heart rate changes, our breathing alters and other chemicals are released into the body. Crying can make us feel better.

Crying also allows us to show people how we feel! We may have evolved our crying mechanism to let people know what we are feeling, or to get sympathy or support.

Sometimes we cry when we see others hurt or sad and this created empathy, something that allows us build strong bonds and create supportive communities.

What different types of tears are there?

As I said above, we have three types of tears and they are…

Basal tears – these are the ones we produce to keep our eyes moist;

Reflex tears – we produce these in response to something else, usually something that is irritating our eye… From a small piece of dirt to a strong chemical, such as the vapour off a cut onion.

Emotional tears – these are the ones that get switched on by our emotions, even if we try to suppress them! These tears make us human!

What would happen if the Earth’s gravity suddenly disappeared?

What would happen if the Earth’s gravity suddenly disappeared?

What would happen if the Earth’s gravity suddenly disappeared?

This was a recent question from my 10-year-old son… it certainly got some interesting discussions going around the kitchen table. When I opened up the question on my Facebook page I got more input from Cathal (5) and Ciarán (7) (from the Bumbles of Rice blog); they reckon that if you were indoors you would float upwards, or feel like you were being pulled up…  and bump your head!  A very good point boys; In fact, the bump on the head would be the least of your worries!

Before I go any further though, it is important to say that this cannot actually happen, we can’t just turn off gravity, so when we discuss what would happen if we did, we are talking more science fiction than science; it is good to keep that in mind!

gravity

SO WHAT WOULD HAPPEN TO YOU?

As Cathal and Ciarán said, you would no longer have a force keeping you on the ground . The Earth would keep spinning, as it does, but you would no longer move with it, you would move in a straight line, upwards. In fact, rather than feeling like you are floating away from the Earth, you would probably feel like the Earth is dropping away from you!

WHAT WOULD HAPPEN TO THINGS AROUND YOU?

Anything not stuck down in some way would move in the same direction you would. Anything inside a building would get stopped by the ceiling, anything outside would float off into space, pretty quickly.

WHAT WOULD HAPPEN TO THE AIR?

Not only would solid objects float off into space but our air, our atmosphere would too; which means that unless you had an oxygen tank to hand you’d have no air to breathe.

WHAT WOULD HAPPEN TO THE LAKES, RIVERS AND SEA?

Liquids would leave the Earth’s surface too, so all the water on our planet, in lakes, rivers and seas would start to float off. A first, water  would probably start floating off in large blobs, but as the atmosphere of the  Earth disappears then the heat of the sun would penetrate to the Earth’s surface even more than it does now and water would probably start to boil off, into steam that would float off into space.

WHAT WOULD HAPPEN TO THE BUILDINGS?

So initially we said that if you were inside a building you would find yourself up at the ceiling; If you had an oxygen tank then you might be OK for a while. But you would start to feel those temperatures rise pretty quickly. The Earth would start to feel an incredible pressure which would ultimately mean that the buildings attached to its surface would start to break up and float away. Then rocks and clumps of earth would break off and float up too.

WHAT WOULD HAPPEN TO THE WHOLE EARTH?

Eventually, the whole Earth would break apart and float away into space, but we would be long gone by then.

So while the notion of floating around in zero gravity might, at first, seems appealing, when we look at the idea a little more closely we realise it is not a very nice concept at all. Fear not, as I said at the beginning… this cannot happen, it is just an imagining of what would happen if it did.

While scientists cannot really predict what would happen if we suddenly lost gravity on Earth, they can tell us the short term effect that lack of gravity (or weightlessness) has on our bodies… by observing what happens to astronauts while in space.

sky-earth-space-working

Image source: pixabay.com
  • Initially astronauts lose their sense of orientation, they find it hard to tell up from down. This disorientation can also make them feel sick for a while.
  • Another issue they report is feeling like their arms and legs are disconnected from their body!
  • The change in pressure can affect their vision a little, this may be due to the altered pressure on the eye ball, brain and spinal fluid (some astronauts report more long term problems when they return to Earth; recent studies have found a genetic link to this problem, but the exact mechanism is still unclear).

They usually get used to these issues pretty quickly but there are greater health effects the longer they stay in space.

  • Due to the lack of weight on their bodies, their muscles and bones begin to weaken; this is why astronauts spend so much time in space exercising!
  • An astronaut will actually get taller in space; without the pressure of gravity on their bodies, they can stretch about an inch or more. Of course, once they return to Earth they soon return to their usual height.
  • Astronauts immune systems can become weak in space too (the number of white blood cells that help to fight infection can reduce) and healing can be slowed down.

Now that we have learned a little about gravity and the lack of it, here is a fun experiment; try out this gravity defying trick with a glass of water and amaze your friends and family!

GRAVITY DEFYING EXPERIMENT

YOU WILL NEED:

  • A glass
  • A small piece of stiff paper or cardboard (large enough to cover the mouth of the glass)
  • A basin
  • Some water
  • (Adult supervision)
  • WHAT TO DO:
  • Fill the glass to the very top with water.
  • Place the piece of paper over the mouth of the glass, making sure there are no air bubbles underneath.
  • While holding the glass in one hand, and keeping the paper in place with the other, quickly turn the glass upside-down, over the basin (or ask an adult to do this for you).
  • Once the glass is inverted remove your the hand that is holding the paper in place.
  • The paper should stay in place and the water should stay in the glass.
  • Watch all the amazed faces of your family and friends as they observe your gravity defying feat!

THE SCIENCE BIT:

While this appears to be an experiment about defying gravity, it is actually all down to air pressure. The lack of air in the glass produces a difference in air pressure on either side of the paper. The air pressure on the underside of the paper is greater than the pressure on the water side, pushing the air up and keeping the paper in place.

I hope this experiment works for you without anyone getting wet feet! Be sure to let me know if you try it!

Fifteen fantastic facts about frogs

Fifteen fantastic facts about frogs

We are used to seeing them at some stage of their life cycle, most of us remember watching them grow as tadpoles in our classrooms, and they are a common part of our ecosystem; but how much do you really know about these diverse and amazing creatures? Here are fifteen of our favourite frog facts … Read more

What is the difference between toxin, venom and poison?

What is the difference between toxin, venom and poison?

Toxin, venom and poison… are they just different words for the same thing? The answer is… sometimes yes, and sometimes no.

You see a venom can be a toxin, which can be a poison but not always.

I looked to the Oxford English dictionary, to see if it could shed some light on the issue;

Poison… A substance that is capable of causing the illness or death of a living organism when introduced or absorbed

Venom… A poisonous substance secreted by animals such as snakes, spiders, and scorpions and typically injected into prey or aggressors by biting or stinging

Toxin… A poison of plant or animal origin, especially one produced by or derived from microorganisms and acting as an antigen in the body

Has that made it any clearer for you? I can’t say it was much help to me. There has to be a more simple explanation. The truth is that these words are often used to mean the same thing, sometimes all three words can be interchanged, sometimes not. They do all tend to have a similarly negative effect on the body, by one means or another, they impact or disrupt the biological function of the affected organism.

Sometimes we need the right question, in order to get the right answer, or in this case, the right series of question. Hopefully, these questions will help define what each is, and the differences between them.

IS IT NATURAL OR MAN-MADE?

If it is man-made (synthetic) then it is a poison!

Toxins and venoms are always organic (biologically produced chemicals), but sometimes poisons are as well. Time for another question.

WAS IT TRANSFERRED BY TOUCHING OR BITTING?

If it was transferred by touch then it is a toxin (which could also be called a poison, in more general terms). Toxins are usually small biological chemicals that can enter the body by absorption through the skin. They can be accumulated through the food chain, so, the organism with the toxin may not have produced it itself, but most likely accumulated it from something it ate, or something that it ate, ate… (we could keep going back the food chain here but you get the idea?).

Just to confuse the matter slightly, organisms that produce toxins are referred to as poisonous organisms.

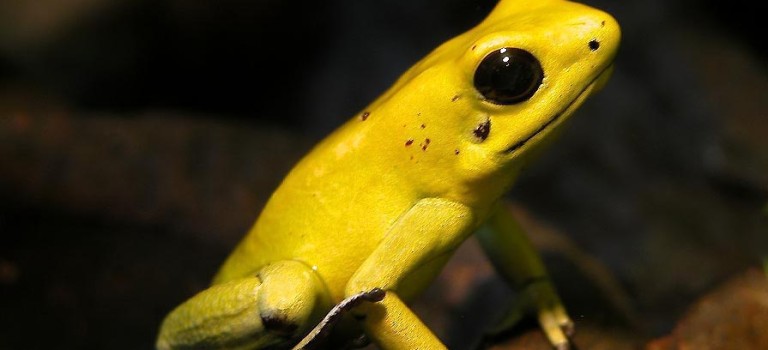
Here is just one example… the poison dart frog, considered one of the deadliest animals on earth. The poisonous dart frog stores its toxin in glands just below the skin. The toxin is called Batrachotoxin and, when agitated, the frog can literally sweat the toxin onto its skin. The level of danger to humans depends on the species of dart frog; the small golden poison dart frog (Phyllobates terribilis), for example, is only 5cm long but harbours enough toxin to kill 10 grown men.

golden poison dart frog

Image credit: Wilfried Berns

It is thought that most species of poison dart frogs accumulate their toxins from the food chain, most likely the toxins originate in plants, eaten by insects that are then eaten by the frog.

Transferred by biting not touching? We have another question for that.

DID YOU BITE IT OR DID IT BITE YOU?

If you bite it and suffer the consequences, then it is a poison (which could also be called a toxin, depending on what you ate!); if it bites you and you suffer the consequences, then it is a venom!

I use the term ‘bite’ loosely here as venom can be administered by bite, spike or sting. Basically, venom has to be ‘injected’ into the skin in some manner.

Venom is usually a biological compound that is produced by the organism that administers it. It is also usually a large compound and therefore cannot enter the body through absorption through the skin.

Time for another example…  we all know the classic snake scenario but sometimes nature is a little more inventive; None more inventive that the Iberian ribbed newt (Pleurodeles waltl). This animal has evolved some amazing defence mechanisms – it literally extends its spiny ribs out through warts in its body. At the same time the newt secretes venom onto its skin, covering the ribs so they deliver the toxin into the body of their assailant, as they pierce their skin.

Iberian ribbed newt

Image credit: Pengo

Sounds like the stuff of science fiction, doesn’t it… but sometimes fact is more amazing that fiction.

Of course, many venoms contain neurotoxins that are of course toxins, which can be referred to as poisons, which brings us back to the start of this post that sometimes a venom is a toxin, is a poison; but not always.

I hope you found this helpful, maybe you have a few tips of your own? Leave them in the comments below, I always love the feedback.