Pancakes- everything you didn’t realise you needed to know

Pancakes- everything you didn’t realise you needed to know

Ok, this week’s blog inspiration is slightly different to the norm.  Usually the idea comes from a question that a child has posed – this time there is a slight deviation, but only slight…. this weeks question came from an adult, but only in the chronological sense – as in fact he is classified as the biggest kid in our house- it was posed by my husband.  I was making pancakes the other morning (as I do every weekend on the request of my son) when my husband pondered aloud…”I wonder what the reason behind each ingredient is… and who made the first pancakes”.  As I was wondering what next to blog about the two ideas seemed to merge into one, and so was born the question…..

…..”WHAT IS THE SCIENCE BEHIND A GOOD PANCAKE, AND WHO’S IDEA WAS IT?”…..

Made in the name of science

A BIT OF HISTORY…

So, before I delve into the science behind the PERFECT PANCAKE, I thought I’d look at a little bit of history first.  The pancake as we know it seems to be accredited to the ancient Greeks, who in the 6th century started combining ground wheat with olive oil, honey and milk – and so the first pancake was born. If we expand on our concept of what a pancake really is we could look back further still to the process of making flat bread from ground grains and nuts mixed with milk or water, dating back to the neolithic period.

WHAT DO WE FIND IN A MODERN PANCAKE?

If we start within Europe a modern pancake can be classified as the round flat variety similar to the french crepe which contains some form of flour, and a liquid such as milk or water.  These flat pancakes usually also contain eggs and butter, and sugar in the sweetened variety.  Then we also have the thicker, fluffier pancakes that contain a raising agent, the name and variation of these include drop scones, Scottish pancakes and of course the well know buttermilk pancakes that are most common in America.

In our house the three most common pancakes made are the buttermilk pancakes, drop scones and the sweet flat crepe like ones.

WHAT GOES INTO A PANCAKE…

If we take a closer look at the primary ingredients we begin to see the complexity and science that really goes into making these delights:

FLOUR… this ingredient can be considered the backbone of the pancake as it provides structure
SUGAR….as well as adding the nice sweet taste and contributing to the colour of the pancake, sugar also keeps the pancake from getting to thick and stodgy
EGGS…. the proteins in the eggs add to the structure of the pancake and to the overall flavour
BUTTER/FAT… as with the sugar, the fats keep the pancake tender and prevent them becoming overly stodgy
MILK/WATER… the liquid portion of the pancake adds to the structure and is necessary for certain chemical reactions to occur
RAISING AGENT…  as the name suggests, these agents help raise the pancake, making them light and fluffy

You can of course find many varieties with their own local changes and substitutes, potatoes are commonly used as the starch ingredient instead of flour.

First lets take a look at the thin flat pancake or crepe… in this case we will assume they contain flour, milk and sugar.  From the above list we can now predict that the flour is the body of the pancake, it provides the structure, but how does it do this?  There are two proteins found in flour called glutenin and gliadin.  When moisture is added to flour (in this case the milk) these two proteins link together to form gluten.  Gluten is a “sticky” protein, this stickiness allows it to form a network and it is this that adds structure to the batter.  Finally we come to the sugar which caramelizes with the heat adding sweetness to the mix and contributing to the colour of the pancake as it cooks.  The sugar also prevents the pancakes becoming too thick and stodgy by reducing the amount of gluten produced.

Image credit: jbeancuisine.com

So now we move on to the thicker pancakes; the main difference with these is that they contain a raising agent!  Yeast is a biological raising agent used in some baking, it produces carbon dioxide gas while digesting sugar and this gas forms tiny bubbles within the yeast.  When heat is added during baking these bubbles expand making the bread/cake “rise”.

The main drawback with baking with yeast is that it requires time and who really wants to wait too long for their breakfast?  That is why, when using raising agents in pancake mixtures, we substitute the yeast for bread soda and/or yeast; but who can really tell what the difference is between these two?

Bread soda verse baking powder

Bread soda (also known as baking soda) is pure sodium bicarbonate. Baking powder contains bread soda but it also contains a powdered acid (usually cream of tartar – potassium bitartrate).  Bread soda is an alkali/base and will therefore react with an acid (such as the buttermilk used in pancake batter) producing salt, water and carbon dioxide gas…

BREAD SODA + ACID —–> SALT + H20 + CO2

This carbon dioxide gas gets trapped in thousands of tiny bubbles within the gluten making the pancake batter rise on cooking into light and fluffy wonders!  (The same process as with the yeast but a lot quicker).

The baking powder has the added advantage of having the acid already present, so once a liquid is added the dry acid and alkali can react in the same manner as above.

So now that we are starting to understand the science of it all how do we use this knowledge to make the best pancakes.  before we jump into this one we first have to consider the science of flavour and odour!

THE SCIENCE OF FLAVOUR

The Maillard reaction describes a chemical reaction requiring certain amino acids and sugars and the addition of heat to produce the molecules responsible for the odours and flavour of food.  Now there is a science worth studying!

MAILLARD REACTION:  Amino Acids + sugar + heat —-> flavour and odour

So what does this have to do with our pancakes?  Well Maillard reactions work best in alkali conditions so bread soda is a definite plus is making golden tasty treats.  HOWEVER, add too much bread soda and the pancake will brown too quickly and will have an acrid burnt flavour, not to mention the unpleasant taste produced from the left over breadsoda.  It is trickier than we think and yes, of course, someone has already done the science bit for us to work out the ideal amount of bread soda required.

WE ARE HUNGRY – SPEED IT UP

You will be glad to hear that speed is recommended when preping pancakes;  Although it is good to allow the batter sit for a few minutes to allow the gluten to “relax” (build up a sufficient network) it has been shown that if left too long the bubbles will have burst and the pancakes will be flat and dense once cooked.

SCIENCE IN MY KITCHEN

I decided I had to try some of this pancake science out for myself so turned to my original buttermilk pancake mix from the wonderful NIGELLA LAWSON.  This recipe actually uses both baking soda and baking powder (I omitted the banana).  I decided to test out two theories…

1.  Does the amount of bread soda determine the colour and flavour of the pancake?
2.  Does the length of time the batter is left standing really make that much of a difference?

To keep it simple, I decided to keep everything else (including the amount of baking powder) constant.
So I donned my apron in favour of my labcoat and I set to work.  I prepared the basic batter mix excluding the addition of bread soda.  To digress for a moment, I also followed another golden pancake rule – not to over-mix the batter (a few small lumps of flour allows it better absorb the liquid and produce gluten).

My “slighlty lumpy” pancake batter

I dived my basic batter mix between four bowls and then added different amounts of bread soda to each (the first bowl had no bread soda, the second had half the recommended amount, the third had the recommended amount and the fourth had double what was recommended!).  Then I let the batter sit for five minutes before cooking the pancakes.

Here are my results…  the pancake on the top left had no bread soda, top right had 1/2 the recommended amount, bottom left had the ideal amount and bottom right had twice the recommended amount.  You can see how the pancake gets darker with the addition of more bread soda, with the last one being just a bit too dark.  The taste test revealed that the one on the bottom left had the best taste (and texture) and that the one with the most bread soda had that unpleasant taste of bread soda!

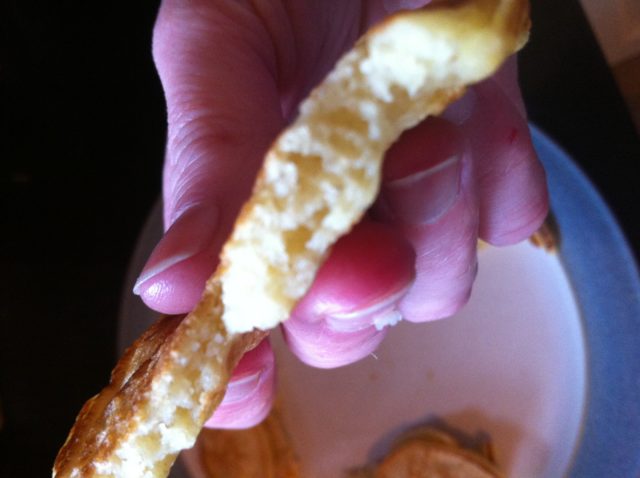
To investigate my second question I left the same pancake batters sit for two hours before cooking them.  As you can see the pancakes cooked after two hours were indeed a lot less light and fluffy and were a bit soggy inside!

The batter for these was left sit for five minutes
The batter for these was left two hours

WHY ARE PANCAKES ROUND?

Pancakes are round for two main reasons: gravity and surface tension.  Assuming that the pancake pan is flat then once the batter is added gravity will pull on all parts of the batter uniformly in all directions, pulling it out into a round shape.  Surface tension pulls evenly on the edges keeping them restrained into the round shape.

THE SCIENCE OF FLIPPING A PANCAKE…

Would you believe that someone has actually looked into the exact science of pancake flipping?  How cool is that ….

According to University Professor of Mathematics Frank Smith, the simple mathematical formula for the perfect flip is: L = 4 H /P- D / 2
(L = hand distance from inner edge of the pancake / H = height of flip / D = diameter of pancake)

If that sounds a bit too complicated check this out …

Dr. Tungate, a senior physics lecturer at Birmingham University, found that “a pancake should be flipped into the air at a speed of 10 miles-an-hour, which means that it takes less than .5 of a second to reach the top of its trajectory.”

AND THEN THERE IS THE SCIENCE OF WHAT YOU ACTUALLY PUT ON YOUR PANCAKES…

… but I think that is a whole other blog! So whatever toppings you choose I hope you enjoy your pancakes today!!

All that science made me hungry!

And if you still want more….HERE IS AN EXPERIMENT YOU CAN TRY….

Inflating balloons… This experiment shows two fun ways of inflating balloons, kids will love it, it’s easy to do and it teaches some kitchen science… like the difference between using yeast and bread soda as raising agents in baking!

Further reading:
Pancakes served with a side of science.
Celebrate your pancakes with a side of science.
Baking powder verses baking soda.
The history of pancakes.
 

There’s "snow" place like home

We were lucky enough to go on a family skiing holiday this January…. sunlight, snow, fresh air, exercise, skiing and just an all round great experience.  I have asked my three children the best things about the holiday and here are their responses….

Caer (age nine)….”relaxing, drinking hot chocolate every day… oh and THE SNOW”
Culann (age seven)….”the snow, eating meat all the time, everything really – except for ski-school!”
…and “Curly” Rohan (age three)….”the hotel, the ski slopes and the snow!”

So a mixed bag of responses there but with the one common denominator… THE SNOW!!!! And who could blame them, I loved it too!  Especially on our last day, the weather got colder and we had a wonderful day of snow.  At lunch time our entire group (15 of us in total) took the cable cars to the top of the mountain for lunch.  The snow up there was thick and deep and as it fell on us we all remarked on the beautiful snow flakes… each one a perfect crystal, large enough to see the tiny branches coming off each arm of the structure.  So the inevitable question came from the children….

……………………..”WHY DOES THE SNOW AT HOME NOT LOOK LIKE THIS?”

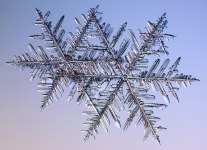
A Dendrite Snow Crystal

In order to answer this question we need to understand how snow is made and what can influence this process!  We also need to understand the different shapes that snow can take!

So firstly HOW IS SNOW MADE?…

Snow is made much in the same way as rain, it is created from the moisture that makes up clouds.  Moisture from the earth (seas, rivers, lakes, puddles etc) is constantly EVAPORATING (changing from a liquid to a gas form).  This water vapour (gas) is picked up by warm air and carried to the sky where it forms clouds.  When the temperatures get cold enough the water vapour turns into ice crystals that form around tiny particles of dust or dirt in the atmosphere.  These ice crystals fall to the earth as snow.

So what is the difference between SNOW CRYSTALS and SNOW FLAKES?

A snow crystal is a single crystal of ice that can come in many different shapes.  A snow flake is the term we are more familiar with – it can refer to one snow crystal or a group of snow crystals all grouped together.  Some snow flakes can contain a clump of hundreds of tiny snow crystals.

WHAT ARE THE DIFFERENT SHAPES A SNOW CRYSTAL CAN BE?

When you think of the shape of a snow flake what do you think of?  Do you think of the lovely star like ones with six branches just like the photo above?  This shape of snow crystal is called an HEXAGONAL shape (having six sides) but finding these in such perfect condition is actually quite rare.  With melting and refreezing, wind interference and snowflake collision most snowflakes we see are much more irregular structures.  The snow crystal shown above is a STELLAR DENDRITE which means a star-shaped snow crystal with six branches that have lots of side-branches coming off them (dendrite means tree-like).  More often than not snow crystals are small, NEEDLE, COLUMN or FLAT PLATE shaped and clumped together into one snow flake.  This is certainly what we are more used to in Ireland when it snows.  The array of shapes and sizes of snow flakes is really well described in this  guide to Snowflakes.

                             
                                                                            This is what we saw in Austria!!

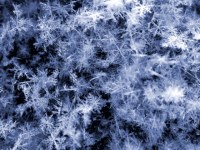
The lovely snowflakes that we saw on the top of the mountain in Austria were particularly intricate and beautiful.  I would say they were FERNLIKE STELLAR DENTRITES  and if you are thinking of skiing these are ideal.  There is so much side branching that they look like ferns.  Although these snow crystals are the largest that we see they are actually individual snow crystals which makes them all the more spectacular.  They are often 5 mm or more in diameter and are clearly visible to the naked eye!  So we were really lucky to see these lovely snow flakes.  These crystals are very light and make the best powdery snow!

WHAT INFLUENCES THE SIZE, SHAPE AND SYMMETRY OF A SNOWFLAKE?

So what factors influence the distinctive shape of each snow crystal?  Well for starters there is the temperature at which they form – snow crystals start to form when the cloud temperature reaches or drops below freezing (zero degrees Centigrade (C));  the amount of dust or dirt particles available also effects snow formation.  Then there is the location of the clouds in which the snow crystals form… in general snow flakes are larger when formed in high clouds compared to snowflakes from lower clouds.  This factor links with the length of time the snow flake takes to fall to the ground along with the air temperature as it falls and with how many collisions the snow flakes might encounter.  Snowflakes will often heat and cool as they drop due to differences in air temperature, this often leads to large snowflakes as they become more “sticky” when they melt at the edges, allowing them to clump together as they collide and refreeze.  Other weather factors such as humidity (how much water vapour is in the air) and the wind speed all contribute to the final size and shape of the snowflake formed.

Taking these factors into consideration the lovely fernlike stellar dendrite snowflakes we saw in Austria were probably formed under the following conditions: formed at very low temperatures, in low lying clouds and fell through dry cold air with little wind!

Now lets consider what we are used to here in Ireland!

So this is today’s snow in the west of Ireland!

As I write this I am looking out on a typical “Irish” snow scene… the ground is covered in patchy white snow that is made up of small ball shapes of snow flakes  that are a bit wet and sticky.  On the plus side these make great snow balls… I can vouch for this one myself as my back is still wet from the pelting I got from my husband as he left for work today (the biggest child in the house)!!  So this snow was probably made at lower temperatures in high clouds and melted and froze as it fell to the earth through moist air; this would result in large snow flakes (like small snow balls) made up of a number of small snow crystals joined together.  This snow does not tend to last too long, beginning to melt as it hits the ground, making for that wet sticky snow!

SO IS IT TRUE THAT NO TWO SNOW FLAKES ARE IDENTICAL?

The simple answer to this is YES and NO!  Although we cannot vouch for every single snowflake that ever existed, science does suggest that the exact shape and structure of each natural snow crystal is unique – so that means YES – no two snow flakes are identical.  Especially if you consider the different factors that are involved in creating each snowflake!  HOWEVER, for more simple snow crystal structures it can at times be hard to tell the difference between two under a microscope!

WHY IS SNOW WHITE?

When we observe the colour of an object we are actually seeing the colour of light that the object REFLECTS (bounces back)- so green grass, for example, is ABSORBING (taking in) all light expect green light, which it is reflecting.  When an object appears white that means it is actually absorbing very little light and reflecting most or all of the light falling on it.  This is the case with snow, it’s crystalline structure creates many reflective surfaces making the light that falls on it “bounce back” or be reflected.  You can read more about this here.

IS IT EVER TOO COLD TO SNOW?

The simple answer to this is NO, once there is enough water vapour around to make snow, and enough circulating air to transport it then snow can be made at very low temperatures!  However, as warmer air can hold more water vapour we tend to get most snowfall at temperatures around freezing point or a bit below.

MAKE YOUR OWN SNOW FLAKE…

Now that you understand all about snow, how it is made and the different shapes and patterns it can take, I thought it would be fun to end with an experiment you can try yourself at home.  These are worth the bit of time and effort (and waiting overnight) as the results are really great!  Let me know if you try it and how you get on!

Images:
Dendrite snowflake photo National Geographic – Kenneth Libbrecht
Images of Fernlike Snowflakes by Kenneth Libbrecht

Further information:
Snow crystals photo gallery 
Observe and photograph snow
Fun snow facts for kids
Met Eireann Primary School Resource
10 Science Facts About Snow

Sticky toes

Sticky toes

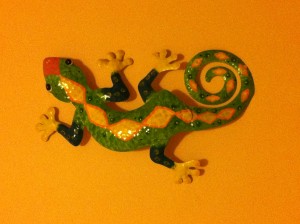
We are amassing quite a collection of geckos around our house these days.  Not the organic variety of course, although that would really please the kids!  No, our collection consists of ornaments, wall hangings, trinkets and even jewellery.  It all started ten years ago when on honeymoon in Barcelona … the little guys were everywhere and we were drawn to them with fascination – especially their ability to scale any surfaces they encountered (even glass).  So the collection started from there, anytime we come across a quirky gecko decoration or ornament we like, we purchase and add it to the collection!

Gecko

Ten years on and our fascination has grown along with our collection.  I was delighted to show my children a recent photo from National Geographic of a gecko.  Of course that lead to the children asking questions, that lead to questions, that led to the ultimate… “How do they walk up walls?” After answering their questions I decided this might be a good topic to start my 2013 blog with.  So…how do these amazing little creatures manage their “spiderman-like” feats? It truly is a marvel of nature but before I delve into that, I want to tell you a few other quirky facts about these lovely little creatures.

Geckos are a type of lizard.  They are found on all continents except Antartica.  They come in many shapes and sizes and are in fact the most species rich order among lizards.  They are also among the most colourful lizards in the world.

Most species of geckos can actually sever part of their tail, usually to escape the hold of a predatory or threat.  The released tail segment can keep wriggling as a distraction while the gecko escapes.  PRETTY COOL DON’T YOU THINK?  This process of severing the tail is called caudal autotomy!

photo credit: Tambako the Jaguar via photopin cc

Another very interesting fact about geckos is that nearly all species of geckos have no eye lids and can therefore not blink. Instead, they use their long tongues to clean any dust from their eyes.

Already you can begin to see how fascinating these creatures are, and that is before we have even looked at their ability to apparently defy gravity! DID YOU KNOW THAT A GECKO CAN SUPPORT ITS ENTIRE BODY WEIGHT ON ONE TOE?

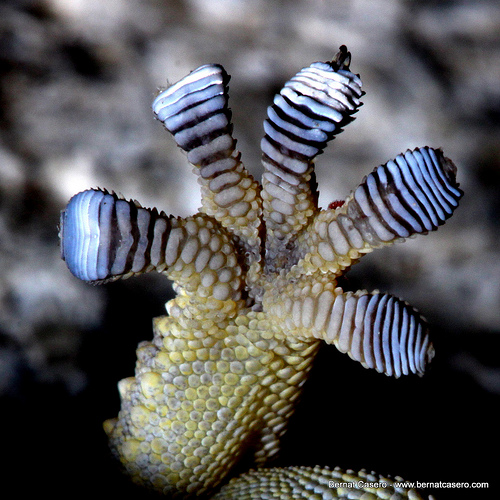
So here is the science bit behind HOW THEY DO IT…the toes of a gecko are covered in hundreds of small ridges called lamellae.  Each ridge is covered in millions of hairs called setae.  Setae are much thinner that human hair (up to 30 times thinner).  Each seta then splits at the top into tiny strands called spatulae – there can be up to 1000 spatulae on one seta (if you think you have problems with split ends, pity the poor gecko!).  So you can begin to imagine how tiny these spatulae are, in fact, they are so tiny that they can bond with the molecules of the surface they are touching.  This bonding is referred to as van der Waals interaction!   The great thing about it is that it is what is called dry adhesion – it doesn’t require any sticky compounds or leave any messy residue.

photo credit: bernat... via photopin cc
photo credit: bernat… via photopin cc


This gives us an idea of how the gecko sticks to the surface, but HOW DOES IT UNSTICK?  The adhesion (sticking) process is said to be one-directional…imagine sticking a piece of sticky tape to a surface and then taking hold of one edge and peeling it back to remove it… the gecko does something similar.  Geckos toes bend in the opposite direction to humans so they can “peel” their toes off the surface from the tip backwards.  Add to this the fact that geckos have rotating ankles and you start to understand how they can move in any direction.

As you can imagine this ability has captured the interest of Scientist for a long time.  Imagine if we could copy this adhesion from the gecko… what could we do with the technology??? Robots that can scale any surface would be great in extreme or rescue situations, right?  Or how about a suit we could wear to allow us to climb like a gecko? Did you know that geckos can climb in a vacuum? So now we can start thinking about using this technology in space!  Or how about using the technology in bandages – inspired by the observation that geckos can climb in wet conditions… a bandage that stays on when wet.

Maybe YOU can think of another novel way to use gecko technology?  If you have any ideas I’d love to hear them!

More on geckos…
Nat Geo Kids Creature Facts – Geckos
The dance of the disembodied gecko tail
Geckos evolved sticky feet many times

carrots, cabbages and cups of tea!

carrots, cabbages and cups of tea!

It’s funny how Autumn comes around every year and I realise how much I love this time of year…. it’s as though I seem to forget I like it all throughout the other seasons.  Of course we have had a particularly nice Autumn this year in the West of Ireland and maybe that has re-enforced my happy memories of the season.  The days have been bright and crisp showing off all the beautiful colours in all their glory and splendour.

photo credit: Stellas mom via photopin cc

I grew up in Co. Wicklow surrounded by some beautiful deciduous woods and forests and this Autumn has really brought my childhood memories flooding back.  My mother brought us often to the woods as children and we would hunt around for hidden treasures and delights to bring home and turn into some “masterful” collage in homage to the season.  There was also the foraging, a distinctive primordial instinct in us all, there is nothing as pleasing as returning home with your bounty… be it blackberries or sweet horse chestnuts- to be turned into jams and tarts or painstakingly peeled of all nasty layers to reveal  the divinely sweet, fruity, nutty delight beneath.  In fact the joy that came with eating the nut always made it suddenly worth your while to start the arduous task of peeling all over again!

…and I hope that I will never outgrow the delight of running, kicking, shuffling through a crisp new crop of fallen leaves!

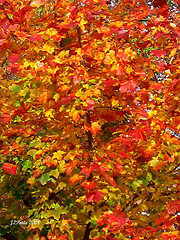
As many people know, the lovely green of most leaves is caused by the pigment chlorophyll… green in colour (obviously) and capable of using sunlight to convert water and carbon dioxide into energy (sugar) for the plant.  However, when the sunlight hours fade coming into winter so too does the chlorophyll in the leaves of trees, or, to be more precise, the pigment begins to degrade and is not replaced.  Once the green colour is gone other pigments that are often present in the leaf come into view… carotenoids are pigments responsible for the yellow/orange colour of leaves, anthocyanins are responsible for the redder colour of leaves and tannins are responsible for the brown colour of leaves.  There is, within this pigmented system, a sense of hierarchy, at least in part.  But did you ever wonder about the science behind those wonderful colours?  I did… why the green suddenly disappears, where does it go and how do the other colours get there in its place? So, if like me, you ever wondered about these things… here is some insight into the why and what of Autumn!


photo credit: looseends via photopin cc

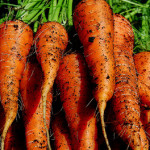
Carotenoids are the pigments responsible for the orange colour of carrots. If carotenoids are present their colour tends to dominate leaving the leaves yellowy and orange.

In the absence of carotenoid, anthocyanin is the dominant pigment. Anthocyanin (the same pigment found in red onions, red grapes, red apples and red cabbage) is a natural pH indicator, meaning that it can change colour depending on the levels of acids or bases/alkali in its environment.  In fact one of my favourite experiments that I often do with children is to demonstrate this colour changing using anthocyanin extracted from red cabbage (but that’s a whole other blog in itself).  Anyway, at the beginning of Autumn the levels of sugar in the leaves tends to be quite high, increasing the acid levels in the leaves, this strengthens the red colour of Anthocyanin if it is present in the leaves.

At the end of Autumn the leaves die off and the levels of carotenoids and anthocynins die off too, leaving another pigment to dominate… and this is the brown pigment of tannin, the same pigment that give a cup of tea it’s colour!

So there you have it… next time you are crunching through those leaves you may wonder why you are suddenly thinking of carrots and cabbages and cups of tea!!!