The science of elasticity, energy and rubber

The science of elasticity, energy and rubber

Energy is a great subject in science. It covers so many things and I have many other aspects that I hope to share with you soon but one thing that explains energy so well is a simple rubber band; it can demonstrate elasticity, kinetic energy and potential energy and it great to use in some really cool experiments. Here are just a few short facts on the topic.

What is Elasticity?

Elasticity is the ability of an object to return to its original size and shape after it has been stretched or squeezed.

When we pull an elastic object we are applying a force on it called a stress. If we apply too much stress to an object it will eventually reach a limit called its elastic limit.

When an object is pulled beyond its elastic limit is cannot return to its original shape.

All objects will eventually lose their elasticity due to wear and tear, friction and stress.

Potential and Kinetic Energy

Potential energy is energy stored within something. Kinetic energy is energy in motion.

If we take the example of stretching a rubber band…

When we use force to stretch an elastic object, such as an elastic band we are filling it with potential energy. When we let go of the rubber band and it springs back to its original shape, the energy released is Kinetic Energy.

Did you know… kangaroos and other animals use the combination of potential and kinetic energy to save energy while jumping and springing?

Rubber

Rubber is a material that has very good elasticity. It is a polymer, made up of a long chain of repeating molecules, that can be easily stretched and bent.

Rubber exists in both a natural and synthetic form; the natural form is latex from the sap of rubber trees.

A bit of history

The ancient Aztec and Mayan civilisations are thought to have been the first to discover and use this natural rubber. They used it to make balls for sport and rubber shoes, although the quality of this rubber was sensitive to heat and cold.

Columbus is credited with bringing rubber to Europe.

In 1839 Charles Goodyear discovered that he could stabilise rubber by mixing it with sulphur at high pressure; he called this process vulcanisation.

When Goodyear died in 1860 he was completely impoverished due to constant legal costs regarding his rubber patents.

Did you know… the largest rubber band ball ever made weighed 4,097kg and was made using 700,000 rubber bands?


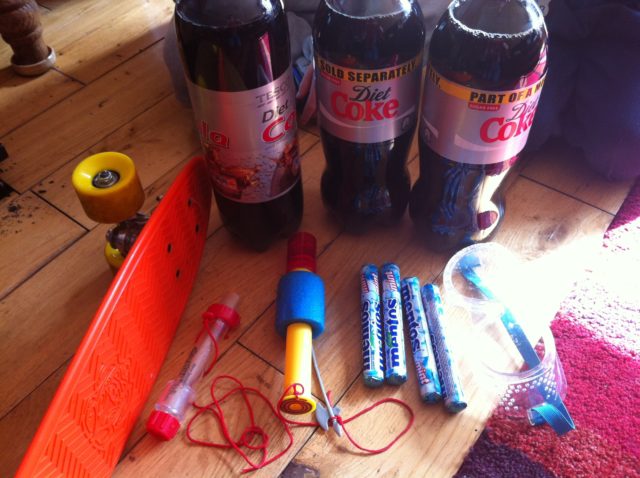
An experiment to try

Want to try an experiment that combines rubber, elasticity and kinetic and potential energy? Why not make a catapult? Or use elasticity to launch a paper plane. You’ll find out how, and a lot more of the science behind these experiments in this post!

**********

A new venture

This article originally appeared in Science Spin magazine. Although the magazine is no longer in print I am delighted to be sharing some science facts and experiments in a new venture… you’ll find my new SCIENCE FOR KIDS page in each edition of Easy Parenting Magazine. I share one of our favourite experiments in the April/May edition, currently in shops. Take a look…


Ten science experiments you can do with a plastic bottle – Part 2

Ten science experiments you can do with a plastic bottle – Part 2

We are back with more bottle science experiments! How did you get on with the first five we shared last week? We have had plenty of feedback from people who tried them out and really enjoyed them so here are five more bottle science experiments to try!

You can find experiments 1 to 5 in this post!

REMEMBER: YOU NEED ADULT SUPERVISION FOR ALL THESE EXPERIMENTS 

6. Using Friction to defy gravity


7. The Hovercraft Experiment


8. The Cloud in a Bottle Experiment


9. Bottle Rocket Experiment No. 1

This video doesn’t include the science of how it happens, so here it is! As you know from previous experiments… when we mix the vinegar and the bread soda the react rapidly making a salt, water and Carbon Dioxide gas. Gases usually take up more space than liquids or solids so the sudden production of Carbon Dioxide gas causes a rapid increase in pressure inside the bottle. The gas wants to break out of the confined space within the bottle but the cork is in the way. With enough pressure the cork is forced off and the gas escapes.

Newton’s Thirds Law of motion states that…

Every action has an equal and opposite reaction!

This law is what makes the rocket shoot into the air. The first ‘action’ is the cork shooting off the bottom of the bottle; this produces the ‘equal and opposite’ reaction of the bottle rocket shooting off in the opposite direction! It all follows the laws of physics!

10. Bottle Rocket Experiment No. 2

This rockets follows the exact same law as the previous experiment, except this time the pressure is built up by the air we pump into the bottle. This pressure eventually builds up forcing the cork, and the water, out of the bottle and the rocket is then propelled off in the opposite direction, shooting up into the sky.

And there you have it! Ten fantastic experiments to do with a plastic bottle. If you missed the first five you can find them here! Please let us know what you thought of this series and how you got on. If you like these video experiments and would like some more just let us know in the comments below and we will get working on a new series straight away!

ENJOY!


Ten science experiments you can do with a plastic bottle – Part 1

Ten science experiments you can do with a plastic bottle – Part 1

Do you love science and want to try out some experiments yourself? Do you worry that you’ll need special equipment and expensive kits? FEAR NOT! There are so many science experiments you can do with things you have around your home RIGHT NOW! Just remember to always ask an adult’s permission. Finish drinking your water and save that bottle because we are going to share TEN amazing experiments with you… you’ll never look at a plastic bottle in the same way again!

A few months ago I promised to share ten experiments you can do with a simple plastic bottle. If you have been following me on Face Book you will have noticed that I have shared one every week and we reached ten no problem; I’ve compiled all the instruction videos here so that you can pick and choose which ones you want to do (or, even better, try all ten).

The reason I started this was because I was sick of seeing science experiment kits full of rubbish (I am not saying all science kits are rubbish, but I have seen my fair share lately). I wanted to show you that you can do plenty of science experiments from things you have around your own home. And what better example to use than a simple, humble, plastic bottle. A great example of reusing and recycling.

PLEASE NOTE: ALL THESE EXPERIMENTS REQUIRE ADULT SUPERVISION!

Without further ado… here are first five Science Experiments you can do with a plastic bottle:

  1. make a fire extinguisher


2. Inflate a balloon


3. The Sneezing Alien Experiment


4. and 5. Ocean in a bottle experiment and Lava Lamp experiment


Those are the first five experiments. Have lots of fun with them, check back next week for the next five experiments. Remember to keep those bottles!

As always, we love to get comments and feedback so do let us know if you try some of these experiments; we’d love to know how you get on, did you make some of your own modifications and improvements to the experiments? Would you like us to share more video experiments?


Free on-line Pancake Science Magazine for children

Free on-line Pancake Science Magazine for children

I am very excited to share this latest project with you; this is an idea I have had for a while so I am delighted to have finally finished and published. I really hope you like it and that your junior scientists get plenty of entertainment from this Pancake Science Magazine.

Science Wows Pancake Science Magazine

Have a look through and see what you think, there are experiment ideas and a video link to show you how. It is crammed full of interesting facts… from who made the first pancake to the mathematical formula for the perfect pancake flip.

You’ll also find puzzles and quizzes and a free printable download if you prefer to print them off and let the children test their pancake knowledge. There are also some pancake jokes to entertain you all and Dr. Simple can be found throughout the magazine, a familiar face with a few costume changes!

There is a little colour coding for all the subjects covered, from chemistry to astronomy, to maths. So your kids can just dip in and choose their favourites, if they prefer.

I would really love to hear what you think and how your children find this magazine, if you have a minute to give me any feedback I’d be delighted.

I haven’t shown this to my own kids yet, but I think I have this rainy afternoon’s entertainment sorted now.


Hope you Enjoy!


Need a mobile friendly version? just click here! And this is a separate link to the free printable.

Behind the scenes – Is Eolaí Mé

Behind the scenes – Is Eolaí Mé

Filming of the Is Eolaí Mé series is well under way… and it looks amazing! I got to see the finished set for the first time last Monday morning, and it was even better than I imagined. Peadar, the presenter, has been working his way through the science curriculum and so far we have managed not to blow anything up, but the experiments are certainly entertaining the whole crew!

Peadar has been joined, each day, by some really enthusiastic young scientists who have helped him with demonstrations, facts, experiments and, of course, the adrenalin fuelled “Science Challenges”.

Do you want a sneak peek?…

set1

Almost ready to begin!


set2

Matt, the man who can “build anything”, makes a few last minute adjustments!


set3

Peadar takes a quick break, after another successful experiment.


Set4

Getting ready for another challenge… wonder what this one will be?


Pigs

The pigs were a big hit!

There is so much more to share… but I guess you will just have to wait for it to air.  It will be a great aid for teachers and classrooms as well as a really fun show to watch at home.

*****

Is Eolaí Mé is a new children’s science programme produced by Meangadh Fibín to be aired in 2016 on Cúla 4, TG4.


The Science of Soil

The Science of Soil

What is Soil?

Soil is the outermost part of the Earth’s surface, where plants grow. Without it we could not survive! Soil is made up of rock material of various sizes (from powdered rock to sand, pebbles and stones). Soil also contains minerals, rotting plants and animals and living organisms. It contains all the nutrients required for plants to grow and survive!

Why is soil so important?

Plants need soil to grow, not just for the nutrients that the soil provides but also as an anchor, a stable place where the plant can place its roots and support its growing structure.

The soil has many other important functions too…

  • Soil acts as a natural water filter, cleaning water as it passes through it
  • The soil provides billions of organisms with a place to live
  • The soil is very important in the cycling of nutrients – especially carbon and nitrogen

How is soil made?

There are a lot of factors that influence how soil is made. The first of these is what type of material the soil is being made from… the type of rock that the soil is made from is called the parent material.

Other factos that influence how soil is made are…

  • the weather,
  • the topography of the land,
  • what living organisms are around and….
  • time!

Did you know… it can take up to 1,000 years for just one inch of soil to form?


Soil is made when the parent material (rock) is broken down by the weather (wind, rain, sun, snow) eventually forming fine powder, sand and small rocks. The decomposition of organic matter and the activity of a variety of organisms help to improve the soils nutritional quality.

The soil is like a big recycling plant

Soil is not just for growing plants. It contains billions of other living organisms too… some can be very small like bacteria, fungi and algae and some can be very large like insects and even mammals.

All of these inhabitants help to break down dead plants and animals so that all the nutrients contained within them are returned to the soil.

Did you know… that in a tablespoon of good soil there are as many as 50 billion bacteria?

SpoonfulofSoil

The earthworm plays a vital role is maintaining healthy soil and is often called “nature’s plough”.

Did you know… there are approximately 3000 species of earthworm in the world?

worm

Learn more at home… make a wormery

You will need…

A large see-through container, sand, soil, worms, leaves and other vegetation, card or paper.

What to do…

  • Fill a large, see-through container with alternative layers of soil and sand.
  • Put a layer of leaves on the top.
  • Add enough water to keep the soil damp.
  • Collect some earthworms from your garden and add them to the wormery.
  • Cover the outside of your container with a large piece of card or paper to block out the light.
  • Put the wormery in a safe place and check on it every day- remember to keep adding water to keep the soil moist.
  • You should soon notice that the different layers of soil and sand are getting mixed together.

What is happening?

The earthworms mix the layers of sand and soil as they move through the wormery. This helps to distribute nutrients throughout the soil, making it more fertile.

Remember to return the worms safely back into the garden once you have finished.

Or you can watch the “how to” video…


A version of this article originally appeared in Science Spin, Issue 63, March/April 2014

Three of our favourite Science Experiments – the messy play edition

Three of our favourite Science Experiments – the messy play edition

There is a lovely linky running over on the Mama Courage blog. It invites bloggers to get over any hang ups they may have and let the kids get… well messy. Messy play is great for children as a fun, tactile, interactive activity. We are all for it in this house. I thought the linky would be a great wayto share some of our favourite messy experiments with you all.

I hope that these entice you to roll up your sleeves and get stuck in to some messy play science, just don’t look at me when it comes time to clean up!

Here are three of our favourite “messy” science experiments…

1. Making Slime


Of course this is top of the list… messy and slime are interchangeable really, aren’t they?

This is one of our popular slime recipes…

You will need… two bowls (or cups), borax powder (you can buy this in pharmacists throughout Ireland), water, PVA glue, some stirrers and food colouring of your choice (optional)


What to do…

Add one cup of water to the first bowl and mix in a teaspoon of borax powder until it is all dissolved.

Add a cup of PVA clue to the second bowl; add a cup of water and mix well.

If you would like to colour the slime add a few drops of your chosen food colouring to the glue mixture and mix thoroughly.

Add the borax solution to the glue mixture and start to stir immediately… you will notice that the glue turned to slime almost straight away.

The slime can be stored in an airtight container and will last for years once it is not allowed to dry out.


Time for slime
Time for slime

What is happening?…

Congratulation… you have just made a polymer!! In simple terms a polymer is a substance made up of lots of molecules arranged in long chains.  If you imagine that the glue is like cooked spaghetti, it slides and slips around the place quite easily.  When we add the borax to the glue it causes some of the molecules in the glue to stick together making the glue more rubbery and less liquid!  Imagine if you took those strands of spaghetti and tied them together in places, the strands would not be able to slip and slide around nearly as much! The borax and glue mixture is just like your knotted spaghetti!


2. Making goo (otherwise called Ooblecks)


Messy but fun
Messy but fun

This stuff is very messy but oh so much fun. Not just for the kids either, once adults get their hands on this goo their is no stopping them. It makes a great stress reliever… honestly, have a go!


You will need… A large bowl, cornflour, water, a large spoon to mix and food colouring (optional)


What to do…

Mix the cornflour and water together in the bowl (approximately one cup of cornflour to two cups of water). Add a few drops of food colouring if you wish. Once it is well mixed it’s time to get stuck in. First place your hands into the goo and slowly lift them, watching how it runs through your fingers. Now try punching the surface of the ooblecks with your fist, you may be surprised with the result.


Here is an demo from an enthusiastic member of the Science Wows team:


I left him play while I was making dinner but had to take one more video to show how much fun he was having (you’ve got to watch this one)…


What is happening?… 

Ooblecks is what we call a Non Newtonian Fluid… meaning that it does not follow the laws of Netonian Physics.  When left to rest it looks just like a regular liquid.  However when disturbed by strong hitting, shaking or pulling it acts more like a solid.  It is a phenomenon worth studying and although still a bit of an enigma, scientists think that the material normally acts as a liquid but can produce a sudden, local reaction to rapid impact and stress, reinforcing the area and briefly solidifying the suspension.
Ooblecks takes it’s name from the green slime that fell from the skies in the Dr Seuss booh “Bartholomew and the Oobleck“.


3. Our version of the ‘Coke and Mentos’ experiment


You have probably all seen the coke and mentos experiment, maybe you have even tried it yourself. The basic idea is that you want to get as many mentos as possible into a bottle of coke as quickly as you can.

Last year I found myself minding two boys who were off “sick” from school. As the day went on it was obvious that they were getting a little less sick and a little more bored. So I decided to give them a challenge (you can read the original post here);

I gave them these …

The props
The props

… and told them to devise their own version of the coke and mentos experiment.

This is what they came up with…. (notice the poor teddies that were strapped onto the front of the skateboard!)

So what is happening?...

Firstly, this is not thought to be a chemical reaction between the coke and the mentos.  It is most likely a physical reaction known as nucleation;  The coke is full of carbon dioxide gas, to give it its fizz;  the mentos are full of tiny little craters on the surface of the sweet, the carbon dioxide gas is able to form bubbles in these “craters” producings thousands of tiny bubbles all at once; these bubbles of gas are under a lot of pressure within the bottle of coke and so come shooting out the mouth of the bottle.  If anyone knows anything about Newton and his laws they will know that every reaction has an equal and opposite reaction (Newton’s third law of motion)… so the coke comes shooting out of the bottle in one direction and the force of this propels the skate board forward in the opposite direction.  PRETTY COOL!

 These are just some of our favourite messy play experiments. Check out what others are getting up to in Mama Courage’s Messy Play Project linky.


Fun Friday – Five Fantastic Facts about DNA and how to extract DNA from a banana

Fun Friday – Five Fantastic Facts about DNA and how to extract DNA from a banana

Dr. Simple was explaining a little about DNA in the last post, so I thought I would share one of the first experiments my children ever asked me to do with them…. they wanted to see DNA, so we extracted it from a banana.

Did you know that we share approximately 50% of our DNA with bananas?


You will need

… a banana, a fork, a bowl, washing up liquid, ice cold surgical spirits (or isopropanol – both available from a pharmacy), salt, a sieve, a glass jar.


What to do…

Remove the banana skin and mash the banana in the bowl, using the fork. Add two teaspoons of washing up liquid and stir slowly.

Add a teaspoon of salt and one to two tablespoons of water and stir carefully.

You want to avoid making bubbles.

Leave for five minutes then strain carefully through the sieve into the jar.

Tilt the glass jar and carefully pour the surgical spirits down the side of the jar, at least as thick as the banana layer.  This will form a separate layer on top of the banana mixture.

Do not mix.

After five to ten minutes you will see a long, stringy substance appear in the top layer. This is the banana’s DNA.

You can use a tooth pick to lift and examine the DNA.


So what is happening?

The salt and washing up liquid break open the banana cells, releasing the DNA.

The DNA will not dissolve in the surgical spirits (or any alcohol) so it floats in this layer.


Here are a five fantastic facts about DNA…

5 Facts about DNA
5 Facts about DNA

The experiment described above is just a quick and simple method that I have used before but if you want something more scientific and a lot more fun… check out Cell Explorers! They do amazing school visits, for junior infants right up to secondary level students,  which I am sure would be of interest to teacher or parents making suggestions in their own schools. Run by Dr. Muriel Grenon and her wonderful team of students and graduates these activities are really top class!  Contact them by email at cellexplorers@nuigalway.ie


Fun Friday – Our favourite Sound Experiments and facts for kids

Fun Friday – Our favourite Sound Experiments and facts for kids

This week’s Fun Friday post is a round up of all our favourite sound experiments and facts. Hear it, make it, feel it and even see it… guaranteed for a weekend full of fun!

 Here are three of our favourite sound experiments…


1. Make Sound…

Make a spooky sound cup


We love this simple experiment to make a spooky sound cup… see what kind of sounds you can make with it.

Just click on this link to find out what to do…


2. Feel Sound…

All you need is a balloon and a radio

All you need for this one is a balloon and a radio or other music player.

Blow up a balloon and tie it. Turn on the radio to a song with low base music. Hold the balloon between your two hands and hold it very
near the speaker of the radio.

What can you feel?

Change to a different radio station and see if the vibrations change.


3. See Sound…

For that extra "WOW"...
For that extra “WOW”…


This one never ceases to get a WOW from everyone, and for a change Dr. How is on the other side of the camera to show how it works … click on this link to check it out.


And here are five fun facts about sound…


photo credit: superUbO via photopin cc
  • Sound waves travel in water at a speed of nearly one mile a second, which is more than four times faster than sound travels through air!
  • Thunder is the sound made by lightning! Sound travels in air at a speed of about one mile in five seconds. If you count the seconds between seeing the lightning and hearing the thunder you can work out the distance from the source of the thunder! For example, if you count ten seconds between the lightning and the thunder then you can tell the storm is about two miles away!
  • An echo is made when sound waves you make bounce off a solid object and travel back to your ear.
  • Some mammals use echoes to help to navigate and to find food – this is called echolocation!
  • Bats use echolocation to fly and hunt at night; they send out high pitched squeaks and clicks almost constantly. These sounds are called untrasonic, they are too high for humans to hear. A bat can detect an object as small as a human hair using echolocation!


We love playing with sound in this house… hope you have some fun with it too

Our five favourite Easter experiments (or should that be eggsperiments)

Our five favourite Easter experiments (or should that be eggsperiments)

Are your children just starting their mid term break? Looking for some exciting activities to entertain them over the next two weeks? How about some Eggsellent Eggsperiments to keep everyone happy?

Here are five of our favourite experiments for Easter… or any other time of the year.

Easter Experiments

1. THE FLOATING EGG EXPERIMENT


Take the floating egg experiment one step further!


Take this one step further….

We mentioned in the video that you can take this experiment a step further.

Float the egg in the salty water as before.

Add a few drops of food colouring to a jug of unsalted water.

Carefully pour this coloured water down the side of the glass so that it sits on top of the salty water.

The egg will sit between the two layers… can you see it in this picture?


2. BALANCING EGG EXPERIMENT

Amaze your friends with this egg balancing trick


The junior science team were a little enthusiastic

with their salt levels in this video

but you can get this to work with A LOT less salt.


3. HOW CAN YOU TELL IF AN EGG IS RAW OR COOKED?


4. IMPRESS YOUR FRIENDS WITH THIS EGG IN A BOTTLE TRICK


5. MAKE A BOUNCY EGG

Not only did we make a bouncy egg, but we also made a fluorescent one…. check out these experiments here.


There will be plenty of great Easter blog posts by fellow Irish Parenting Bloggers over the next week or two…. here are a few already posted and if you check back I will keep this list updated as new posts are available.

You may also like…

Easter gift tag printables over at My Country Girl Ramblings

Check out these great dairy free treat ideas over at Dairy Free Kids

Easter Hama bead activity and Things I love (and hate) about school holidays over at Learner Mama

Easy Easter bonnets at Where wishes come from

Office Mum wonders “Is the Easter Bunny a thing?”

There is an Easter trip involving “Hot cross buns and Vikings in the Park” over at The Busy Mama

Tyler Lee’s Easter basket over at Dolly Dowsie

or check out what Bumbles of Rice has planned for Easter with this lovely Easter Ideas post


Happy Easter!